
Easter Cards
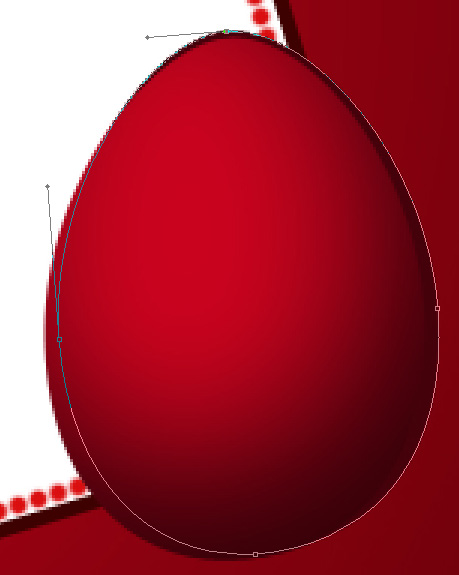
Choose then the Ellipse Tool (U) to draw the shape of an Easter egg. The Convert Point Tool is used when wanting to make the corrections on the egg’s shape:

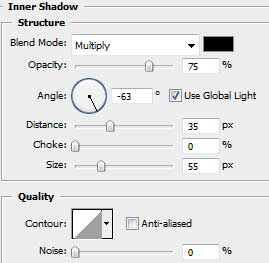
The layer’s parameters: Blending Options>Inner Shadow

Make a copy of the last made layer, changing the copy’s color on this one #45010A (move off the effects). Then select Free Transform solution to move the copy’s position to the right side on the top, placing it also lower than the previous layer (on the layers’ panel).

Now we should represent a separate file of 1024×768 px and 72 dpi which must be filled with black color, applying the Paint Bucket Tool (G).

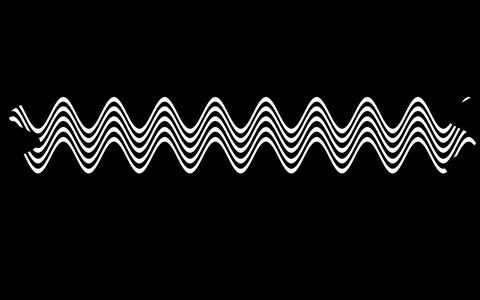
Select then the Rectangle Tool (U) to draw five white thin lines:

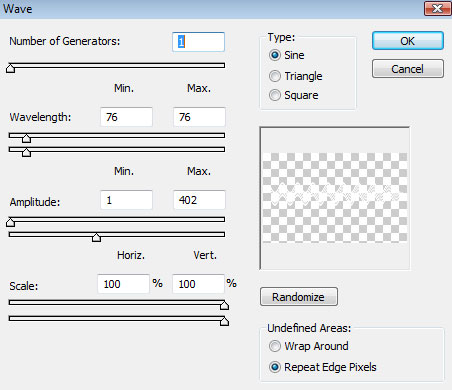
Combine in a group all the layers containing the lines (press Ctrl button for marking out all the necessary layers and then hold on the left mouse’s button to take the marked layers on Create a new group selection). Put together the group’s elements in a single layer, pressing CTRL+E and choose for the new layer this demonstrated option – Filter>Distort>Wave
Next insert the last made layer with the wavy lines above the Easter egg. Press CTRL+T and switch between Free Transform and Warp modes. The tops on the edge should be united in the same point, indicated below. We’ll get the perspective’s effect.

Press Alt button and make a mouse click between the lines’ layers and the egg’s one (on the layers’ panel).

Comments