
Create a Photo Manipulation Of a Lonely child in Photoshop
Step 11
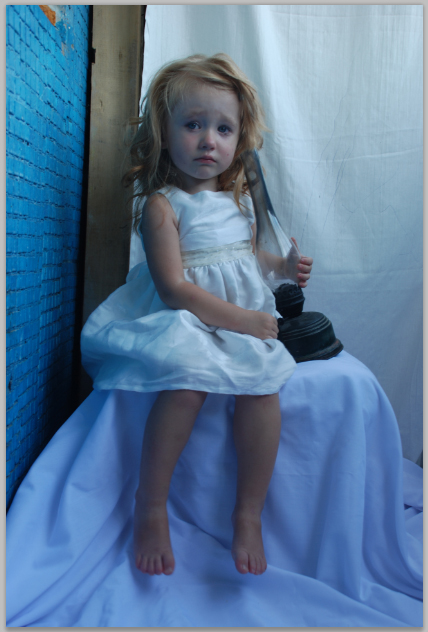
We will add a model to the main scene. We will use this image. Prior to add it to the scene, we will do a bit retouching on the model skin. To do this, go to channel and select green channel. Hit Ctrl+A to select the channel. Copy the channel and paste it on a new layer above the model layer in the layer panel. I named this layer green.


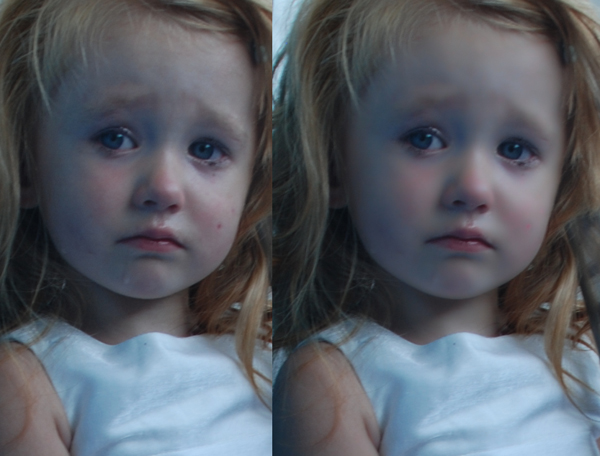
Invert (Ctrl+I) the green layer to have the result like the one below:


Give this inverted layer high pass filter (filter > others > high pass)

Then, set this layer to overlay blending at 100% opacity. Give this inverted green layer a layer mask and mask areas around the eyes, nose, lips and cloth.

Here is the result after the quick retouching on skin.
Finally, cut out the model from its background.

Step 12
Here is the result of the model after being painted hair. I just simply use pen tool to paint the hair. Basically it is similar way when we create the highlight on the window frames is that creating the path first and then stroke the path with brush tool set its size accordingly (make sure we have downloaded the hair brushes and install them on PS). Sample the nearest color of hair to decide the color of stroking.

Here is the result I created after I added lace on the lower cloth of the model.

Step 13
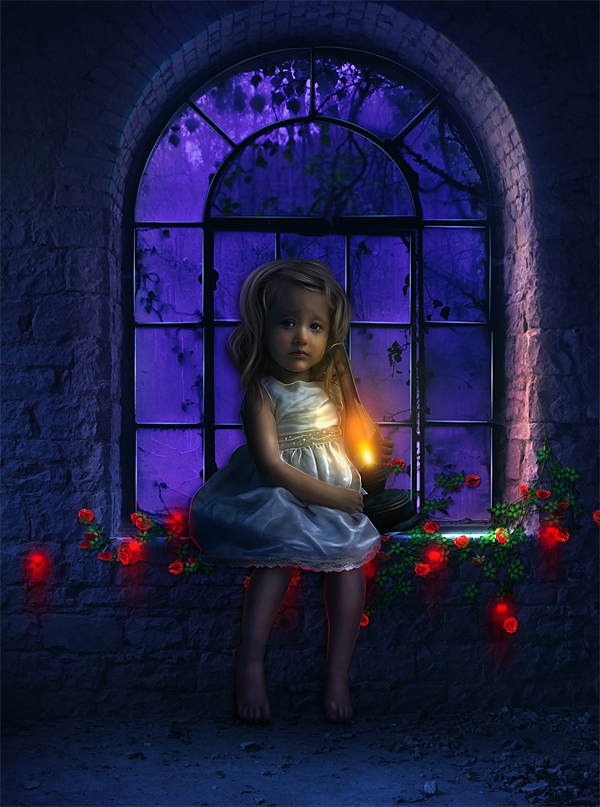
Finally add the model to the main scene. Scale its size and position it where needed as shown below.

Next, start giving the model color adjustment. Firstly, we will give this model brightness/contrast. Make sure to give this layer a clipping mask. Mask a bit on areas on face, arm and feet.

Another adjustment layer: color balance with a clipping mask.

Create a new layer with a clipping mask filled with black above the color balance layer. Set this layer to normal at about 30-40% opacity. Mask areas on the model’s face, arm and feet. This layer will give more shadow on the model.

Create a new layer again above the black layer. Fill this layer with 50% gray and set its blending to overlay. On this layer paint some highlight on cloth, arm, face and feet. Refer back to previous step on how to add highlight and shadow (step 8). Select all the model layers and group them in a folder. I named this folder model.


Dek Wid
Thank you for following this tutorial! Hope that you learn something today and happy photoshopping. Wid's side - My personal blog
Comments