
Texas Rangers desktop wallpaper
The layer’s styles:
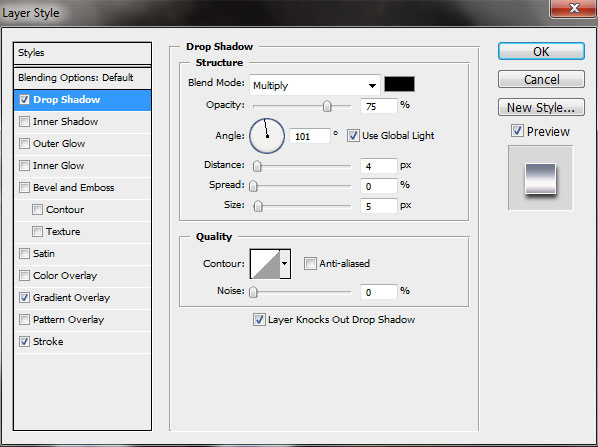
Blending Options>Drop Shadow
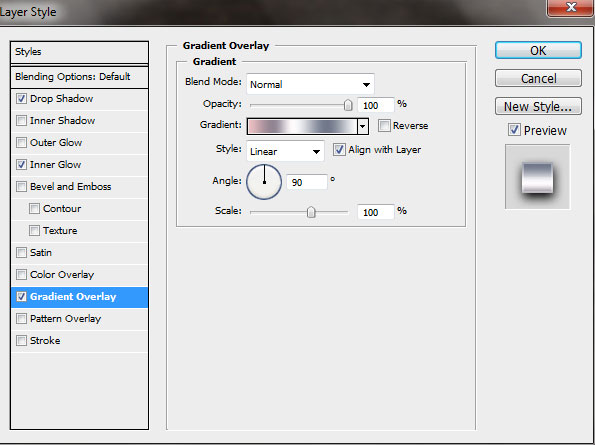
Blending Options>Gradient Overlay
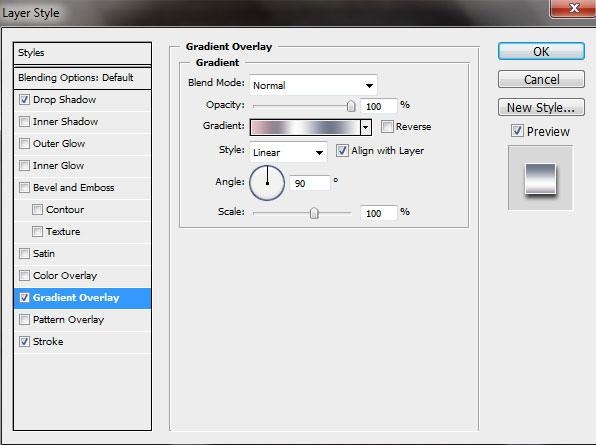
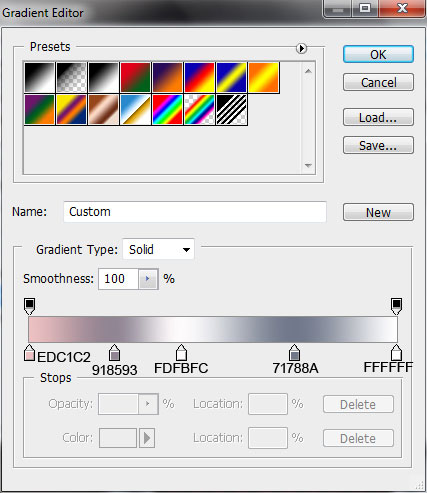
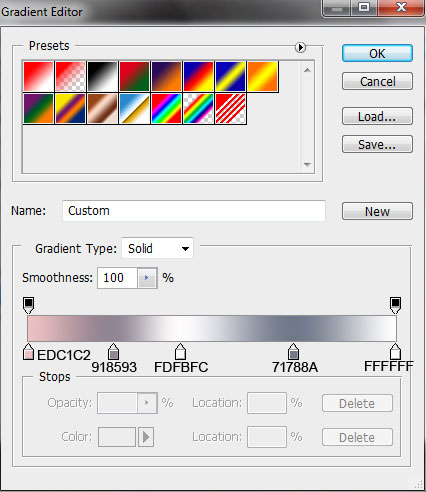
Gradient’s parameters:

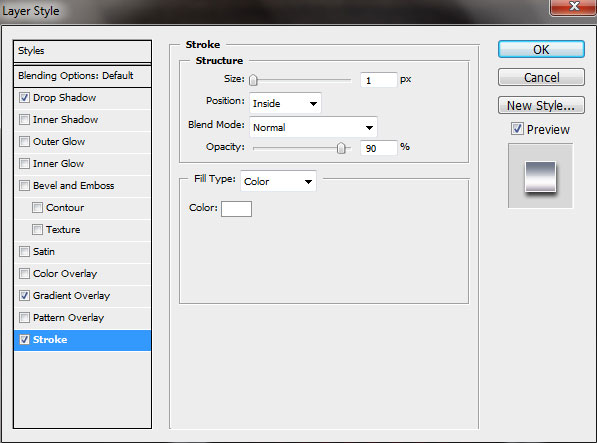
Blending Options>Stroke

Make a copy of the last made layer and apply Free Transform option to move down the copy (placing its layer lower than the previous layer on the layers’ panel). Set the next parameters for the copy’s layer.

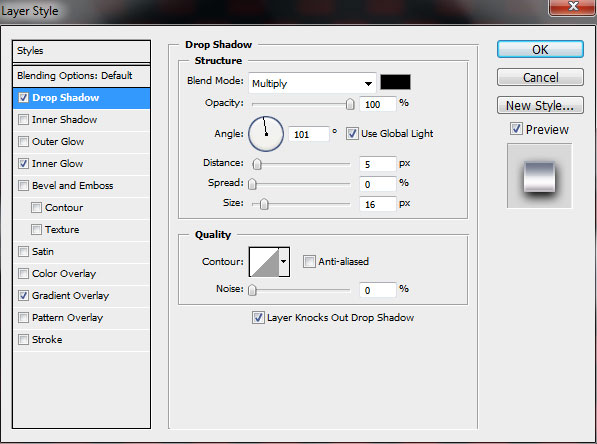
The layer’s styles:
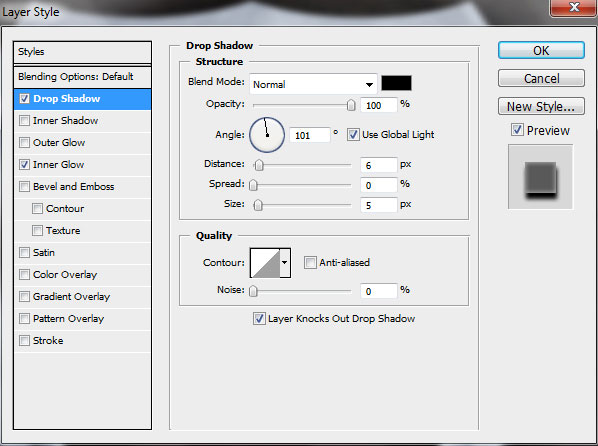
Blending Options>Drop Shadow
Blending Options>Inner Shadow

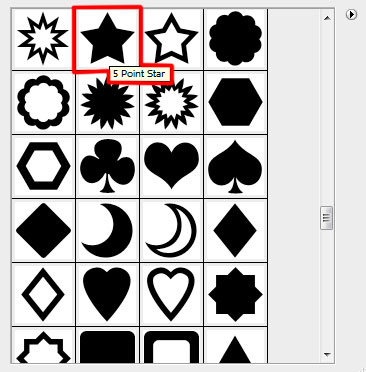
On the left side of the TEXAS word, insert a small star of white color, using the Custom Shape Tool (U).

Press Alt button and click seven times the down direction button on the keyboard

Make one more copy of the top layer containing the star and set the next styles for the layer:
Blending Options>Drop Shadow
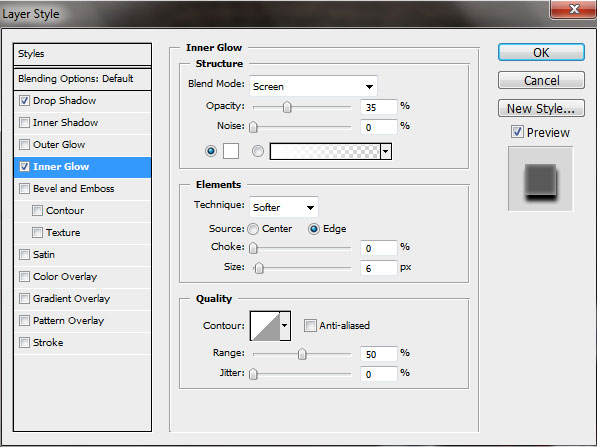
Blending Options>Inner Glow

Blending Options>Gradient Overlay
Gradient’s parameters:

Combine in a group all the layers composing the small star on the left side of the TEXAS word (hold on Ctrl button to mark out the necessary layers and press the left mouse’s button when moving down the marked layers on Create a new group selection).
Make a copy of the got group and apply Free Transform option to place the copy on the right side of the TEXAS word.

Find a stock photo with a revolver represented on it, I have used a photo from Flickr. I would like to thank the author of this photo:
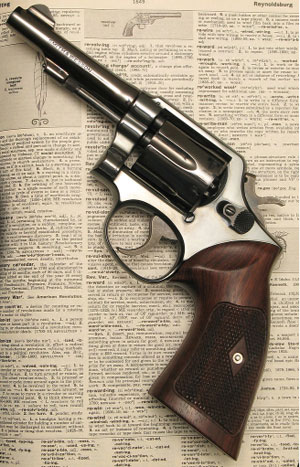
Cut out the revolver and insert it on our picture:
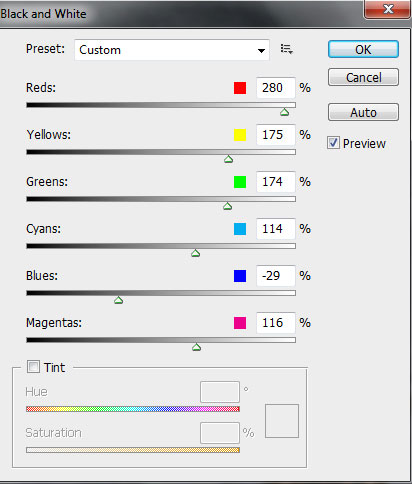
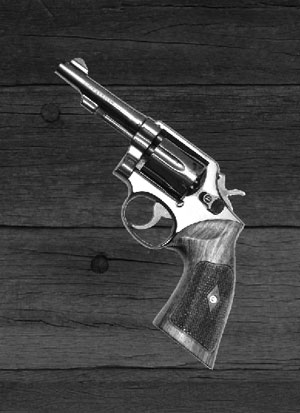
Click on the bottom part of the layers’ panel on the next selection: Create new fill or adjustment layer>Black & White
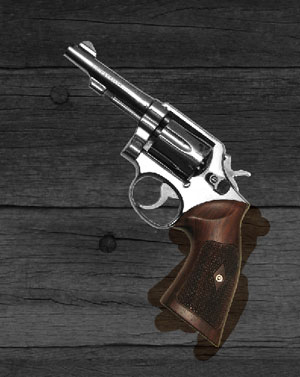
Click on the same layer on the bottom part of the layers’ panel on Add a Mask selection and choose a standard brush of black color to clean out the indicated zone on the revolver’s handle:
Comments