
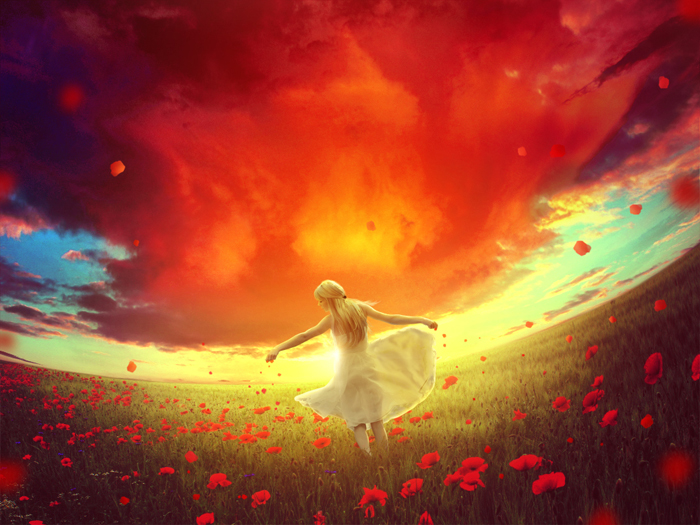
“Red Dream” photo manipulation tutorial
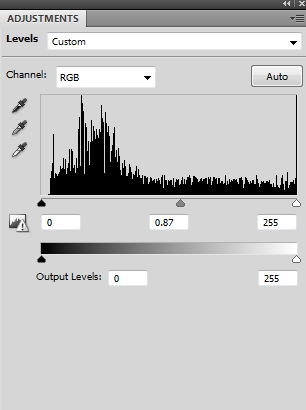
Step 20
To make a better contrast for the whole scene I used Levels:

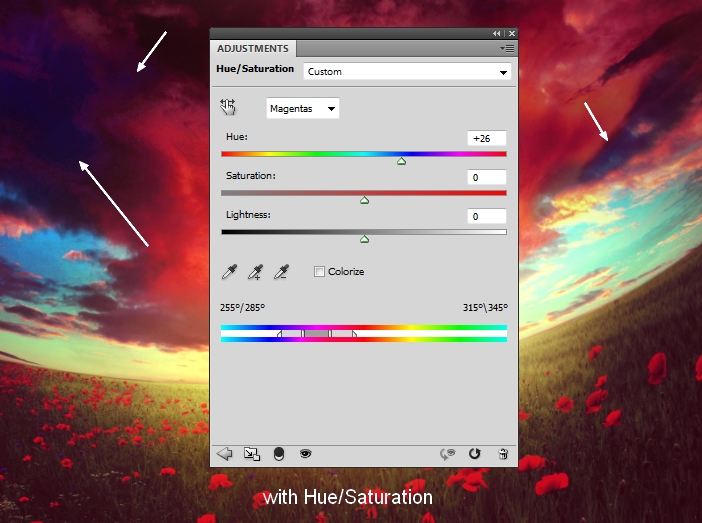
Step 21
I used Hue/Saturation to change the color of the the top cloud a little:
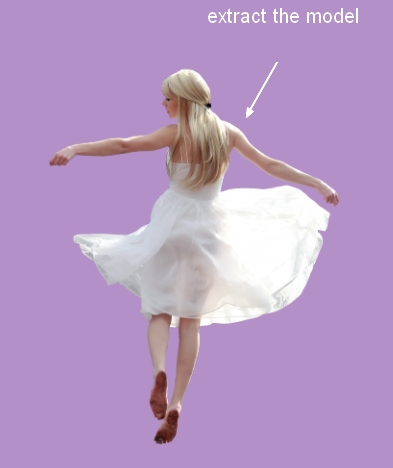
Step 22
Open the model stock and extract her from the background:

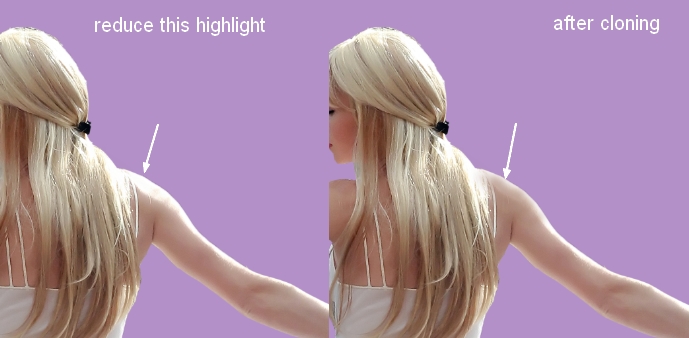
Step 23
Make a new layer and active the Clone Tool (S). Use this tool to reduce the highlight on the right shoulder:
Step 24
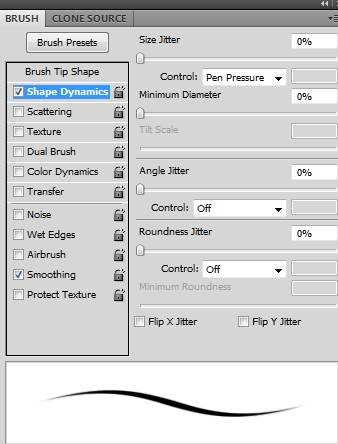
In this step we’ll paint more hair for the model. If you don’t want to paint the hair, you can use hair brushes instead.
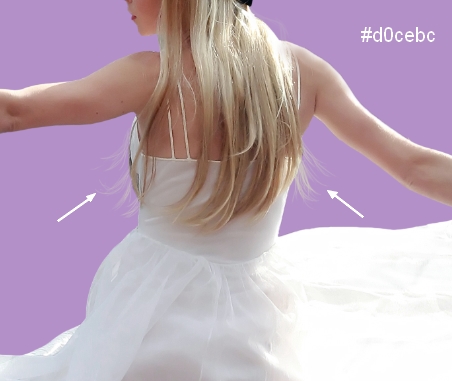
Make a new layer and use a hard brush with the color #d0cebc. Press F5 to change the settings of this brush:
Use it to paint some tiny hair out of the model back:
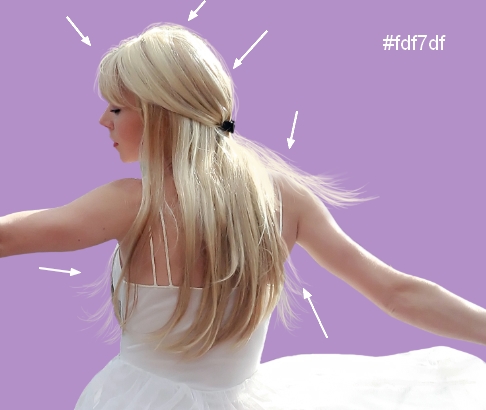
Create another layer and change the brush color to a lighter one (#fdf7df). Paint more hair on the back, on the shoulder and above the head to make the overal hair more natural:
Step 25
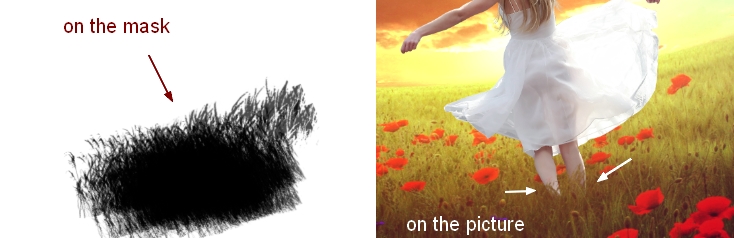
Merge all transparent layers (model, clone, hair ones) using Cmd/Ctrl+Option/Alt+Shift+E. Place the merged model in the field:
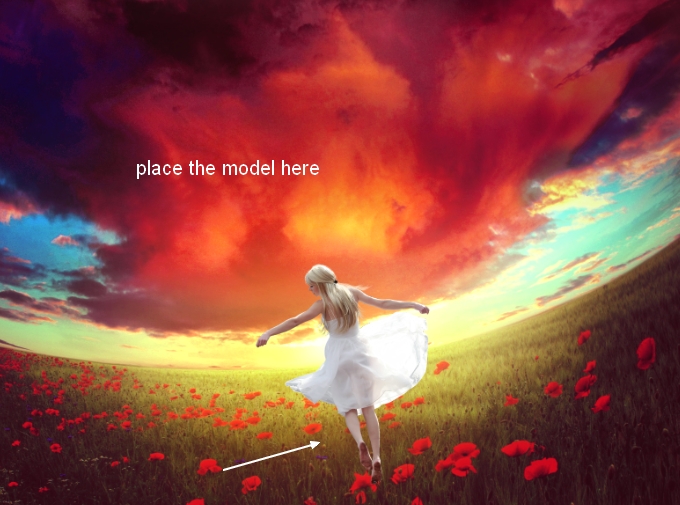
Add a mask to this layer. Use the grass brushes, number 504 and 360 to blend the model feet with the grass of the field:
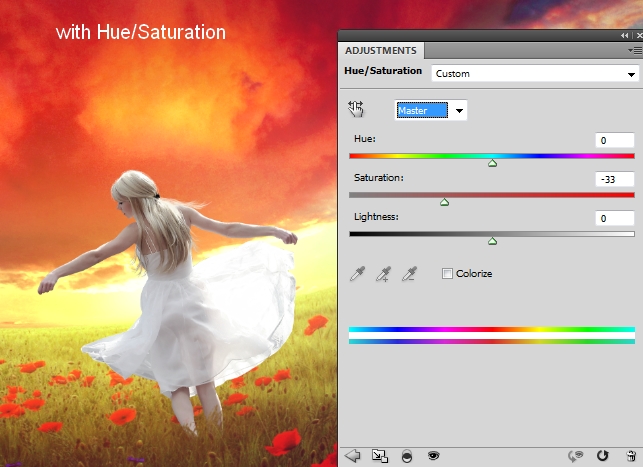
Step 26
I used a Hue/Saturation adjustment layer with Clipping Mask to reduce the saturation on the model:
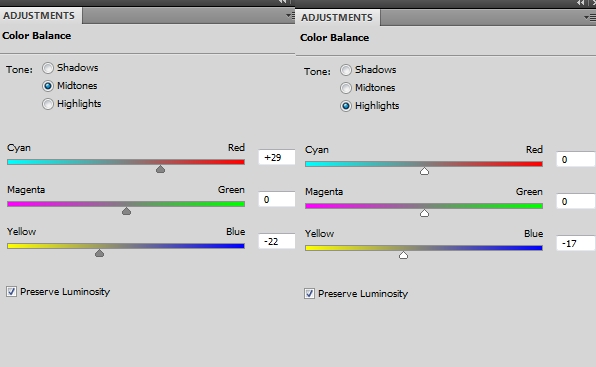
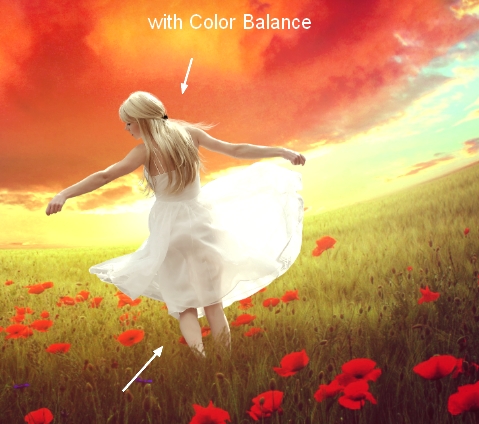
Step 27
I used Color Balance to add some vibrant yellow to the model:
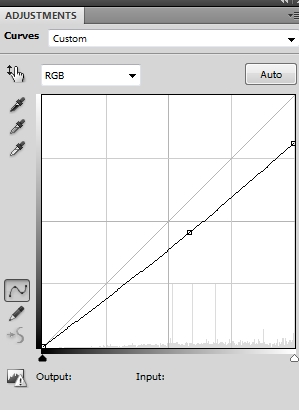
Step 28
The back of the model should be darker so I used Curves to do it:
On this Curves layer mask use a soft black brush to reveal the light of the model contour that should be bright:

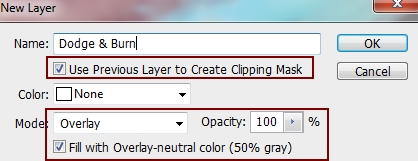
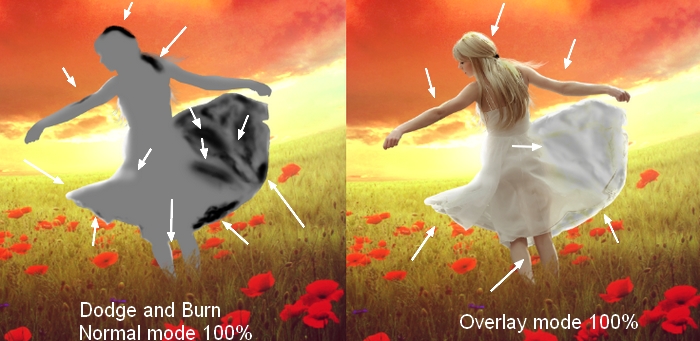
Step 29
Make a new layer, change the mode to Overlay 100% and fill with 50% gray:
Take Dodge Tool (O) with Midtones Range, Exposure about 50-55%, Burn Tool with Shadows Range, Exposure about 40-50% to refine the light and shade on the model, also add the wrinkles to the dress to avoid its flat look. You can see how I did it with Normal mode and the result with Overlay mode:
Jenny Le
Self-taught artist from Vietnam who loves drawing and doing photo manipulation. See more of my work at http://jennyle88.deviantart.com/
Comments