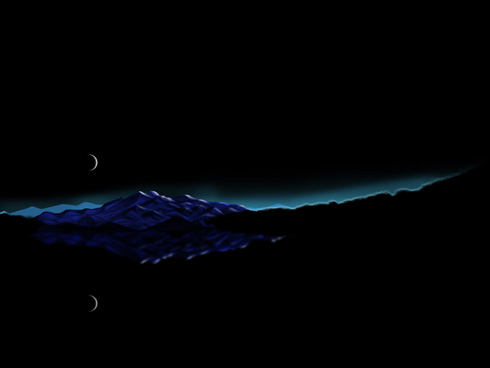
Showcase and discover digital art at yex

Follow Design Stacks

Subscribe to our free newsletter to get all our latest tutorials and articles delivered directly to your inbox!

Night Sky

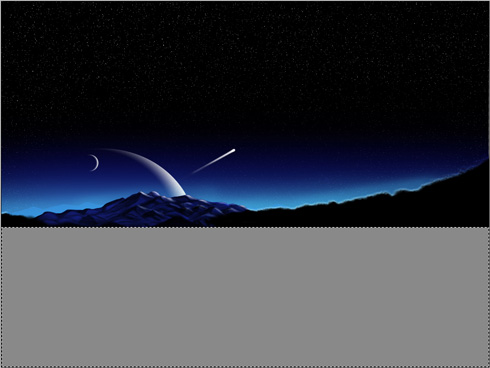
It’s time to represent the starry sky. It’s necessary in this case to create a new layer (Create new layer) and choose the Paint Bucket Tool (G) of black color. Place this layer upper than the previous layers and upper than the layer of the big planet (on the layers’ panel).

Create Night Sky in Photoshop CS3

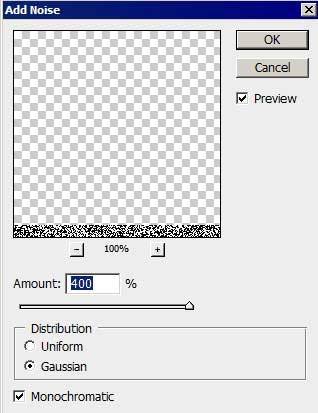
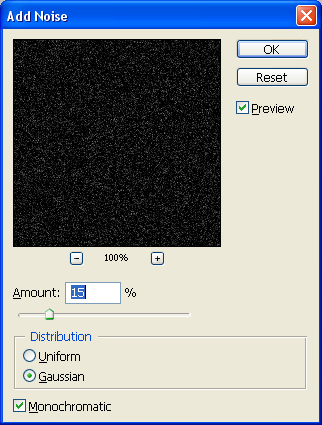
Apply for the last layer Filter>Noise>Add noise

Create Night Sky in Photoshop CS3 

Create Night Sky in Photoshop CS3

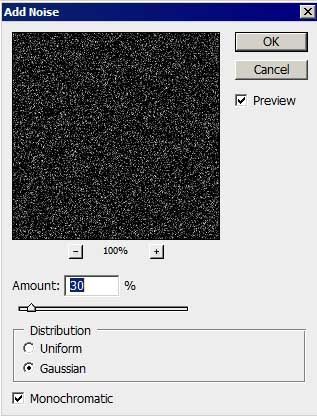
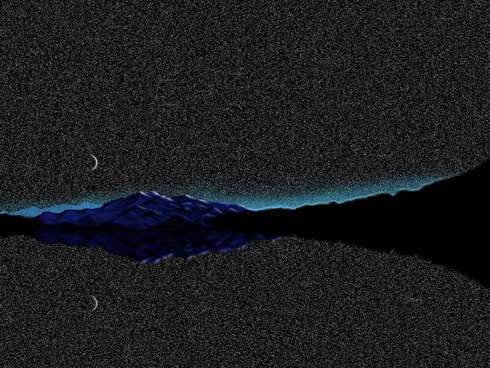
Apply the layer’s parameters: Blending mode-Linear light
Make also a mouse’s click on the lowest part of the layers’ panel on Add a Mask option. After that it’s necessary to select the Brush Tool (B) with blurred edges, diameter – 300 and black color to erase the unnecessary part of our picture.

Create Night Sky in Photoshop CS3

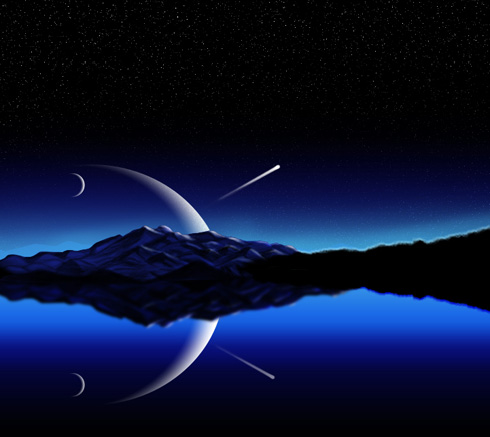
Try to picture now a meteorite. Create a new layer and choose a standard brush on it – Brush Tool (B) of white color and diameter – 7 to represent a patch and than apply the Eraser Tool (E), Opacity of 30% to clean out a little the meteorite’s tail.

Create Night Sky in Photoshop CS3 

Create Night Sky in Photoshop CS3

Now we have to represent the meteorite’s reflection. In this case we’ll make a copy of the last made layer and select the Free Transform option to turn over the copy and to place the copy exactly it is shown below. Fill 50% on the copied layers.

Create Night Sky in Photoshop CS3

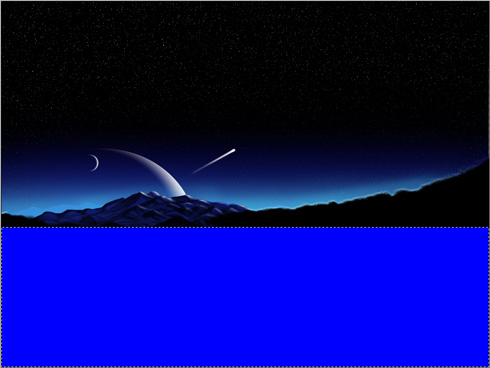
Create another new layer (Create new layer) and select on it the Rectangular Marquee Tool (M), mark out the necessary area and paint it in this color – #0000FF, choosing for this operation the Paint Bucket Tool (G)

Create Night Sky in Photoshop CS3

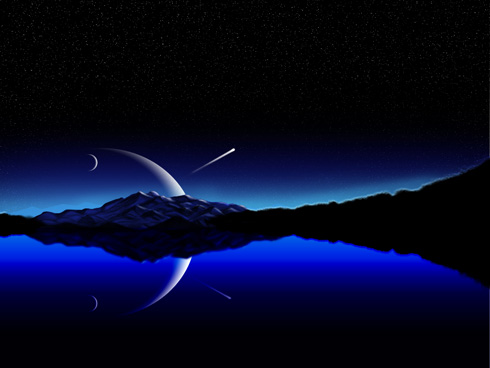
Apply the next layer’s parameters: Fill 29%
Blending mode- Color Burn

Create Night Sky in Photoshop CS3

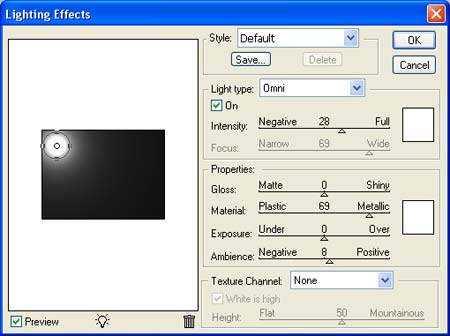
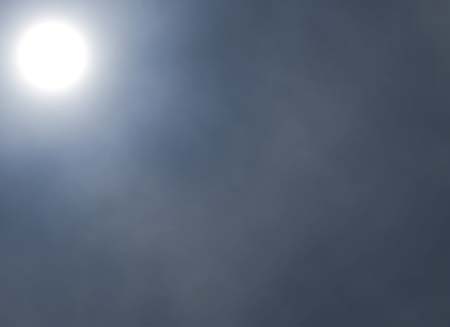
Using the same instrument – Rectangular Marquee Tool (M), try to mark out the appropriate area and select one more time the Paint Bucket Tool (G) to paint the marked place with #898989

Create Night Sky in Photoshop CS3

Apply for this layer the next selection – Filter>Noise>Add noise

Create Night Sky in Photoshop CS3 

Create Night Sky in Photoshop CS3

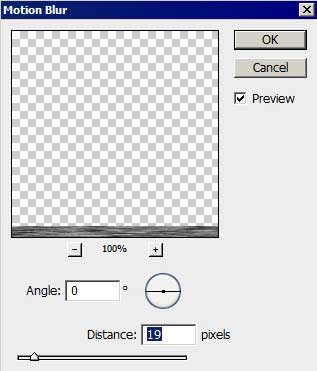
One more filter’s option should be applied on the layer: Filter>Blur>Motion blur

Create Night Sky in Photoshop CS3 

Create Night Sky in Photoshop CS3

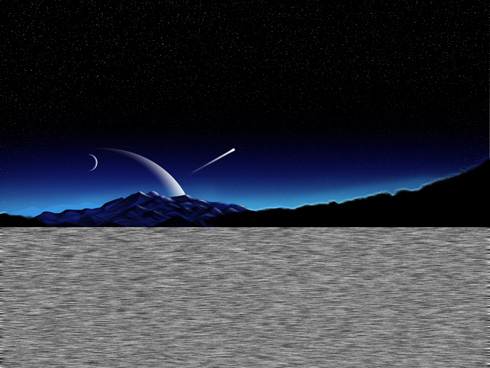
The parameters of the same layer: Fill 50%
Blending mode-Soft Light

Create Night Sky in Photoshop CS3

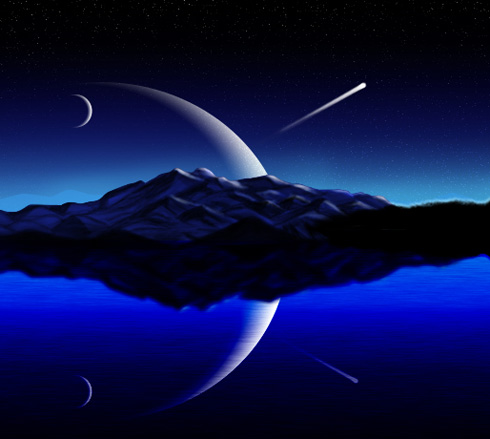
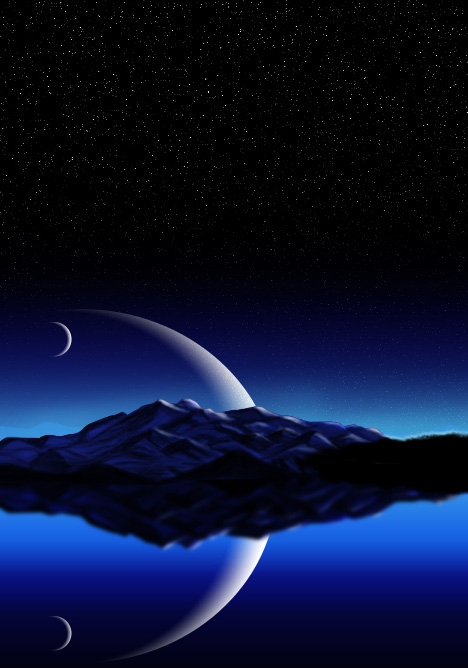
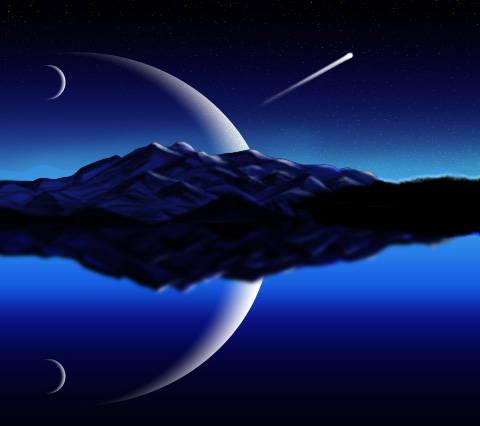
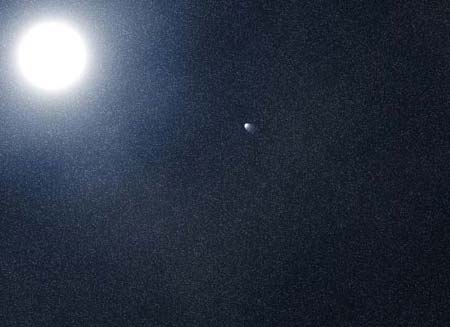
The picture is finished!

Inspired  from Nightly Journey by gucken and taenaron
View full size here.

Page: 1 2 3 4

Comments

Night Sky

1. New file, goto the scroll menu and select flash, or make it 550×400
Night Sky Tutorial

2. Press “D” to go back to default colors, fill layer with white (ctrl+Backspace)

3. Time to add a moon, goto Filter, Render, Lighting effects, and use something around these settings.
Night Sky Tutorial

4. You need to get darker colors for you clouds, I used #898988 and #4b4b4b

5. Make a new layer, then goto Filters, Render, Clouds. (Ctrl+F if you dont like the outcome)

6.Now just goto the Hue/Saturation.
Use something around these settings:
Hue:216
Saturation:19
Lightness:+20

7. Now set the Blending Mode to Overlay

Now it should look something like this:
Night Sky Tutorial

8.Now make a new layer, set your colors back to defalut (press “D”), and fill the layer with black, Alt+Backspace.

9. Stars now, goto Filters, Noise, Add Noise. Check Gaussian, and Monochromatic and use about 14-16.
Night Sky Tutorial

10. Set the blending mode on the Noise layer to Soft Light and then your done.

Myn turned out:
Night Sky Tutorial

And for added effect add another layer with a “Spotlight” Light effect, and play around with the blending mode and order of layers for a shooting star.
and with the shooting star:
Night Sky Tutorial

Comments