
How to create a stunning photomontage in Adobe Photoshop CS5
Today, we will learn how to use different tools and techniques to create a stunning photomontage using Adobe Photoshop CS5. Layered PSD file included. Let’s get started!
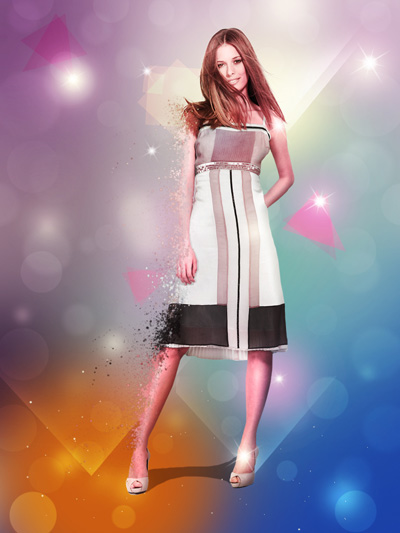
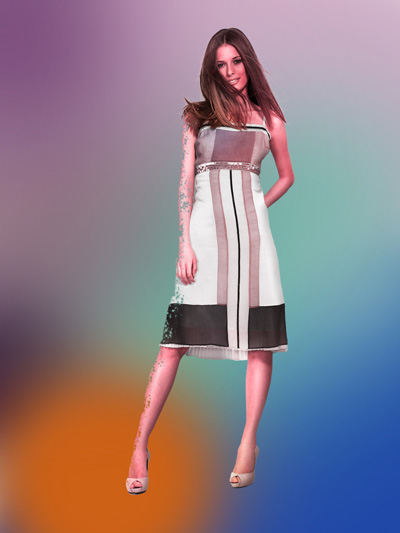
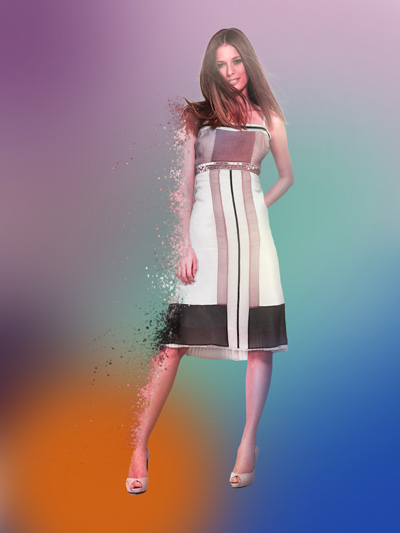
Final Image Preview
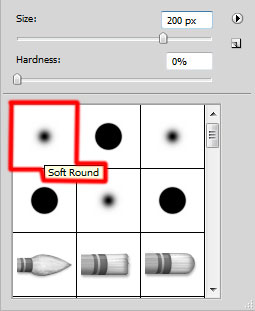
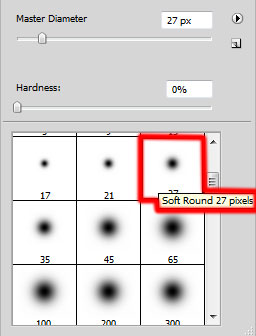
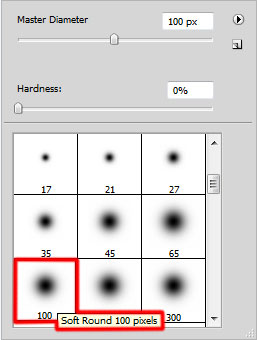
Create a new document (Ctrl+N) in Adobe Photoshop CS5 with the size 768px by 1024px (RGB color mode) at a resolution of 72 pixels/inch. Create a new layer and select the Soft Round brush from Brush Tool (B).

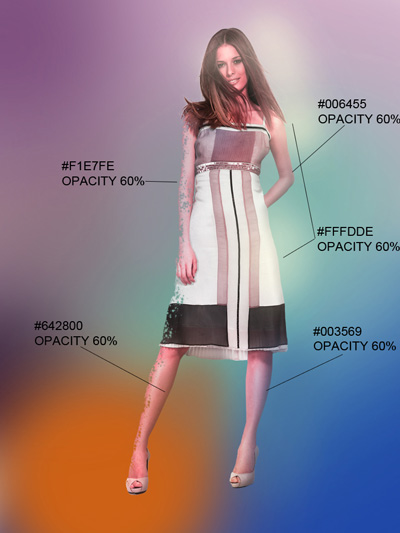
Use this brush to paint the background with the color #CFADC6.

On the next new layer we’ll apply the same brush to continue painting the background, this time with the color #1F47A7.

Create a new layer and apply again the above mentioned brush to paint the background with color #271239.


On the next new layer select again the Soft Round brush.
Use this brush to paint the background as shown with color #6CBBAA.

Continue by creating a new layer and apply here the Soft Round brush to paint the background with #CD6115 color.
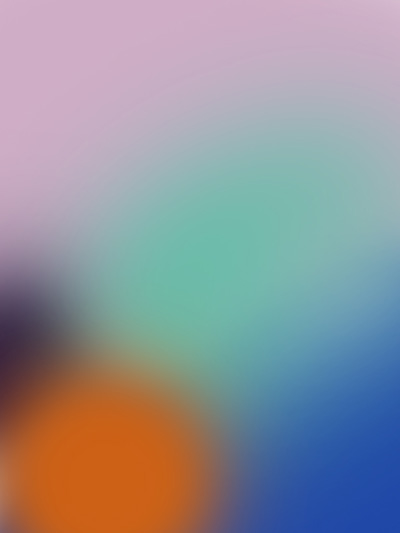
Create a new layer again and paint the background with the Soft Round brush.

The brush’s color is #7C007C and set Opacity to 15% in Options bar.

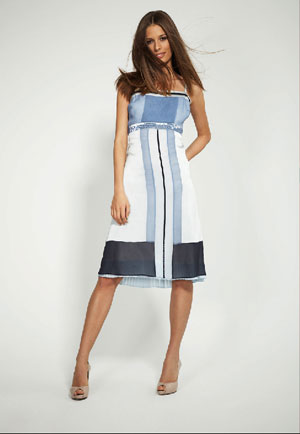
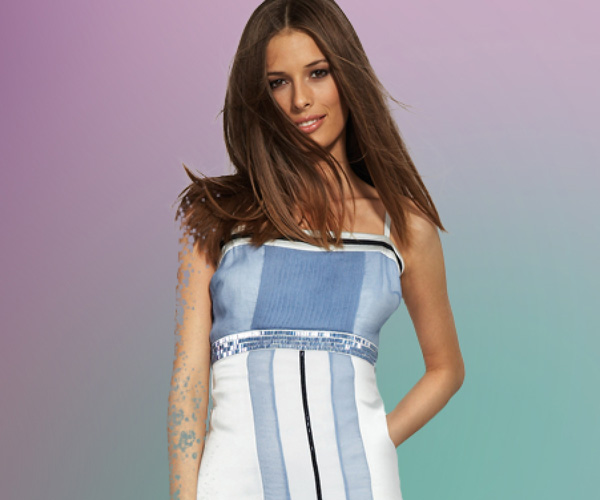
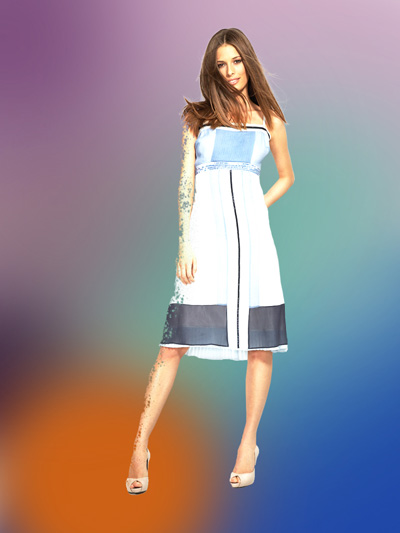
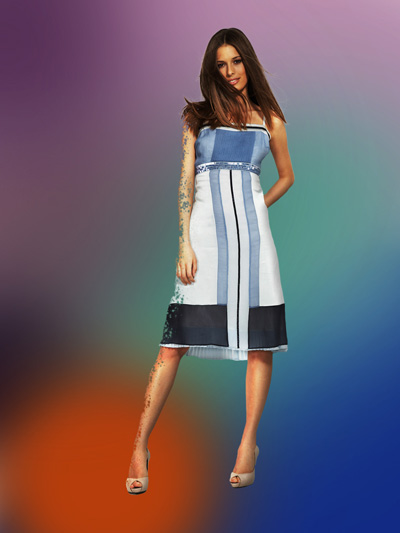
Find a stock photo with a model represented on it, I used this photo from deviantart. I would like to thank the author of this photo:
Remove the background using your favorite tools like Pen Tool (P), Magic Wand Tool (W), Magnetic Lasso (L) or even a simple Filter>Extract and insert it on a new layer in our main document.
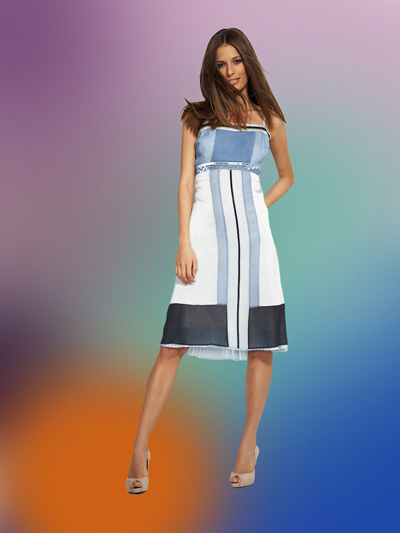
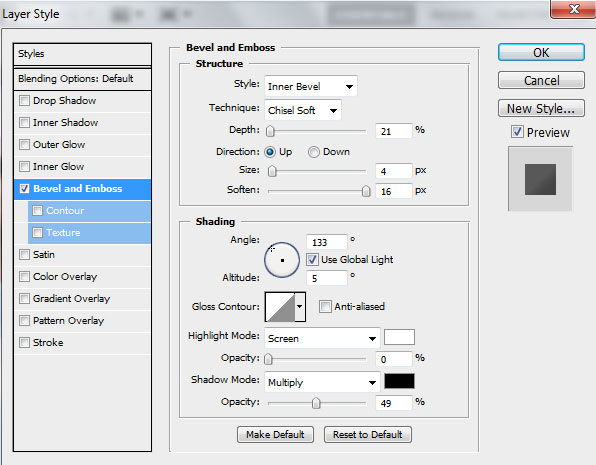
Click on Add a layer style icon from bottom part of the Layers panel and select Bevel and Emboss style for the girl’s layer.
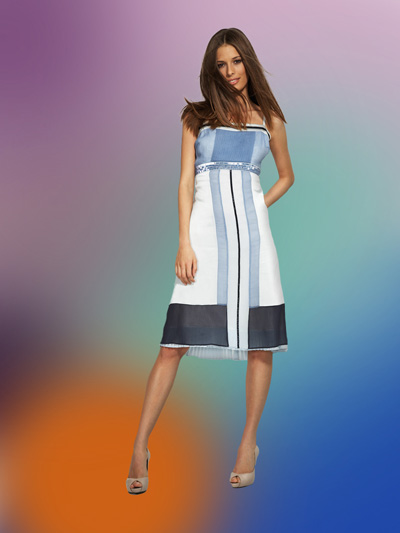
We’ve got the next result:
We have to rasterize now the girl’s layer. In this case we have to create a new layer above the girl’s one and press CTRL button while selecting the both layers and only after that press CTRL+E to Merge Down.
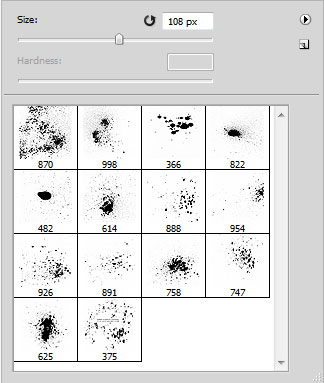
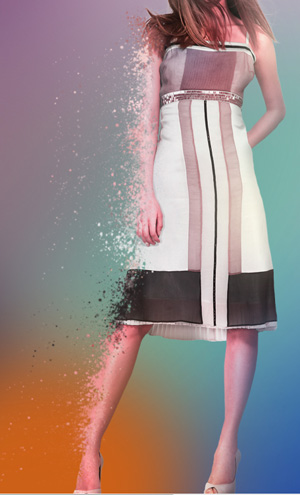
Next step we’ll download a set of brushes for in Adobe Photoshop, named: c130_splatter and Lep reflections.
Make sure the girl’s layer is active and click on the bottom part of the Layers panel on Add layer mask icon. Choose the next brushes from c130_splatter set and change the Foreground color to black.
Use this brush to paint in the mask to make a kind of scratch on the girl’s left side.

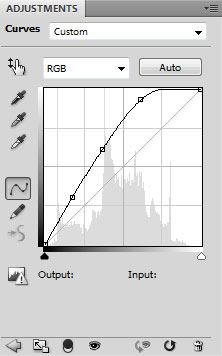
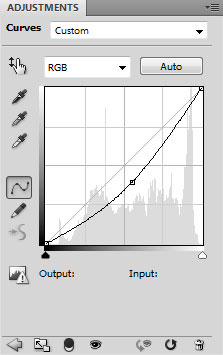
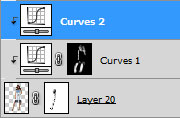
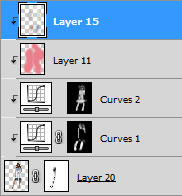
Select Create new fill or adjustment layer from bottom part of the Layers panel and click to Curves to adjust the curve shape as shown to make a little color corrections.
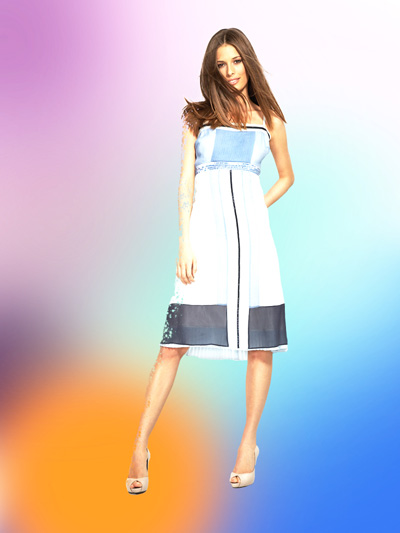
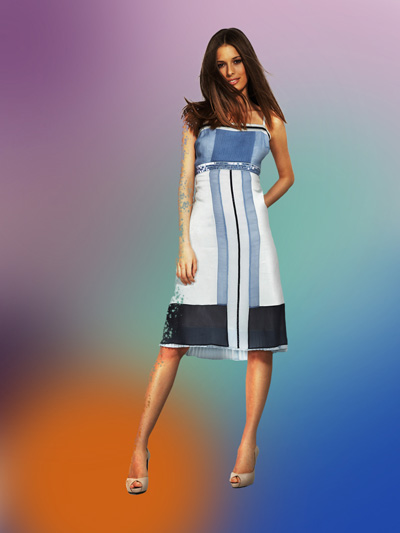
We’ve got the next result:
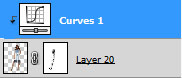
Let’s create a clipping mask to make the content of the Curves adjustment layer only visible within the content of the girl’s layer. Hold down Alt (Windows) or Option (Mac OS) and click between Curves adjustment layer and the girl’s layer (on the Layers panel).
We’ve got the next result:
Insert the mask on the Curves adjustment layer (Add layer mask). Press Shift+Ctrl+I to inverse and select Soft Round brush of white color.
Use this brush to paint in the mask to make darker several zones on the girl’s body.
Select once again Create new fill or adjustment layer from bottom part of the Layers panel and click to Curves to adjust the curve shape as shown to make a little color corrections.
We’ve got the next result:
Hold down Alt (Windows) or Option (Mac OS) and click between layers in Layers panel to create a clipping mask.
We’ve got the next effect:
Insert now the mask on the Curves adjustment layer (Add layer mask) and press Shift+Ctrl+I to inverse the color. Use also the Soft Round brush mentioned in the previous example of white color to make lighter this time the shown below zones on the girl’s body.

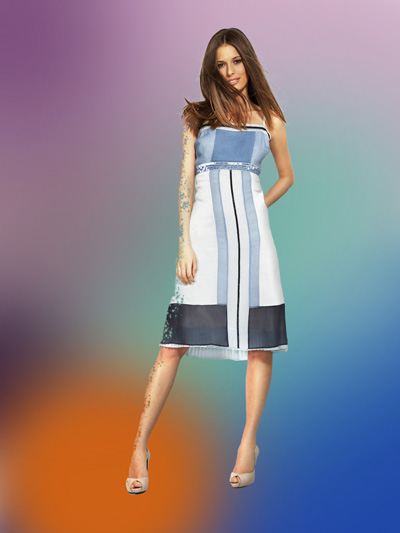
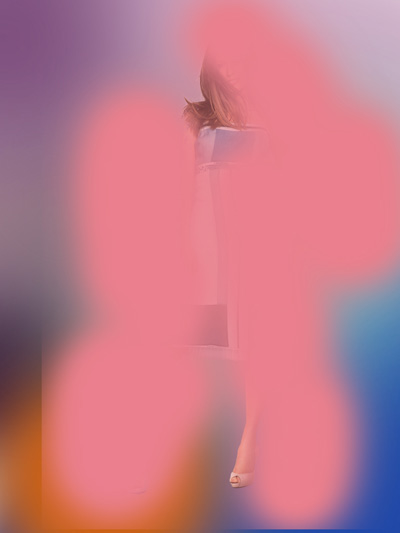
Create a new layer and select the Soft Round brush, this time with the color #EA7F8C.
Use this brush to paint the girl as shown.
Hold down Alt (Windows) or Option (Mac OS) and click between layers in Layers panel to create a clipping mask.
We’ve got the next result:
Change for this layer the Blending mode to Hue.
Create a new layer again and select again the Soft Round brush.

Use this brush to continue painting the girl with the next shown colors.
Hold down Alt (Windows) or Option (Mac OS) and click between layers in the Layers panel to create a clipping mask.
We’ve got the next effect:

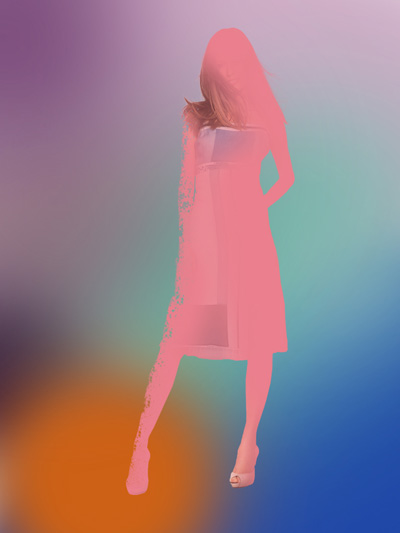
Create a new layer and use on it the next brushes from c130_splatter set.

The brush’s color may be chosen with the Eyedropper Tool (I) on the left side of the girl. This way take a sample of the color and continue paint with brushes as shown.
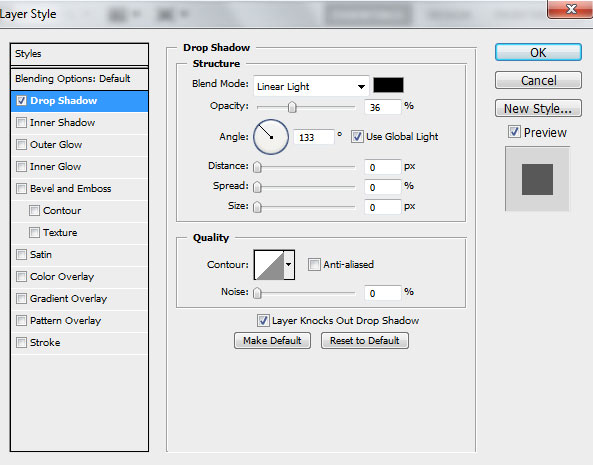
Click on Add a layer style icon from bottom part of the Layers panel and select Drop Shadow.
We’ve got the next result:
Page: 1 2
Comments