
Why Layers (page 4)?
Since I was happy with the Levels adjustment I had, and the clone corrections looked good, I wanted to merge these layers together to make subsequent steps less complicated. Note that once these three layers are merged, you can’t go back and change them.
I clicked on the little arrow in the upper right corner of the Layers palette and chose Merge Visible from the menu. As the title of the command indicates, you can exclude a layer from merging by clicking its layer’s eyeball icon and turning off its visibility. I had all mine visible, so, after using the command, I was left with one layer.
A common technique used to correct images that are overall either too dark, or too light is to make a duplicate layer, and use the layer blend modes to correct the tones.
To do this, click on the little arrow in the upper right corner of the Layers palette, and choose Duplicate Layer from the menu. Or, you can drag the layer that you wish to duplicate onto the New Layer icon at the bottom of the Layers palette.
In the dialog box that appears, it’s a good idea to give the duplicate layer a name that indicates what you will be using it for.
Any layer can be renamed at any time by double clicking its name in the Layers palette (Photoshop 6.0 users, you have to press Alt while double-clicking to rename anything other than the background layer).
With the duplicate layer directly above the original, select it, and change its blend mode to Multiply if you want to darken your image.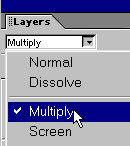
Change the blend mode to Screen if you want to lighten your image.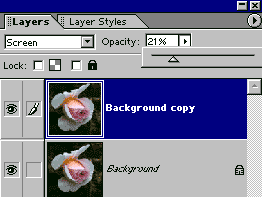
Use the layer opacity setting to adjust the degree of lightening or darkening (click on the little arrow to the right of the Opacity percentage text box to access the slider shown activated, above).
If you would like to create artistic effects with your image, you can apply filters to the duplicate layer (filters affect the currently selected layer, only). You can then use the layer blend modes, and/or layer opacity settings to blend the filtered image with the unfiltered original, in the layer below.
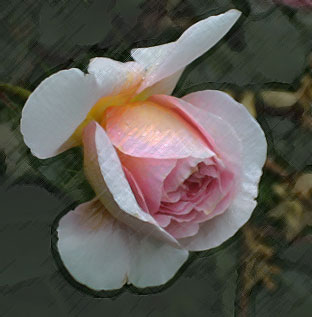
Above are two examples of filters applied to the duplicate layer. The top image shows the results of using Filter > Artistic > Colored Pencil. After the filter was applied (with the default settings), the duplicate layer’s opacity was changed to 32 %.
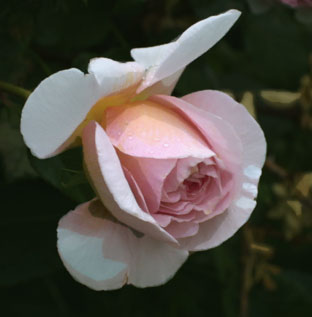
The second example, above, has had the Filter > Artistic > Cutout filter applied. The duplicate layer’s opacity was changed to 37 % in this case.
Another way to use filters on a duplicate layer is to erase a portion of the image from that layer, allowing the unfiltered image, on the layer below, to show through.
In the example below, I applied the Filter > Artistic > Palette Knife filter to the duplicate layer. I then used the eraser tool to erase all of the flower from the duplicate layer. This allowed the unfiltered flower to be seen, while leaving the filtered green background of the duplicate layer.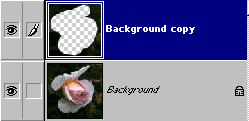
Sharpening of your image should be left until last. Corrections and edits that you make to an image can change the way you will apply sharpening, so you want to make it your last step before outputting the image (printing, etc.). I’ll cover sharpening, next.
Comments