
Why Layers (page 3)?
For the next part of this lesson, I used the photograph of a rose, shown below. You may use this if you like, though any image will do.
If you download the rose photo, be sure and open it in Elements and save it in psd (Photoshop) format before starting. The JPG format does not allow layers.
The first thing I’ll do is adjust the contrast by using Levels. There are two ways to do this. You can choose Enhance > Color > Brightness/Contrast > Levels, or you can choose Layer > New Adjustment Layer > Levels.
If you use the Enhance route, the Levels changes will be applied directly to the image. The only way to change the effect is to use the History palette to undo it, if you still have the option.
On the other hand, if you use an Adjustment layer, the effect is contained in that layer. The image layer, below it, is untouched.
Naturally, I used the latter. I clicked the New Adjustment Layer button at the bottom of the Layers palette (the black and white circle) to add a Levels adjustment layer to the rose.
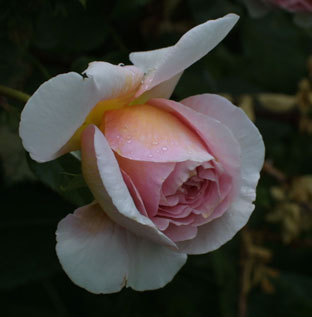
original image
overcorrection with Levels
I have purposely overdone the Levels adjustment, shown above, so I can point out that this can be corrected at any time by simply double clicking the Levels icon on the adjustment layer (shown with the cursor pointing to it, below). This will reopen the Levels dialog box, with the current settings, which I can correct.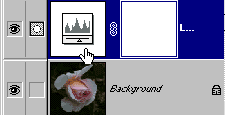
This tutorial is not going to be about Levels, but in case you are a beginner, and have no idea how it works, the thing that looks like a black mountain peak in the Levels dialog box (the histogram) is a representation of your image’s tonal values.
Standard procedure (though not necessarily the best one for any given image) is to move the two, tiny end triangles that you see below the black mountain, inward until they just touch the edges of the histogram.
Be sure the Preview option box is checked so you can see what you’re doing to the image. It’s generally best to leave the center triangle alone, though you are encouraged to slide it around and see what it does.
After a Levels correction, the next thing most people want to do with an image is correct any scratches, dust or other blemishes.
I should have picked a dirtier photo. It wouldn’t hurt to remove the bit of light stem that is showing on the left side of the rose.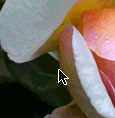
For this you will want the clone stamp. If I use it directly on the background layer, I will probably be just fine. However, it is just as easy to make a new layer, and make the changes there. That way, if I don’t like the results, I can simply delete the layer.
I can also see how the image looks before and after the changes by clicking the eyeball icon on the added layer to remove visibility of the layer which contains all the clone additions.![]()
Here’s the procedure. Click the New Layer button at the bottom of the Layers palette to add a new, empty layer. Make sure that layer is selected (it will be dark blue—click on it to select it if it’s not).
Zoom way in on the area that you want to edit. The easiest way to do this is to choose the zoom tool in the toolbox, and drag a rectangular selection around the area you want to zoom to. When you release the mouse button, the screen will maximize that area.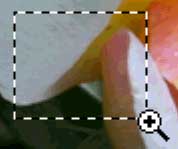
Note that this is not a ‘selection’ like you would make with a selection tool; it is just looks like one for a moment, as you are dragging the outline.
Next, choose the clone stamp tool in the toolbox. Make sure Use All Layers is checked in its options bar.![]()
Choose a brush appropriate to the spot you want to cover. Press the Alt key, and click on a spot that has the color, and luminosity that you want to apply to the blemish. Then release the Alt key, and click on the area that you want to correct. This will transfer the image data to cover that spot.
It is almost always a better idea to click, and not stroke with the clone stamp. Click repeatedly, as needed to cover the spot. It is also often better to use a reduced opacity. You can change the opacity on the clone tool’s options bar.
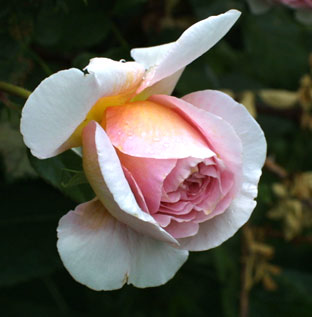
I went ahead and removed two little bumps from the petals at the top of the image since they were distracting. See the results of the corrected Levels adjustment, and the clone stamp edits, below.
Next, I’ll show you some filter effects and layer blend mode techniques.

Comments