
Website Design Studio
Make six copies of the recently made layer and select one more time the Free Transform option to situate the layers as it is indicated next image:

Combine in a group all the layers containing the white stripes (press Ctrl button to mark out the necessary layers and then keep pressed the left mouse’s button while moving the marked layers on Create a new group option). Mark out the group and press Ctrl +E, applying the next shown parameters for the rasterized layer:
Fill 20%
Blending Mode-Overlay 
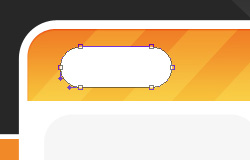
Choose again the Rounded Rectangle Tool (U) (radius of 20 px) to draw a button of white color.
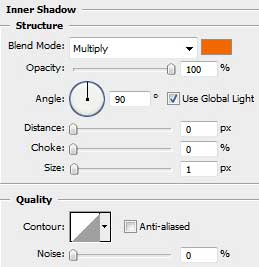
The layer’s parameters: Blending Options>Inner Shadow


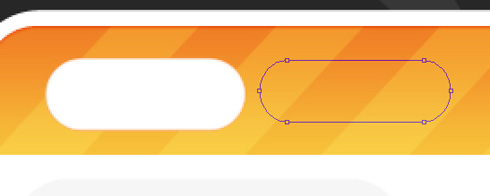
Let’s create the primary layer, reserved for the next button on the menu. The tool applied in this case is Rounded Rectangle Tool (U) (radius of 20 px).
The layer’s parameters: Fill 0%
Blending Options>Inner Shadow 
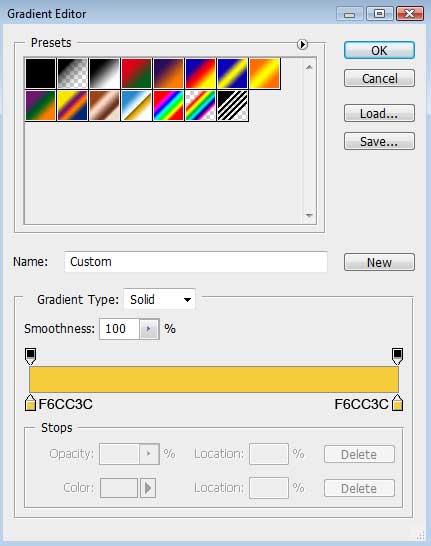
Blending Options>Gradient Overlay 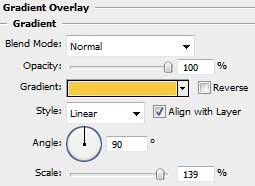
Gradient’s parameters:

Make a copy of the last made layer and use again the Free Transform option to situate the copy a little lower, changing also the layer’s parameters with those from below: Fill 0%
Blending Options>Inner Shadow 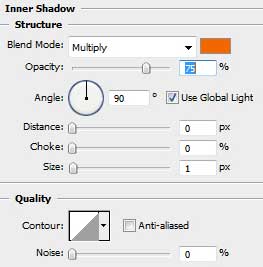
Blending Options>Gradient Overlay 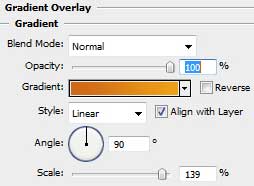
Comments