
Validate your source code syntax
Validate your source code syntax
You spend precious time creating pages in Adobe® GoLive® that look good and navigate properly. To that end it behooves you to make certain that your pages are free from errors and that they use valid syntax, which will ensure that they behave as expected in a Web browser.
Using GoLive’s built-in Syntax Checker, you can see if your pages are compliant with a particular DTD (Document Type Definition) or whether or not your code is well-formed, meaning all tag pairs are complete, etc.
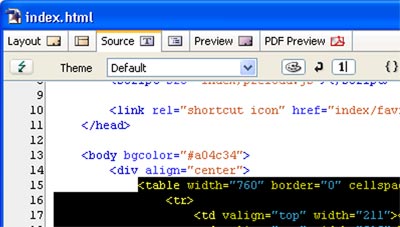
To use the Syntax Checker choose Edit > Check Syntax, or click the Check Syntax button in the Highlight palette, control-click (right-click on Windows) on a page in the Files tab of the Site window and choose Check Syntax, or click the Check Syntax button in the Source tab of the HTML file window (shown below).
Once invoked, a modal dialog will open. In the “Comply With” portion in the upper left, choose one or more DTD’s to check against by enabling the checkbox next to them. Alternatively, you could check for well-formedness only.

The “Additionally Allowed” portion in the lower left lets GoLive-specific tags and attributes go through the checker without being flagged. If you intend to strip out the GoLive specific code while uploading, then enable these checkboxes.
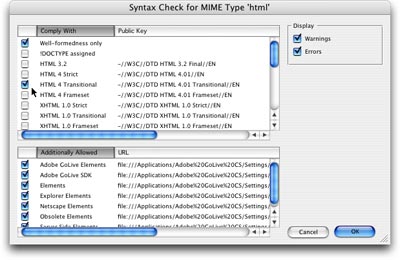
Choose the DTD to check against and whether or not to allow additional elements.
By default the Warnings and Errors checkboxes in the upper right are enabled. For the best results leave them on. When you’re done making your selections, click OK. The syntax checker proceeds and a list of results is shown. If errors or warnings are found, the problems are highlighted on the page, and the Highlight palette automatically opens.
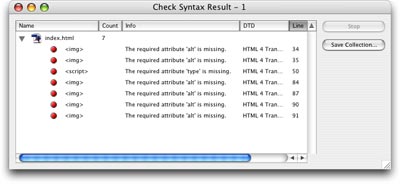
After running the Syntax Checker a results list is shown.
Double-clicking on a warning or error in the results list causes the page to pop forward with the problem area in view, ready for you to fix. Using the Outline Editor is the easiest way to fix errors since it not only highlights the errors on the page, but it also gives a brief description of the problem. If a required attribute of a tag is missing, the Outline editor even puts a bullet next to it in the tag’s attributes list, making it a snap to fix.
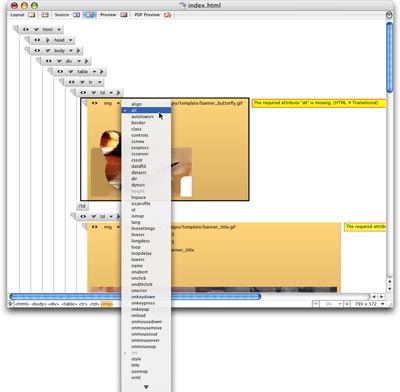
The Outline editor is the best choice for fixing syntax errors.
You can run the Syntax Checker on a single open page, on selected pages in the Site window, or on the entire site if the Site window is in focus with no pages selected.
Tip: Want to use the same settings you used last time you checked syntax? Hold Shift when you click the Check Syntax icon in the Highlight palette to bypass the modal dialog and use your previous settings.
Comments