
The Making of an Icon
I’ve
had a few requests for insights into the process of making icons.
Instead of answering individually, I’ve decided to make this the first
subject of a range of articles to be authored here at PixelResort.
This won’t be a tutorial or a step-by-step walkthrough, more like a general guideline based on my own experience. It’s how my
workflow crops up. Enough disclaimer, let’s see if we can make an icon.
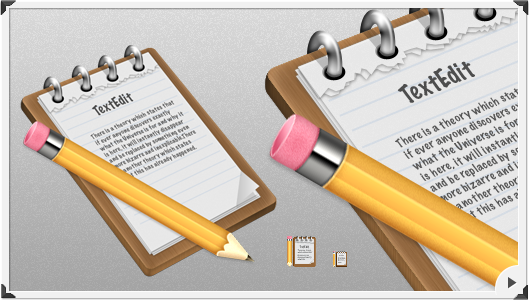
To illustrate the creation of an icon, I’ve decided to redraw my old TextEdit icon from the bottom up.
Sketching
Sketching is an important tool in defining the concepts of your
icons infancy. Sketching shouldn’t be accurate, it’s all about getting
your ideas down on paper.
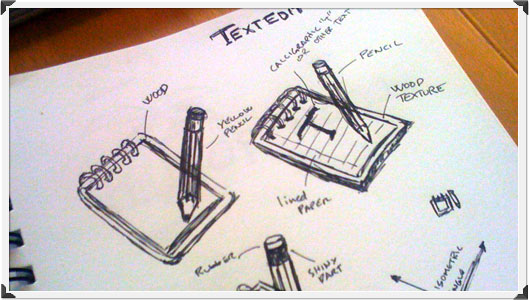
Unconsciously you make alot of decisions when you first put that pen
to the paper. Perspective and major elements materialize and you get a
first and early look of what might work. The power of moleskins should
never be underestimated. Reference pictures and rough tracing might
come in handy if you’re drawing something completely alien to you.

Where to Start?
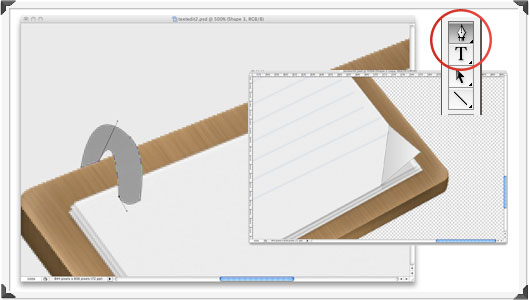
When that unceremoniously blank photoshop document is staring back
at you, it might be hard to know where to begin. My advice is, start
with large and defining elements of the Icon. In this case the wooden
pad sets the perspective and works as the foundation of the icon.

The Pen Tool
The Pen tool is the iconists best friend. It takes time to master,
but it’s the heart and blood of icon creation. Even though your
finished work will be raster based, vector scalabillity in the work
area is essential. It allows you to move around and resize elements
like there’s no tomorrow.
Blending Options
If the Pen tool is the iconists best friend, blending options is the
beer they enjoy together. Blending options are way more powerful than
many recognize. The subtle symphony of individual styles can create
almost any texture and surface.
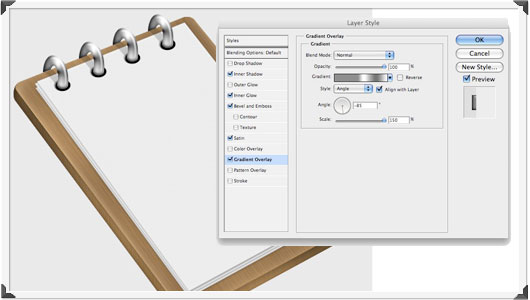
I could write an entire book about the power of blending options.
The best way to learn is to play around with it yourselves. Don’t be
fooled by the labels adobe has given the individual options – an inner
shadow doesn’t necessarily need to cast a shadow, etc. Explore the
possibilities of the individual options.
Organize!
As you slowly add more details to your icon, make sure to stay in
control of your growing number of layers. Organize in folders, and
nestle in smart objects.

Icons can easily have 100+ layers, so staying on top of the individual parts make tweaking alot easier.
Smaller Sizes
As you may know, a regular icon package contains several sizes. When
you first start out, make sure to work on the maximum size your package
will contain. This is often 512????512 pixels (leopard standard). From
there on, you should work your way down the various sizes (256, 128,
32, 16).
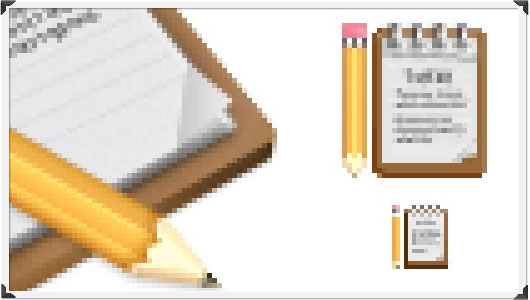
Tweak and completely redraw your icon to fit each individual size.
Much of the liberty you have in the 512px version won’t be afforded you
in the smaller sizes. Each size is equally important. An icon is only as good as it’s least attractive size. Make those pixels count!
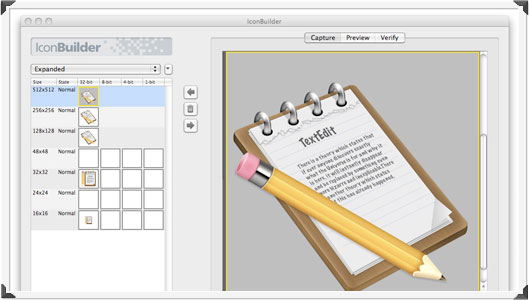
Packaging
When you’ve spend a few hours perusing the details and tweaking
everything to your satisfaction it’s time to pack up the icon.
Personally i use Iconfactory’s marvelous IconBuilder. It outputs Mac & PC formats without a blink.
Ultimately the creation of each icon is inheretly different. To say
that I haven’t gone into detail is a mild understatement. There are
quite alot of aspects which i haven’t covered, but I hope that i’ve
shed some light on the process of making an Icon.
Download
Download the finished icon from the Icons Section.
I’ll be happy to answer any questions in the comments.
Author: Michael Flarup
URL: http://pixelresort.com
Comments