
Text Tool in After Effects 6.0 – Page 4
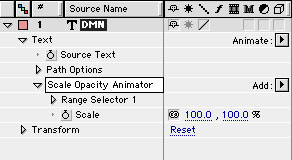
So we don’t get lost, click on Animator 1 so it is the only thing highlighted in the Timeline. Press the Enter key and rename the Animator to Scale Opacity Animator.
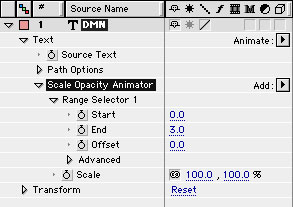
Each of these can be animated. For example; if you set Start to 1 and End to 2, only the letter M will be selected in the Comp Window.
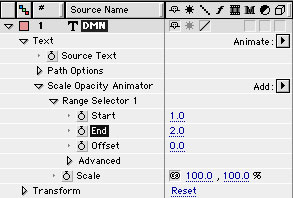

If you set the Offset to –1, the selector will move back one letter, if you set the Offset to 1, the selector will move forward one letter. This is very helpful when you are trying to animate letters or blocks of text at a time.

You can also define the range by clicking and dragging the arrows in the Comp Window.
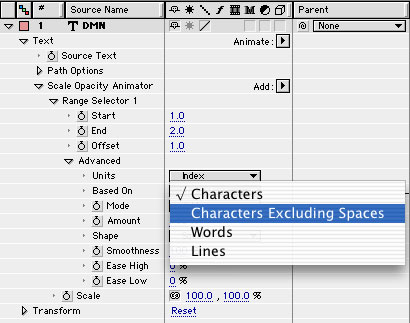
Twirl down the Advanced Controls. I am not going to go into a whole lot of detail here (got to save stuff for future tutorials), but I do want you to notice the Units amount. Units defines the units of measurement used for Start, End, and Offset. You can leave this at Index, which defines the number of characters, or you can change it to Percentage. For this exercise (and to give you time to wrap your head around what is going on) leave the Units to Index.

Based on let’s you select all characters (including spaces), characters excluding spaces, words, or lines. For this tutorial, let’s use Characters Excluding Spaces. Leave all of the other settings alone and twirl back up the Property arrow.
Comments