
Text Tool in After Effects 6.0 – Page 3
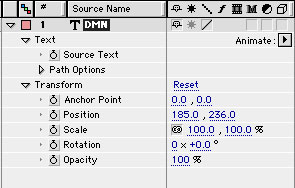
Twirl down the arrow next to the Text Layer in the Timeline to reveal the properties for layer. As with all other layers created in After Effects, you will see the familiar Transform Properties that allow you to animate Position, Rotation, Scale, Opacity, etc. You should also see a Text Property. Twirl down the arrow next to this property to reveal the controls.
I’m going to hold off on Path Options for the moment. But fear not, I’ll cover it before the end of this tutorial.
In the Switches/Modes column you should notice an element that is also new to After Effects 6.0: Animate. This is where you will do most of your text animation in AE6.0.
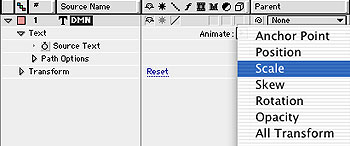
Click the arrow next to Animate and select Scale from the pop up window. Alternately, you can Command+Click or Right Click on the text in the Comp Window to do the same thing.

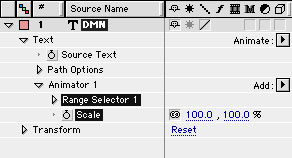
In the Timeline, a new control now appears called Animator 1. This is a Text Animator. A Text Animator contains one or more Selectors and one or more Animator Properties. Selectors (labeled Range Selector) are kind of like an animated mask in that it defines characters or section of text that will be animated by the Animator.
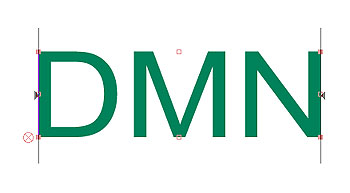
You can see the Selector in the Comp Window. It looks like two lines with arrows attached at the beginning and end of your text.
Comments