
Symmetrical Flowers – Part II
Symmetrical Flowers
With the top, newly merged layer selected in the Layers palette, use the rectangular marquee tool to once again drag a selection that crosses the center of the flower. If your first marquee was horizontal as mine was, make this second one vertical. And, if your first was vertical, make this one horizontal.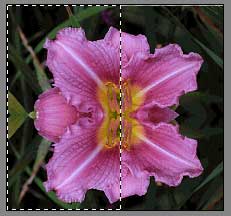
As before, you have to choose which side you want to use. I liked both sides, so I’m going to use the left side first, as shown. I’ll go back and do the right side later.
Once you have the selection where you want it, press Ctrl-J, or choose Layer > New > Layer via Copy. Then select the new, top copied layer and duplicate it by dragging it onto the New Layer button at the bottom of the Layers palette, or by choosing Duplicate Layer from the Layers palette menu.
Turn off visibility for all but the two top layers that you just created. You’ll remember that you do this by clicking on the eyeball icon at the left end of the layers you want to turn off.
With the top, duplicate layer selected in the Layers palette, choose Image > Rotate > Flip Horizontal or Flip Vertical if your marquee was Horizontal. (Photoshop users use Edit > Transform > Flip Vertical/Horizontal.)
Select the move tool in the toolbox, and, pressing the Shift key, drag the newly flipped layer to the right. Zoom in, and use the arrow keys to nudge the layers into exact alignment.
As you can surely tell, this is exactly the same process we used before.
Here’s how your Layers palette should look at this point.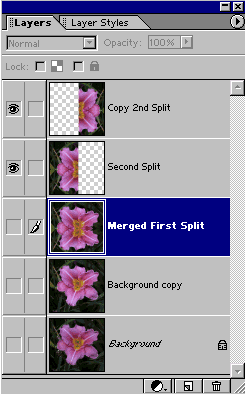
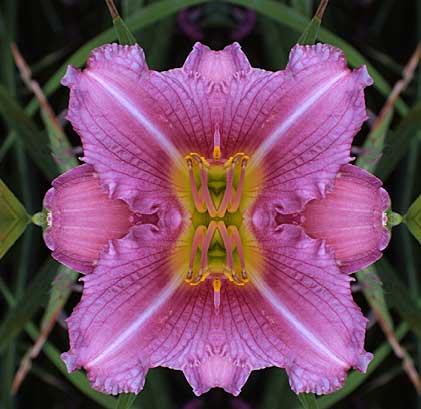
Below is the image created so far.
I mentioned earlier that I also liked the right side of the image when I dragged my rectangular marquee, above. If you would like to see how both sides of your flower look with a double flip, you can flip the other side, too.
Select the top layer which, in my example Layers palette above is called Copy 2nd Split. Press Ctrl-E, or choose Merge Down from the Layers palette menu. Then turn off visibility for this newly merged layer.
Turn visibility back on for the combined first flip which is what we started with before dragging our second marquee. In the example Layers palette this layer is called Merged First Split.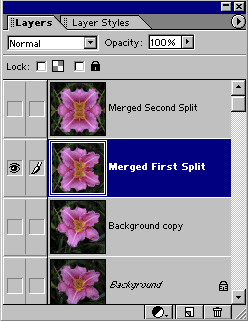
Use the same steps as before. Drag a vertical marquee, only this time select the right side of the image instead of the left.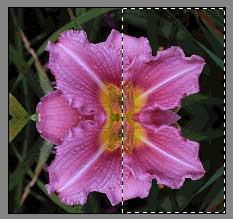
Proceed through the steps as I have already described. Copy. Duplicate. Flip. Drag. Merge. Enjoy.
You can choose File > Save As and check the As a Copy button to save separate versions.
Or, you can turn visibility on and off for the various versions to pick the one you like best.
Note that when your rectangular marquee selection includes less than a full half of the image, you will end up with a strip of transparency on one side of the picture while visibility is still turned off for the layers below.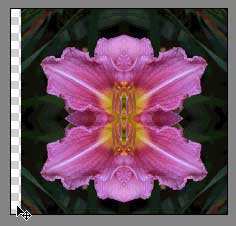
You can remove this with the crop tool, but if you have multiple versions as we do here, use the crop tool only on a copy. The crop tool cuts all layers, and other versions won’t need cropping in the same place.
Comments