
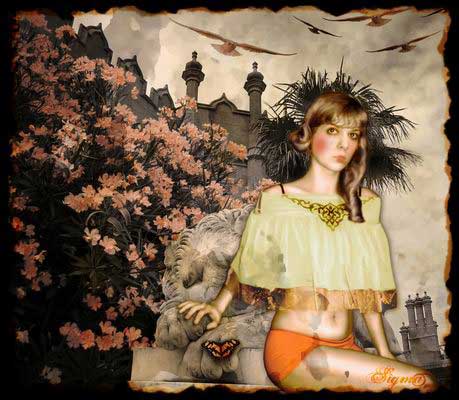
Spirit Of Castle Photo Effect
This lesson we’ll see how is it possible to create an effect of an old picture with burned edges and also represent the make-up, change colors, create the objects’ shadows and lay over the textures.
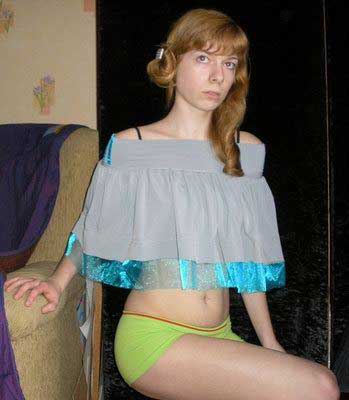
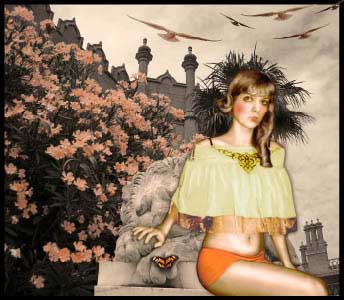
Open a girl’s photo: File – Open
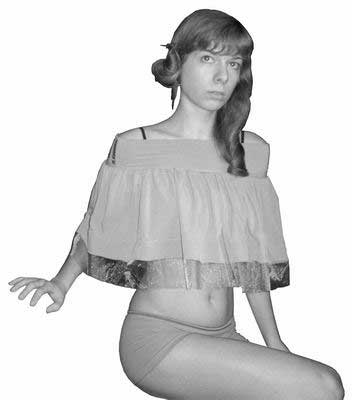
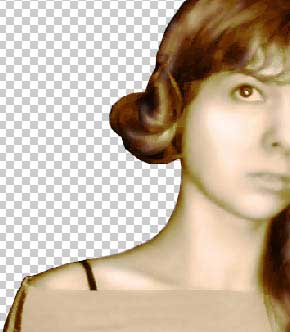
Use then Polygonal Lasso Tool to mark the girl along the contours and cut the marking: Edit – Cut (ctrl+x). Place it on a new layer: Edit – Paste (ctrl+v). Decolorize the picture now: Image – Adjustments – Desaturate (shift+ctrl+u)
Apply now a color filter: Image – Adjustments – Photo Filter


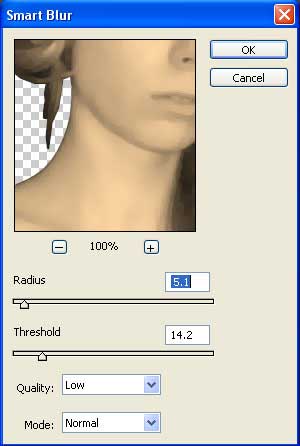
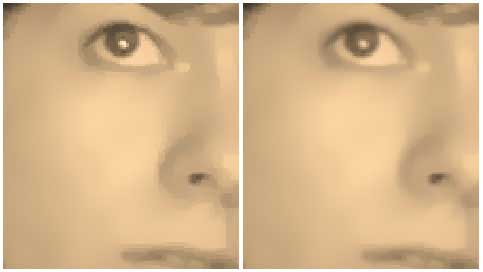
Next step includes applying Filter ??? Blur ??? Smart Blur
Then smooth out the image’s inequalities with Blur Tool.
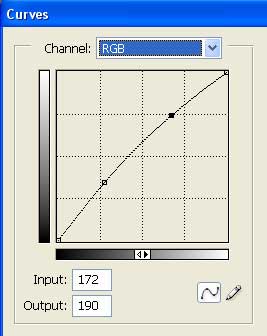
Change a little the layer’s brightness and contrast: Image – Adjustments – Curves (ctrl+m)
Make now the skin and the hair look shining by bleaching the lighten portions with the Dodge Tool.
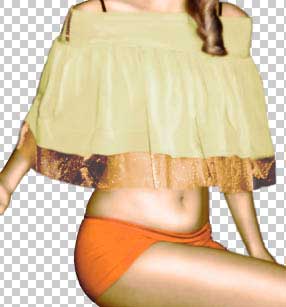
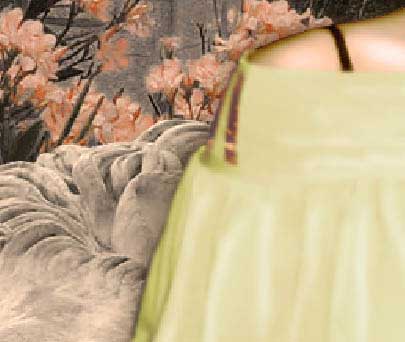
Color the clothes now, marking it out with Polygonal Lasso Tool and applying Photo Filter of the necessary color.
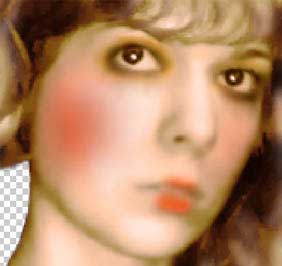
Take the Brush Tool now and represent the eyes’ and lips’ make-up on a new layer. The new layer is possible to create by choosing the fast button on the Layers window.
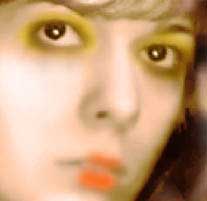
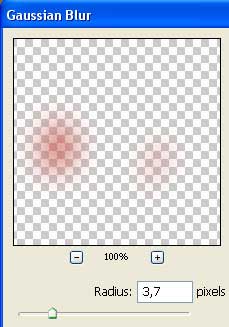
Change the layer’s type on Multiply. On a new layer picture now the blushes and blur them out with next combination Filter – Blur – Gaussian Blur.
Combine this layer with that one containing the make-up of the eyes and the lips, applying next command Layer – Merge Down (ctrl+e)
 Add the background now.
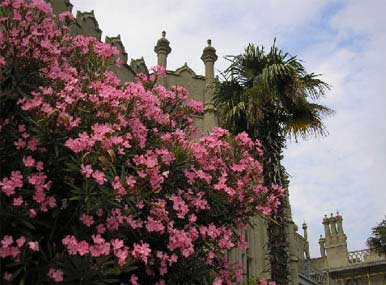
Open the necessary picture in a new window. Mark it out with Rectangular Marquee Tool, copy it: Edit – Copy (ctrl+c) and get back to the processed picture to insert the background on a new layer: Edit – Paste (ctrl+v). Move this layer on the bottom. Applying Magic Wand Tool, mark out the flowers.

Copy them and insert them on a new layer. The previous layer with the background must be decolorized. Apply to it also Photo Filter with Sepia nuance.
Get back now to the flowers’ layer and change their color: Image – Adjustments – Hue/Saturation (ctrl+u)

Take now a photo representing a lion made of stone.
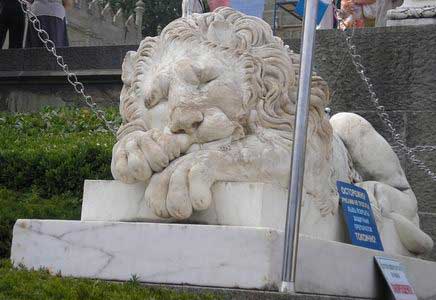
Cut it and insert it on a new layer also, under the girl’s layer. Decolorize the layer now, applying Filter – Blur – Smart Blur, giving to it the Sepia nuance.
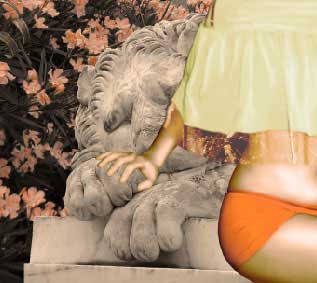
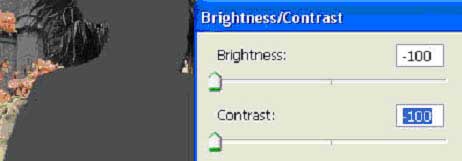
Copy now the girl’s layer: Layer ??? Duplicate Layer, making the copy of grey color: Image ??? Adjustments ??? Brightness/Contrast
Give it also the Sepia nuance. Blur it out, applying Filter – Blur – Gaussian Blur. Place this layer under the girl’s layer to get her shadow.
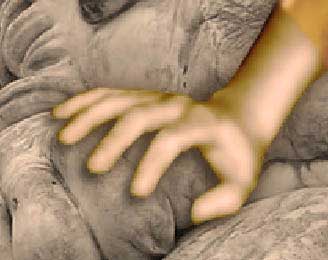
The Brush Tool can be useful in representing a more obvious shadow, from the girl’s palm.
 Insert a butterfly on a new layer.
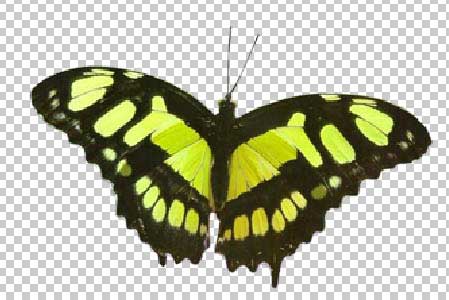
Change its color, using next combination Image – Adjustments – Hue/Saturation (ctrl+u). Add the filter Smart Blur. Add the shadow the same way we did with the girl’s shadow. Turn the butterfly a little and minimize its size, applying Edit – Free Transform (ctrl+t).
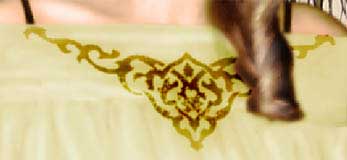
Add the ornaments on a new layer now, making use of Smart Blur filter.
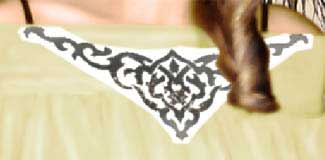
Change the layer’s type on Color Burn and make also a blurred ornaments’ copy.
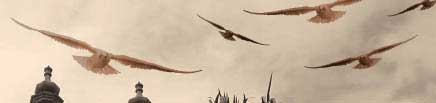
Insert a bird’s image on a new layer now, above the background, making it preliminary of the Sepia nuance too.
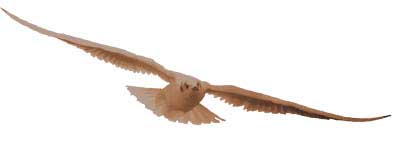
Copy the layer several times: Layer – Duplicate Layer. Represent different the bird’s size and its direction on the copy layers , using next combinations: Edit – Free Transform (ctrl+t) and Edit – Transform – Flip Horizontal. The birds placed further must look darker: Image – Adjustments – Brightness/Contrast
“Burn” out the picture’s edges. For the beginning insert the picture in a frame, choosing Crop Tool and Rectangle Tool
Take the Brush Tool an start picturing unequal edges.

Change the layer’s type on Multiply. Then on a new layer represent the edges more unequally choosing a lighter color also.
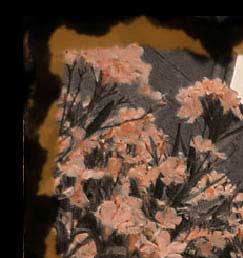
Change the layer’s type on Overlay.
Add the wall’s texture now on the top layer.

Increase the brightness now with Smart Blur selection.
Change next the layer’s type on Linear Burn and minimize the Opacity to 47%.
The picture is finished!
Made by Sigma
+ View full size image
Comments