
Spinning Fire Ball
1. Make a 400×400 document. Now press “D” on your keyboard to reset the foreground and background colors to black and white. Make sure your background is BLACK.
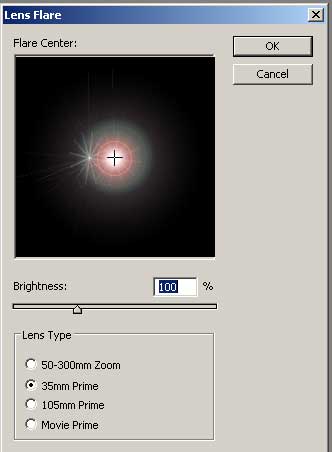
2. Apply Filter>Render>Lens Flare. You can to place it right in the middle of your canvas.
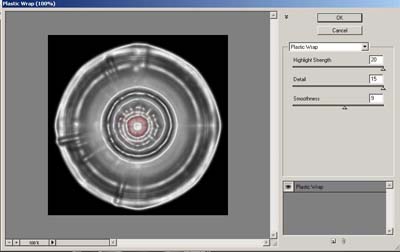
Now apply Filter>Artistic>Plastic Wrap with these following settings:
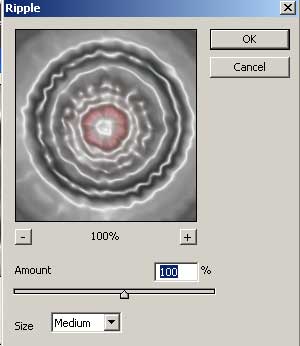
Go to Filter>Distort>Ripple to apply some waves to the graphic. Use my settings or use your own:
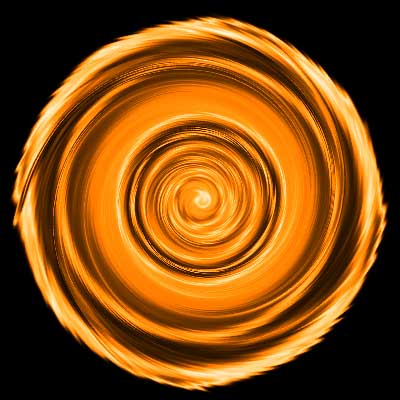
Last filter we got to apply is the twirl, this will give it a nice spinning feel. Filter>Distort>Twirl.
I cranked the twirl to +999 the highest it can go.
3. Apply some color now. Press CNTRL+U and use these hue settings or make your own:


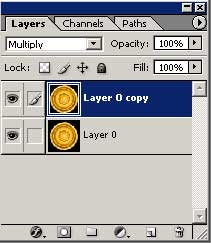
3. Duplicate the layer and set the new duplicated layer to Multiply.
This will darken our graphic and make it so much cooler.
If you want you can press CNTRL+E to merge the 2 layers together so you can use them in other projects you work on. A lot of professional webmasters save every little bit of work they do so when they got something new to design they can use all the open source files they have created over the months. Nothing is easier then click and dragging. Here is my final piece:
Comments