
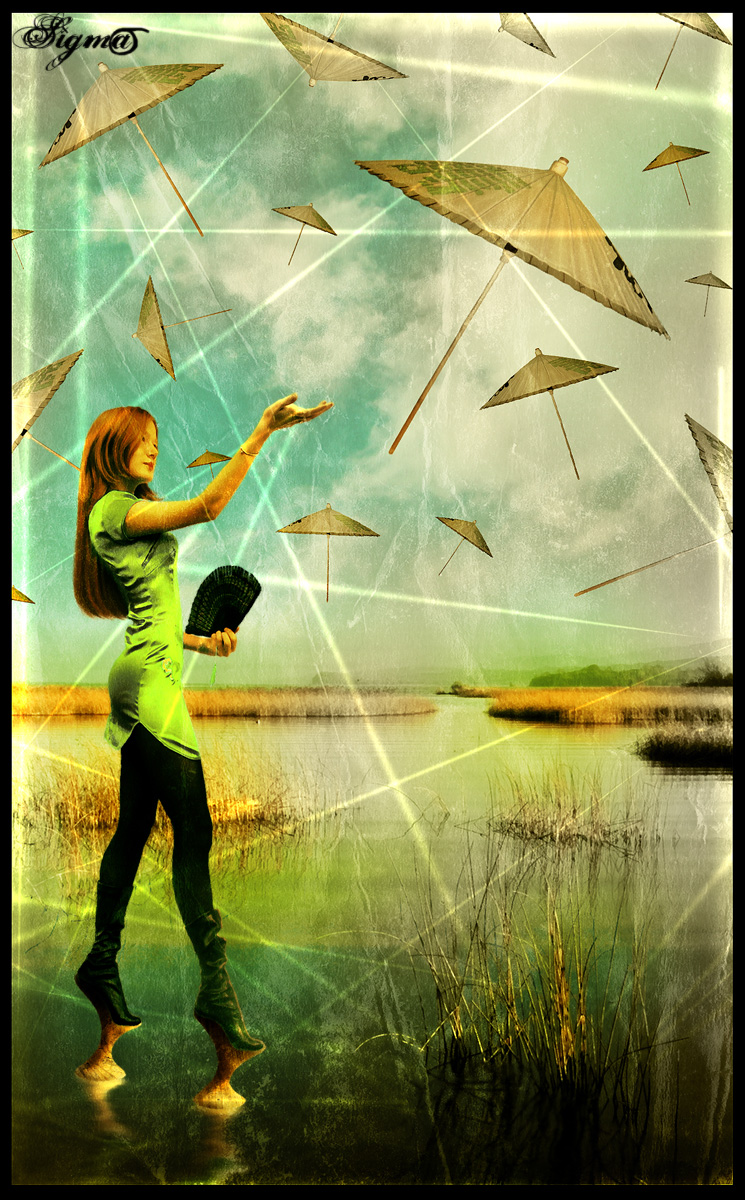
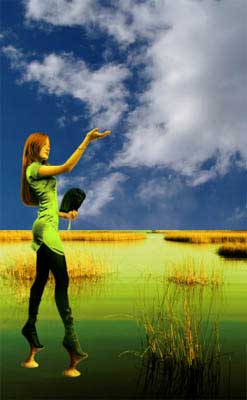
Sovereighn Lady of Umbrellas Photo Effects
In this tutorial we will learn to make corrections on a model’s figure, change her coiffure, create the wooden shoes, show the reflection in the water and also change the colors of the picture, add the texture and represent the rays.
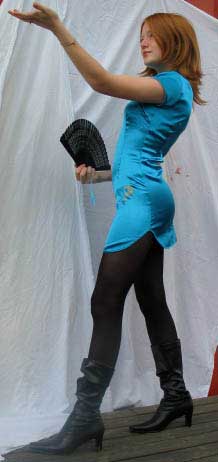
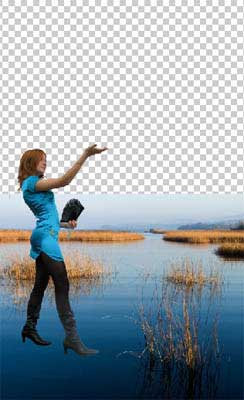
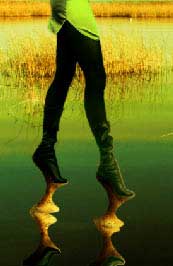
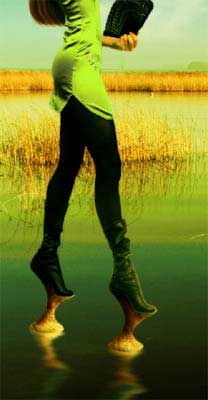
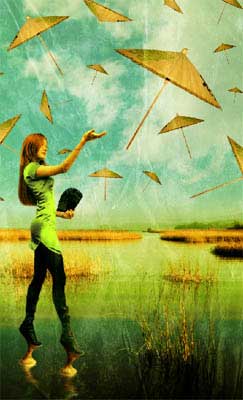
First we need to open in a new window the picture of a girl, dressed in the oriental style: File – Open (ctrl+o)
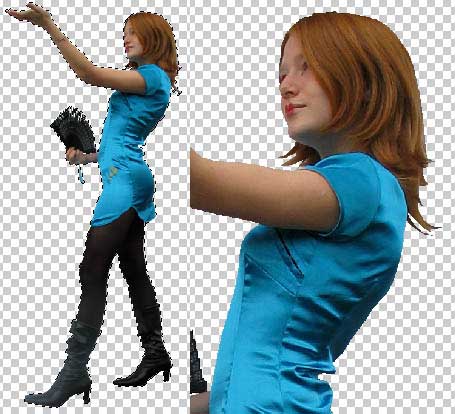
Copy the layer to be easier to work with it: Layer – Duplicate Layer (ctrl+j). The previous layer should be deleted by clicking the Delete Layer on the Layers window. Choose after that the Polygonal Lasso Tool to accentuate the background the girl is situated on, and then erase the background (by the way the hair should be marked out entirely). Erase the markings after that: Select – Deselect (ctrl+d)

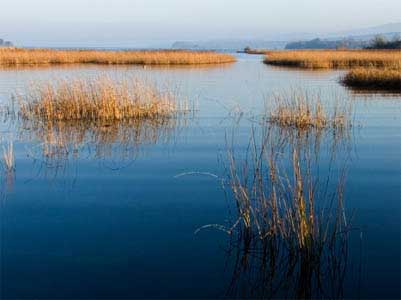
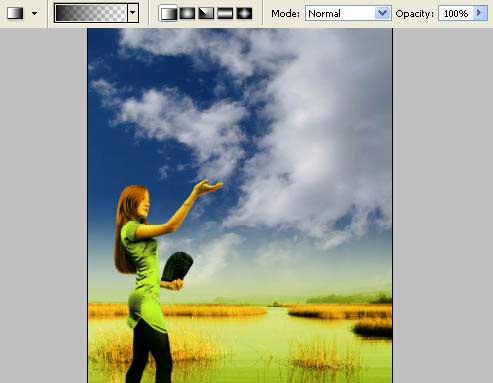
Select the Crop Tool now and increase the working place we will be working on. Open in a new window (ctrl+o) the scenery we want to make the background out of it.
Mark it out with Rectangular Marquee Tool, make a copy of it: Edit – Copy (ctrl+c) and get back to the initial file, insert it on a new layer: Edit – Paste (ctrl+v). Move it under the girl’s layer. If that is necessary we may change the background’s size or the girl’s size with Edit – Free Transform (ctrl+t) bu holding also the shift button for even change. Rotate the girl’s image horizontally: Edit – Transform – Flip Horizontal.
Create a new layer (Layer – New – Layer) and place it lower than all the layers. Then choose the Gradient Tool. Copy the sky’s color from that place it becomes detached. Select the Eyedropper Tool and increase its area.
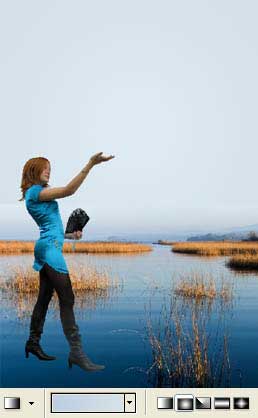
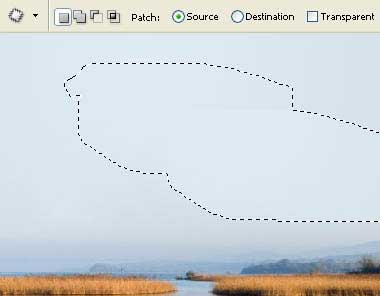
Merge down both these layers: Layer – Merge Down (ctrl+e) and choose the Patch Tool after that to delete the easy visible line between the sky and the painting (marking the sky’s edged place and moving it on a single nuance’s place).
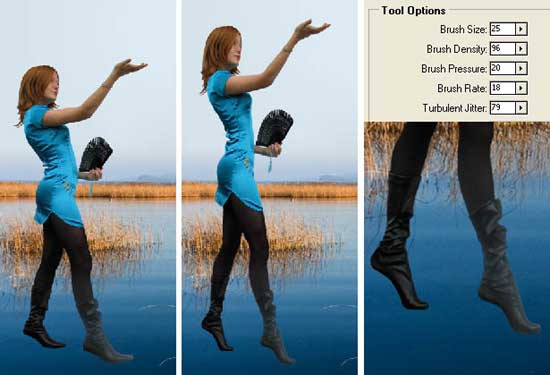
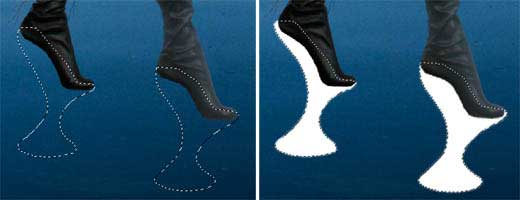
Them mark out and erase the hell on the girl’s boots and stretch the girl’s image vertically a little: Edit – Free Transform (ctrl+t). Select then the Turbulence Tool in the Filter – Liquify (shift+ctrl+x) window and make her look slender (be attentive not to distort the lines). Change the girl’s shoes size and the shape. But also change the size of the instrument we work with, depending on the operation we do at the moment: the big shapes should be corrected with a big brush, the smaller ones ? with a small size brush.
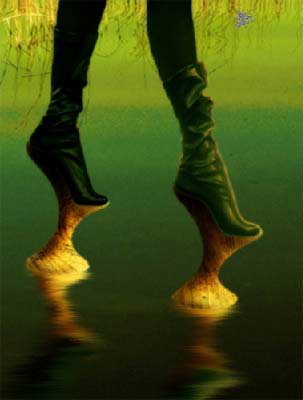
Create now a new layer under the girl’s layer and represent on it the shoes’ sole, having the same shape as the old Chinese shoes. Paint the new drawn figure in any color you want choosing the Paint Bucket Tool.
Erase the markings (ctrl+d) and insert on a new layer above the previous one, the wooden texture, like the next one:
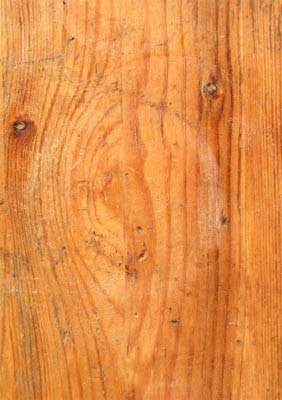
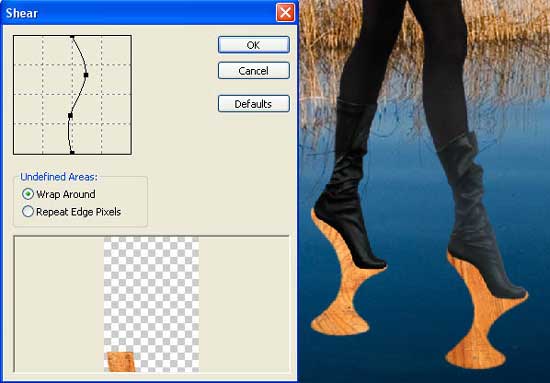
Group out both these layers with Layer – Create Clipping Mask (ctrl+g) and place the wooden’ texture on the shoes’ sole (ctrl+t). Merge down the grouped layers: Layer – Merge Down (ctrl+e). Give some volume to the soles. First we need to distort the texture, applying Filter – Distort – Shear.
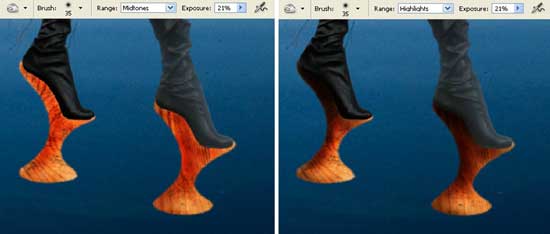
Use the Burn Tool to add the necessary shadows.
Change a little now the girl’s hair. Use firstly the Smudge Tool with the same adjustments indicated below and smooth out the girl’s hair.
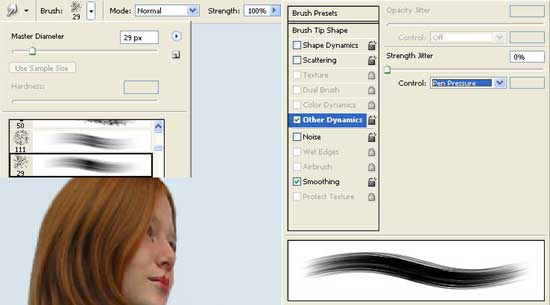
Make use now of the Stamp Tool
to copy many times some parts of her hair. Choose then the necessary
brush to continue picturing the rest of the hair. Smooth them with the Smudge Tool.
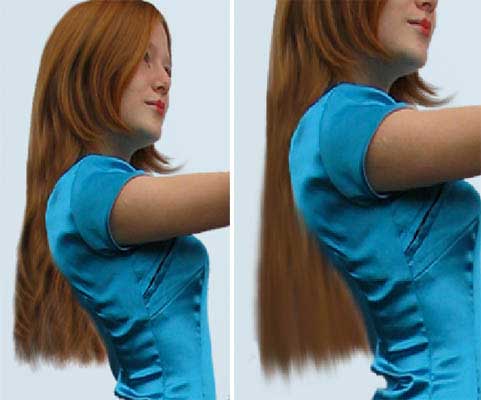
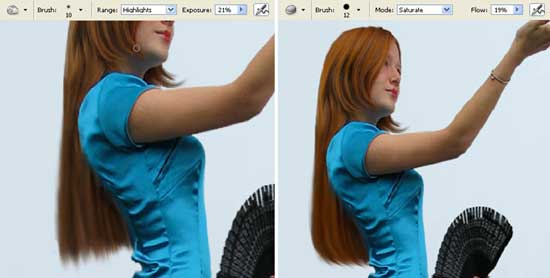
Select the Burn Tool to introduce several darker locks. Then select the Sponge Tool with Saturate mode to make the hair look brighter and livelier. Use then the Smudge Tool to smooth finally the edges of the hair.
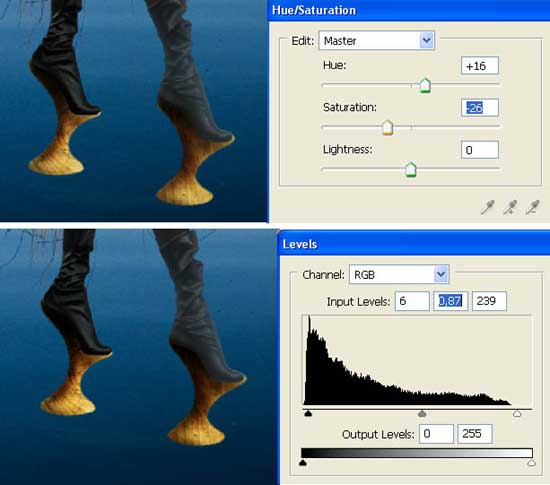
Start now correcting the colors. First change the color’s intensity on the shoes’ sole with Image – Adjustments – Hue/Saturation (ctrl+u). After that change their brightness and the contrast with Image – Adjustments – Levels (ctrl+l).
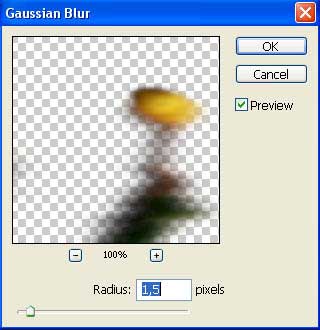
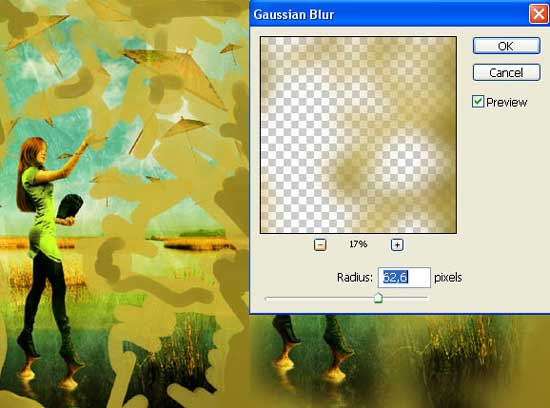
Copy now the girl’s layer (ctrl+j) and blur out this copy using Filter – Blur – Gaussian Blur.
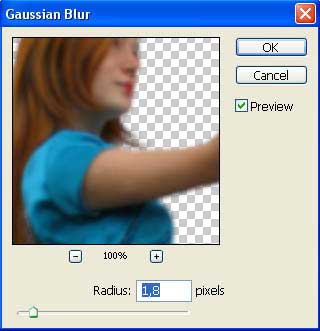
Change the layer’s type on Soft Light
and combine both these layers (ctrl+e). The same way should be
processed the background’s layer (if you’ll get too intensive colors,
the layer’s Opacity may be minimized on the copy).
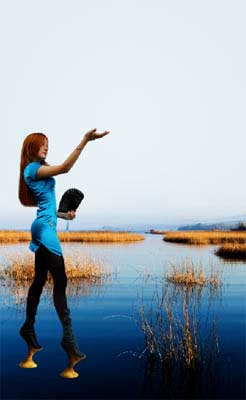
Change the color of the background selecting the Image – Adjustments – Color Balance (ctrl+b) and Image – Adjustments – Selective Color.
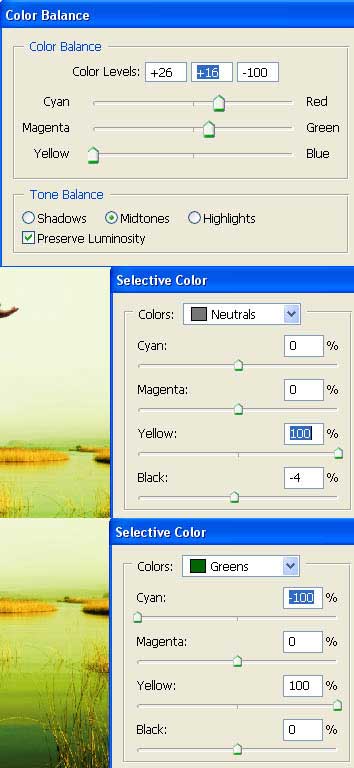
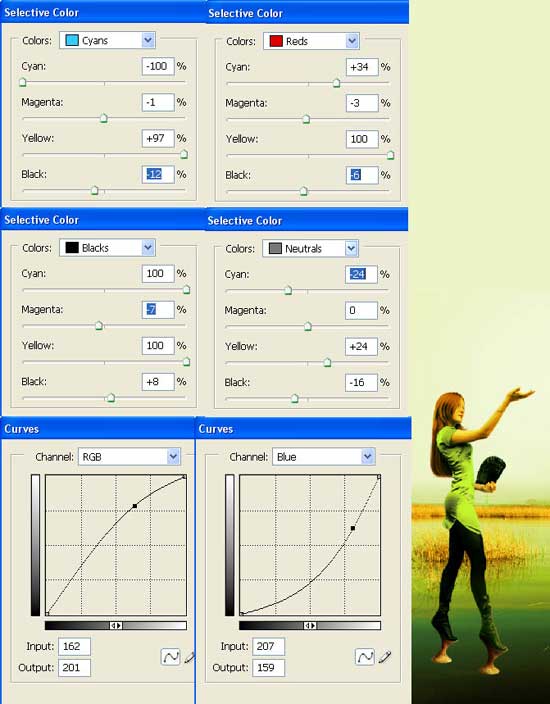
Change now the girl’s color and her brightness, applying Selective Color and Image – Adjustments – Curves (ctrl+m).
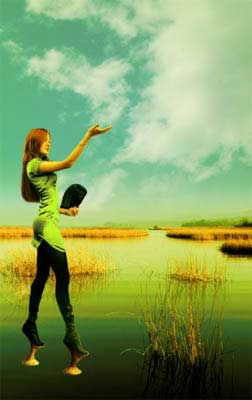
Create now a new layer, above the background’s layer and insert on it the picture representing the sky.
Create out of this layer a mask using next combination: Layer Add Layer Mask ? Reveal all. Select after that the Gradient Tool to make the sky’s visibility appearing smoother on the bottom:
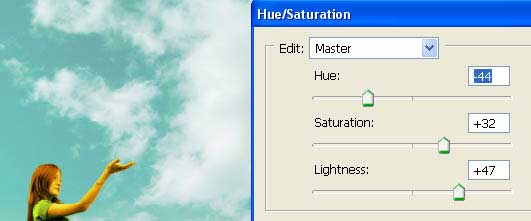
Choose the next command: Layer – Remove Layer Mask – Apply and change a little the sky’s color, selecting Hue/Saturation option (ctrl+u).
Change the layer’s type on Multiply.
Now
we have to represent the girl’s reflection in the water. First we need
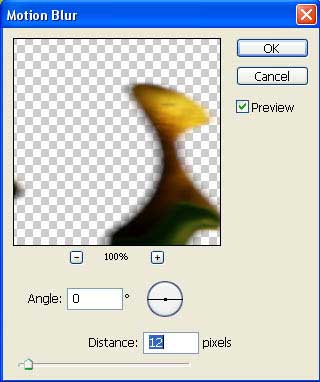
to copy the layer with her (ctrl+j), turning it vertically: Edit – Transform – Flip Horizontal and correct the distort level, applying Edit – Transform – Distort.
Apply this filter to blur out the image horizontally (Filter – Blur – Motion Blur).
Now select the Smudge Tool with the same adjustments use in the hair case and smudge out a little the girl’s reflection.
Blur it with Filter – Blur – Gaussian Blur.
Change the layer’s type on Screen.
On a new layer, above the background, should be inserted the umbrella’s photo.
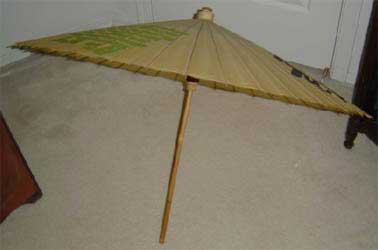
Mark
and erase the background the umbrella was situated on. Then copy many
times the umbrella’s layer by changing also its size and placement.
Select for this the next combinations: Edit – Free Transform (ctrl+t) and Edit – Transform – Flip Horizontal.
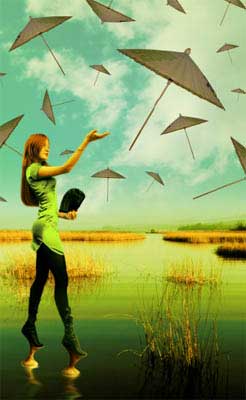
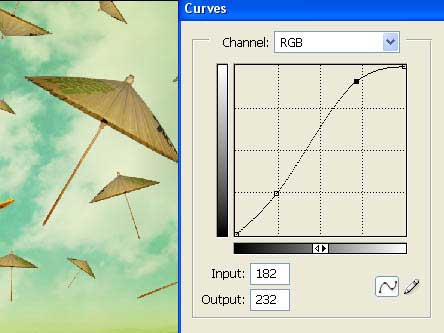
Combine all the layers having the umbrellas on them and increase the level of their brightness using Curves (ctrl+m).
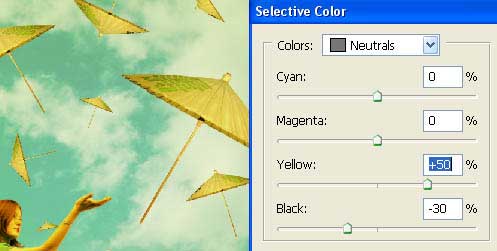
Change a little the color (Selective Color):
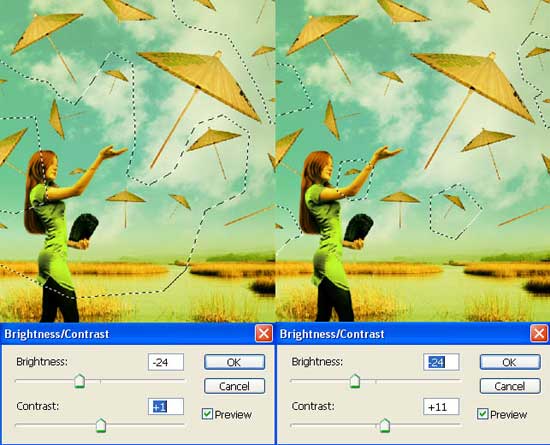
Now we should minimize the brightness of those smaller umbrellas, situated of course farther. Mark them with Polygonal Lasso Tool and apply the next command Image – Adjustments – Brightness/Contrast.
Merge down all the layers: Layer – Merge Visible (shift+ctrl+e). Insert now on a new layer the paper’s texture.
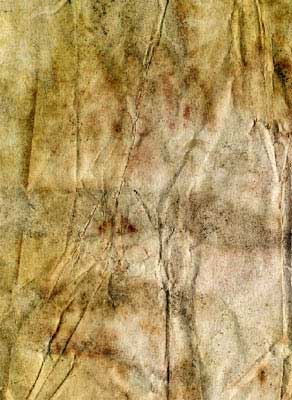
Decolorize it with Image – Adjustments – Desaturate (shift+ctrl+u) and invert the colors: Image – Adjustments – Invert (ctrl+i).
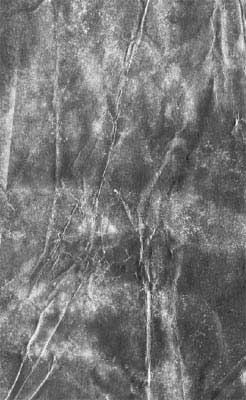
Change the layer’s type on Soft Light and minimize the layer’s Opacity till 75%.
Take the Brush Tool with two colors on a new layer and make the necessary drawings of the picture, then apply on this layer next selection: Filter – Blur – Gaussian Blur.
Change the layer’s type on Color.
The picture should be introduced in a frame. That is why we should choose the Crop Tool and Rectangular Tool to make the necessary manipulation.
Select now the Dodge Tool with the following adjustments:

Decolorize
the edges of this picture, keeping pressed the shift button. Now draw
many stripes by placing two points (the first one and the final one)
and holding the shift button.
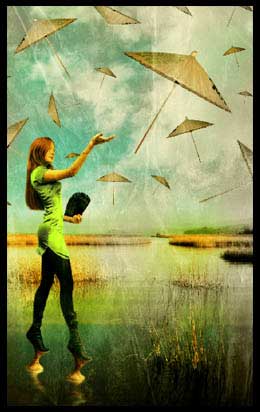
The illustration is finished!
Made by Sigma
Comments