
Skinning with Code
Skinning with Code
In general, if you want more control over your skinning, you must use code. In some cases, this method also offers skinning options not available in the previously studied methods. Some methods are quite simple, while others can be quite involved.
Use the Prototype Method
The prototype method is the easiest coding method. This method involves writing code that redefines the default value of skin properties.
Take the Button component, for example. If you wanted to set the four main values for skin properties ( falseUpSkin, falseDownSkin, falseOverSkin, falseDisabledSkin) you would do the following (the finished result can be found in the Prototype folder of the downloadable sample code):
- Create a movie clip symbol for each state in your library.
-
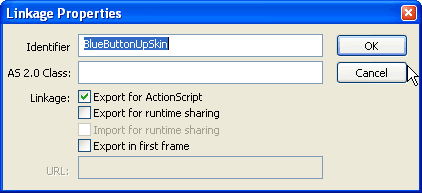
Be sure the Linkage identifier is set for each state; usually its best to follow some standard naming convention. For this example, I use the BlueButtonUpSkin, BlueButtonDownSkin, BlueButtonOverSkin, and BlueButtonDisabledSkin identifiers (see Figure 2).
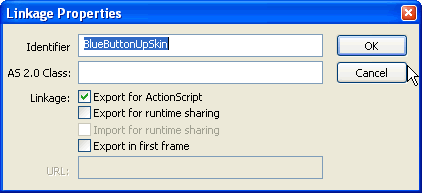
Figure 2. The completed Linkage Properties dialog box for the BlueButtonUpSkin identifier

Notice that I didn’t set the symbol to export in the first frame. If you don’t mind exporting all your symbols on the first frame, then you can leave the Export in first frame checkbox selected and skip to step 7.
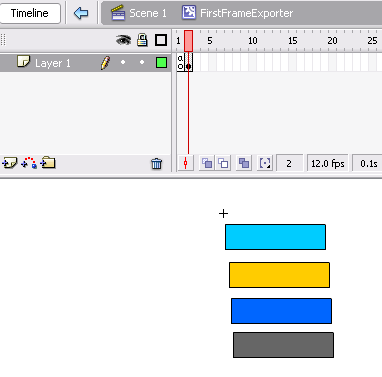
- Create a new movie clip symbol called FirstFrameExporter. The symbol doesn’t need to have a linkage identifier. In the new movie clip symbol we will create two frames.
- On the first frame you will have a
stop()function call. -
Place the four symbols you created in step 2 on the second frame (see Figure 3).
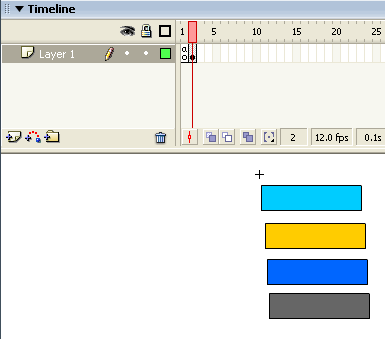
Figure 3. The completed FirstFrameExporter symbol
- Place a copy of that new symbol on the Stage. Notice it will end up being just an empty item with the registration point visible. It’s usually easiest to place that symbol at the registration point 0,0.
-
Finally, you need to place the code that will set the values of the properties equal to the Linkage IDs. The easiest way is to open the FLA file, go to the main Timeline, and enter the following code:
mx.controls.Button.prototype.falseUpSkin = "BlueButtonUpSkin";
 mx.controls.Button.prototype.falseDownSkin = "BlueButtonDownSkin";
 mx.controls.Button.prototype.falseOverSkin = "BlueButtonOverSkin";
 mx.controls.Button.prototype.falseDisabledSkin = "BlueButtonDisabledSkin";
- Place a Button component on the Stage.
- Select Control > Test Movie to view the result.
This method is the simplest method for skinning components through code. It has the benefit of enabling you to redefine the skin property values of all instances of a component in one place. With the previous example, all Buttons added to our project will use those new default values rather than the default values the component was originally set to.
This method also has the advantage of enabling you to set skin property values for subcomponents of a component. A good example of this use is the ComboBox component, which uses a ListBox component. If you set the skin property values for a ListBox using this method, the ComboBox ListBox will automatically use the new value.
However, this method has one downside, which may not affect you—the ability to skin a component on an instance basis. Many times this is not needed, but there are times when you want to set the skin property values of a component specifically for that instance. In that case, you can use one of the other methods that require code.
Pass in the Values with initObject
Another approach similar to the using the prototype method is passing in the new skin property values to the initObject object when attaching a component through code, rather than setting them through the prototype method. To achieve this method, you can follow these steps:
- Open the FLA file you created in the previous example.
- Remove the code you placed on the main timeline and delete the instance of the Button component from the Stage. Make sure you don’t delete the instance in the Library as we will need that to attach the component through code.
-
On the main timeline, create an
initObjectobject with the properties and values of the skin properties and pass the object to thecreateClassObject()calls, using the following code:var initObj:Object = new Object();
initObj.falseUpSkin = "BlueButtonSkin";
initObj.falseDownSkin = "BlueDownSkin";
initObj.falseOverSkin = "BlueOverSkin";
initObj.falseDisabledSkin = "BlueDisabledSkin";
createClassObject(mx.controls.Button,"myButton",1,initObj); - Select Control > Test Movie to view the result.
This method offers several benefits. For example, it enables you to specify the values on a per component instance basis. Although some applications can live with a single skin per component, often you run into situations where you need that extra level of control.
This method does have some drawbacks though. The most obvious is the requirement to specify this information for each and every instance of a component. It can sometimes get tedious to do this for each component you plan to use. Another requirement is having to attach the component through code. I almost always attach my components through code, but for times when you want to place a component on the Stage, this method won’t work.
Overall, I prefer to use a mixture of the method described in this section and the prototype method in my applications. It’s a personal preference, but I’ve found that using the prototype method I can define global settings, and the per instance method enables me to override those values for the times in my application where the component will not use the values set using the prototype method.
Subclassing a Component Class
The last method that I want to discuss is subclassing a component class to define the skin property values. This approach enables you to create a subclass of the component that doesn’t do anything but define new skin property values.
Follow these steps:
- Create a new FLA file and save it.
- Open the file StandardComponents.fla located in the C:Program FilesMacromediaFlash MX 2004enConfigurationComponentFLA (Windows) or Hard Drive/Users/ <username>/Library/Application Support/Macromedia/Flash MX 2004/ <language>/Configuration/ComponentFLA (OS X) directory.
- Open the libraries of both FLA files.
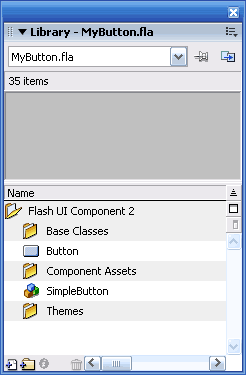
- Create a new folder in the library in the blank FLA called Flash UI Components 2.
-
Locate the Button component base symbol (Main Button component symbol) in the file StandardComponents.fla and drag it to the library folder you created in step 4. The symbol is located in Flash UI Components 2 of the library. Your Library panel now should look similar to Figure 4.
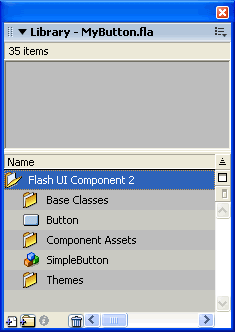
Figure 4. Completed copying of Button component-related symbols
- Create another folder in the Library panel called My Components.
- Create a duplicate of the main Button component symbol in the new folder.
-
Specify an identifier and a class for the duplicated symbol. For this example, I used com.rewindlife.controls.MyButton for both and cleared the Export in first frame check box (see Figure 5).
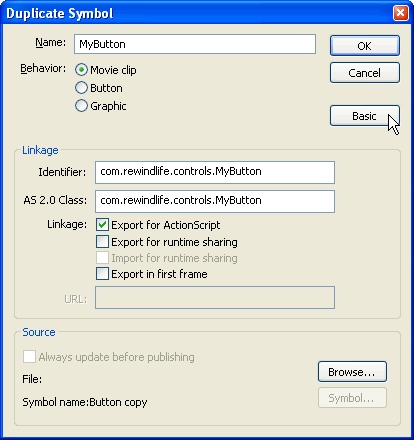
Figure 5. Completed Duplicate Symbol dialog box
- Create a folder called Skins in the My Components library folder.
-
Create four skins for the different states of the Button and include the linkage identifier as you did in steps 1 and 2 of the
prototypemethod. Alternatively, you could also copy the symbols from the library of theprototypemethod example to this one.The library should now look like Figure 6.
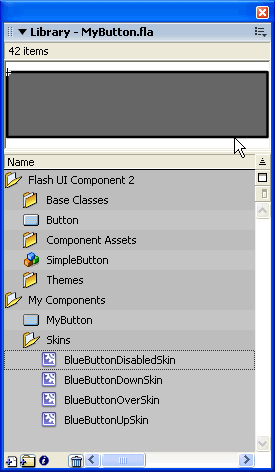
Figure 6. Added Skins and MyButton symbol
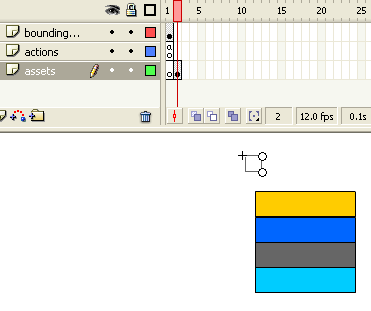
-
Double click the MyButton symbol and locate the second frame of the assets layer. Drag the four new skins and place them on the second frame to ensure they are exported properly when Flash is ready to compile your new skinned component (see Figure 7).

Figure 7. The MyButton symbol with the skins
Now you have completed all the work you need to do before writing any code. The last step is to write your component class which will be a subclass of the Button class.
-
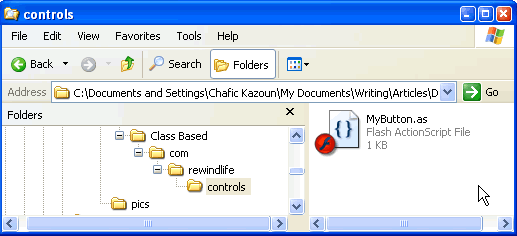
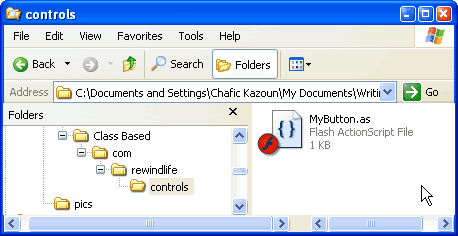
Create a new folder to place your class in the proper package (in this example, the package is com.rewindlife.controls, so you will create com/rewindlife/controls folder structure) and create a new ActionScript file called MyButton.as and save it in that folder (see Figure 8).
-
Figure 8. The Folder structure with new class file
In the MyButton.as file include the following code:
//It is good practice to include this information
 //and in some instances it is required
 import mx.controls.Button

  class com.rewindlife.controls.MyButton extends Button
 {
     //these values are required for every components,
     //we set the symbolName equal to the symbol identifier
     //of our components
     //
     //We set the symbol ownder equal to the fully qualified
     //class name.
     //
     //We can copy these values from the original Button class
     //as a starting point, the Class file can be found here:
     //C:Program FilesMacromediaFlash MX 2004en
    //  First RunClassesmxcontrols
     //
     static var symbolName:String = "com.rewindlife.controls.MyButton";
     static var symbolOwner = com.rewindlife.controls.MyButton;
          //Here we define the SkinIDs, again we can easily open the
     //Button class and copy/paste the current values as a good
     //starting point
     var falseUpSkin:String  = "BlueButtonUpSkin";
     var falseDownSkin:String  = "BlueButtonDownSkin";
     var falseOverSkin:String = "BlueButtonOverSkin"
     var falseDisabledSkin:String = "BlueButtonDisabledSkin";
 }
- Place the MyComponent component symbol on the main Stage and select Control > Test Movie to view the result.
As you have seen, this method is the most involved of the coding methods to set up. It might not seem worth it at first, but it definitely has several benefits. For example, it enables you to create different buttons and easily re-use a button without having to redefine the skin property values each time (as you would have to do with the initObject method).
I like to use this method when I am working on a project with multiple interfaces, and those interfaces will share certain common skin property definitions. With this method I can create a Button and re-use it through all the projects without having to rewrite anything. If I ever want to change the skin property values for that component later on, I can edit that single class file and re-export all my interfaces with the updated values. This is also the only coding method that enables me to use components that are skinned through code without any code (that is, once this method is set up).
When working in teams, developers may at times set up such components for designers to give designers access to the component. You can also package your new component as a SWC file with this method, if you want. In larger teams this can prove to be a very valuable benefit.


Comments