
Serenity Prayer
In this lesson we learn some ways to change colors of the image, to do a premise greater when there is only its small part, and also to create illusion of movement and to give photos mystery.
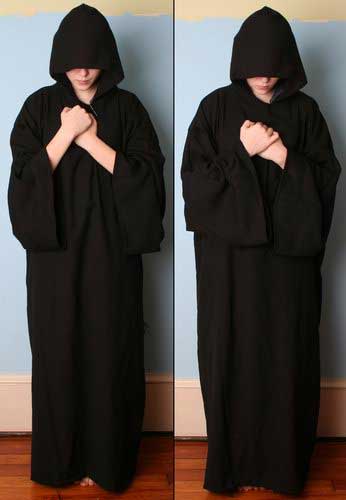
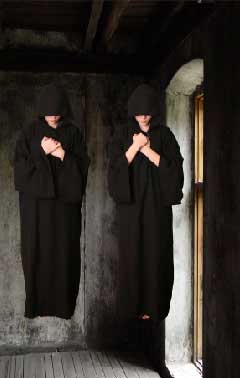
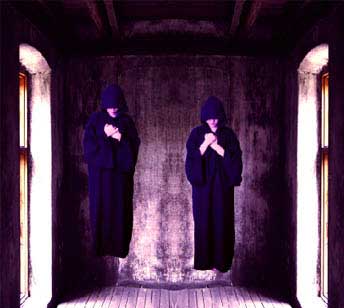
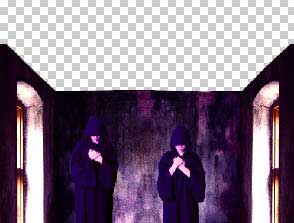
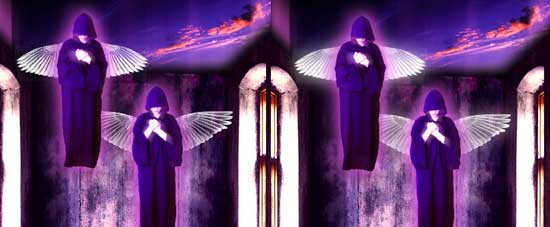
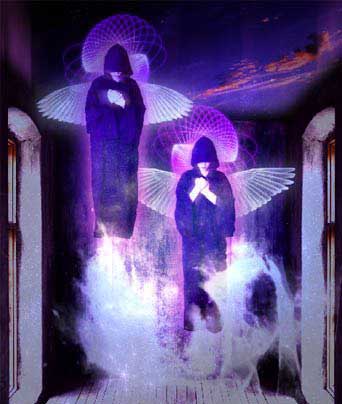
Open the picture representing the monks: File ? Open (ctrl+o)
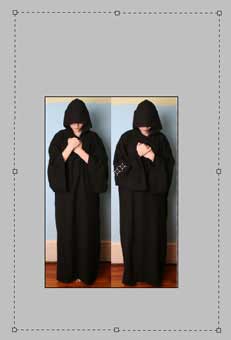
Make a copy of the picture’s layer to be easier to work with it: Layer ? Duplicate Layer. Erase the previous layer and increase the work’s field by using the Crop Tool.
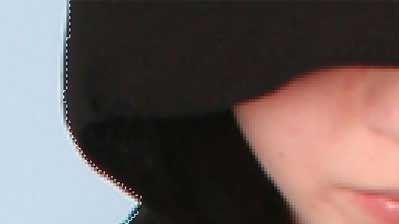
Mark out the figures along the contours, applying Polygonal Lasso Tool

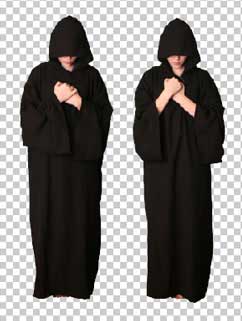
Copy them: Edit ? Copy (ctrl+c) and insert them on a new layer: Edit ? Paste (ctrl+v).
Erase the previous layer with the picture’s rests.
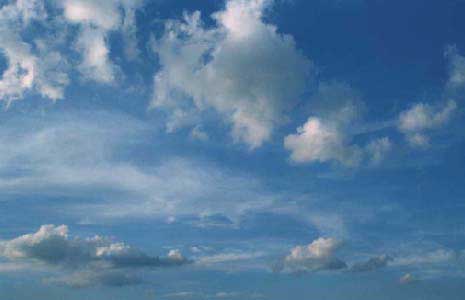
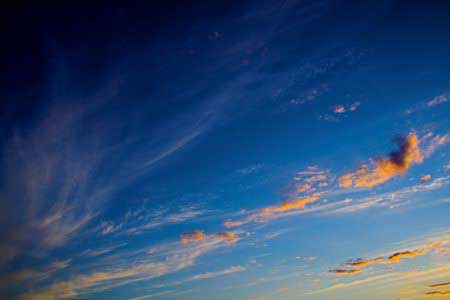
Open in a new window the necessary picture for the background: File ? Open (ctrl+o)
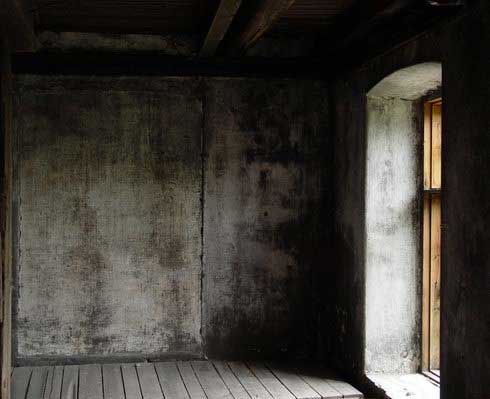
Mark it out, using Rectangular Marquee Tool and copy it inserting on a new layer. Get back to the window containing the processed picture. Place this layer lower than the previous one, just clicking on it and moving on that place. Applying Edit ? Free Transform (ctrl+t), stretch out the background’s layer vertically.
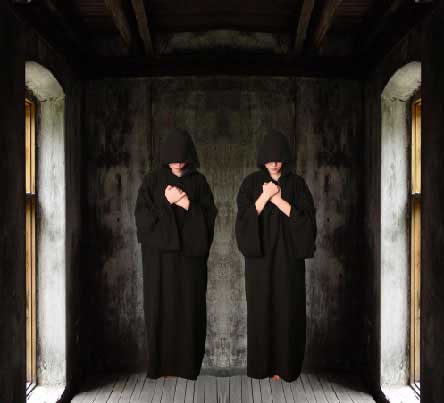
Copy this layer then (Layer ? Duplicate Layer) and insert it on a new layer. Turn it around in a way to get a mirror reflection of the previous layer. Apply the command Edit ? Transform ? Flip Horizontal. Applying the Move Tool, merge down the edges of these two layers in a way that the junction wouldn’t be seen and merge both layers: Layer ? Merge Down (ctrl+e)
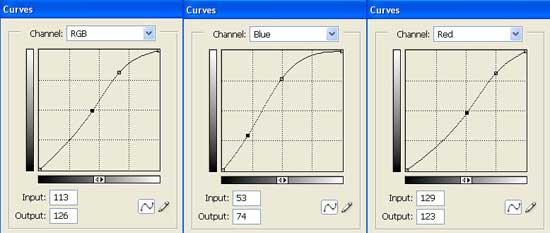
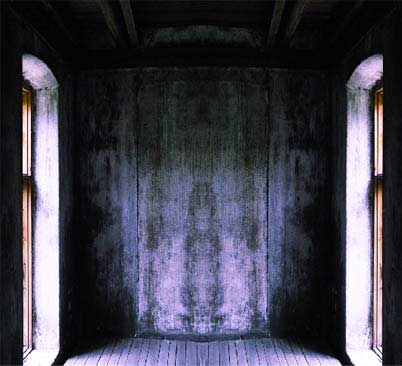
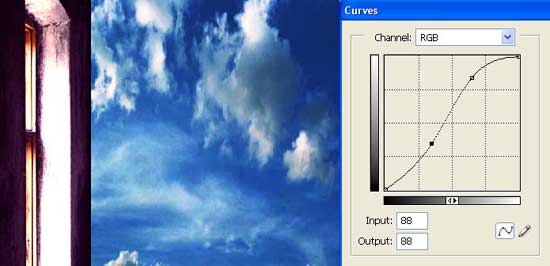
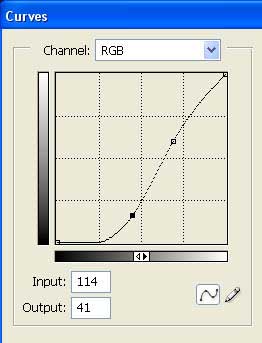
Work with the background’s color now, brightness and the contrast. For your convenience just hide the monks’ layer visibility, clicking on ?eye? situated close to the layer. Pass to the background’s layer again, applying Image ? Adjustments ? Curves (ctrl+m).
That is what we’ve got.
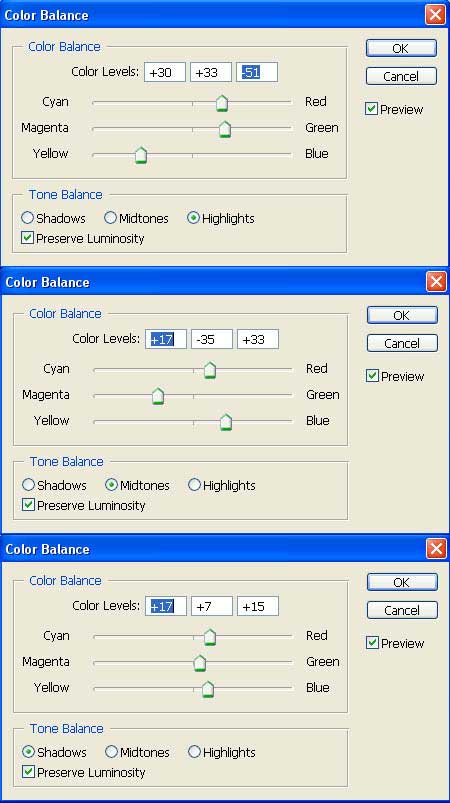
Work now with this layer, using Image ? Adjustments ? Color Balance (ctrl+b).
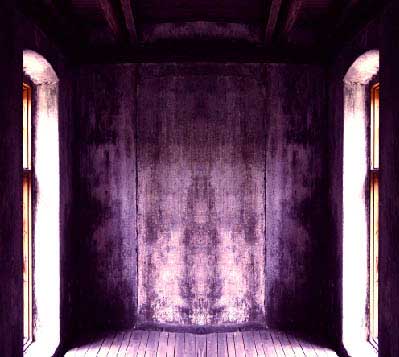
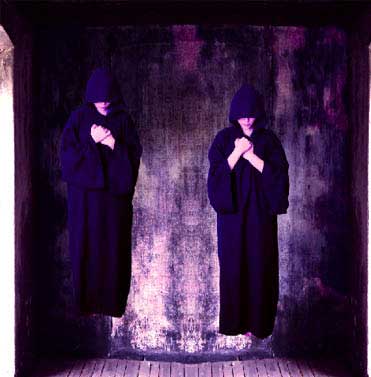
We’ll get such a picture then:
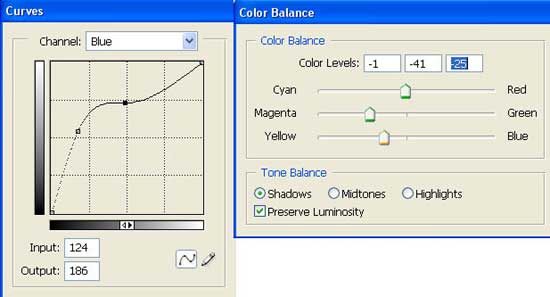
Choose again the monks’ layer and the layer automatically will be visible. Work with them, applying the same command.
We’ll get the next picture:
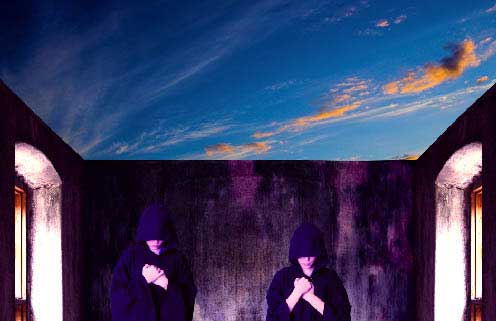
Give a certain texture to the background’s back wall and insert on a new layer above it the sky’s picture.
 Correct its size with Edit Free Transform (ctrl+t) and increase the brightness and the contrast.
Change the layer’s type on Soft Light and combine this layer with the previous one: Layer ? Merge Down (ctrl+e)
Apply the next selection Polygonal Lasso Tool and the command Edit ? Cut (ctrl+x) to cut out the ceiling on the background’s layer.
Insert on a new layer a different sky’s picture.
Place this layer lower than the walls’ layer and correct its size and perspective, making use of a special command Edit ? Transform ? Distort.
Change the brightness and the contrast.
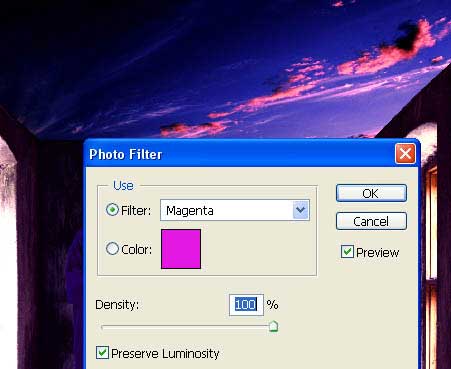
Apply next a color filter (Image ? Adjustments ? Photo Filter).
Next step includes copying the layer with the walls and placing the copy lower than the basic layer. Blur it out with Filter ? Blur ? Gaussian Blur.
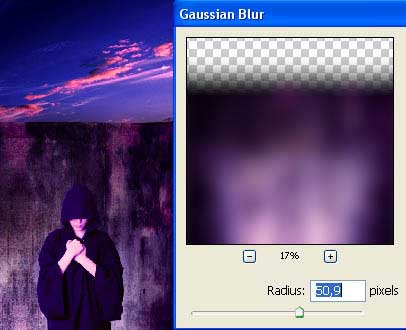
Make this layer darker: Image ? Adjustments ? Brightness/Contrast.

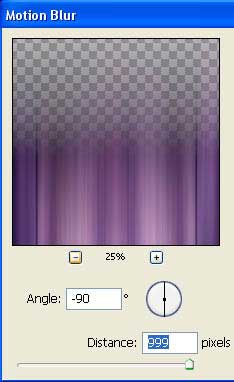
Make another copy of the walls’ layer and place it above the sky’s layer.
Apply to it Filter ? Blur ? Motion Blur.
Make use of the known already color filter to the new layer, choosing Magenta color and change the layer’s type on Screen.
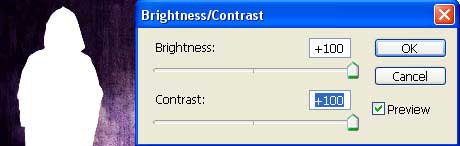
Combine the layers with the background’s parts (ctrl+e). Copy next the layer with the monks and make this copy totally white, using Image ? Adjustments ? Brightness/Contrast.
Place this layer lower than the basic layer of the monks and blur it out (Gaussian Blur).
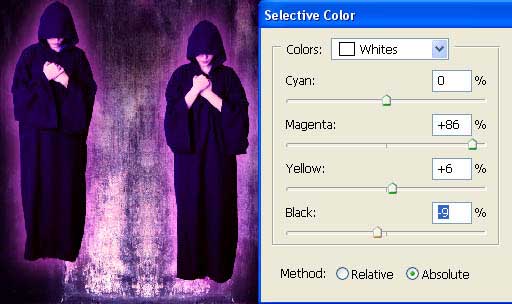
Change the color of the halo that we’ve got: Image ? Adjustments ? Selective Colors.
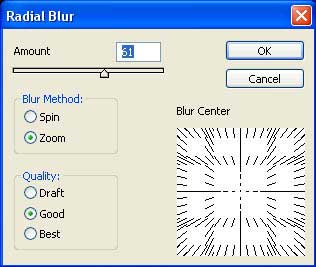
Copy again the layer representing the monks and apply to it Filter ? Blur ? Radial Blur.
 Change the layer’s type on Linear Dodge, minimizing the Opacity also till 74%.
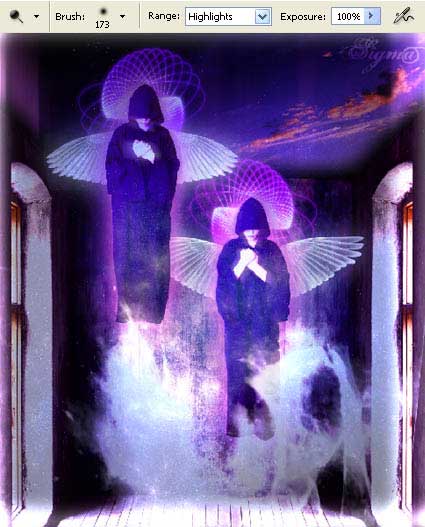
Choose now a set of ready brushes with the wings (they may be downloaded on the next address: http://www.deviantart.com/deviation/22149376/
?qo=3&q=by%3Afalln-brushes+wings&qh=sort%3Atime+-in%3Ascraps).
Picture now the wings to our monks on the layer above the background.
Copy the layer and blur it a little (Gaussian Blur).
On the top layer, insert the texture, representing the spider’s web.
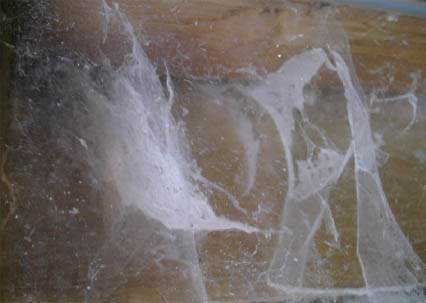
Decolorize it: Image ? Adjustments ? Desaturate (shift+ctrl+u).

Increase its contrast (Curves).
Change the layer’s type on Lighten and choose Burn Tool to erase the rest of the layer’s dark parts by darkening out.
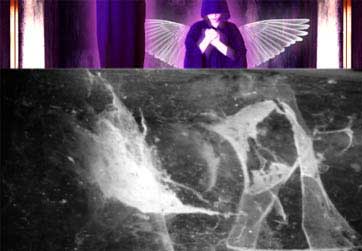
Change the layer’s type on Color Dodge and make a copy of it. Blur it out with Gaussian Blur.
Minimize the Opacity of the blurred copy till 63%.
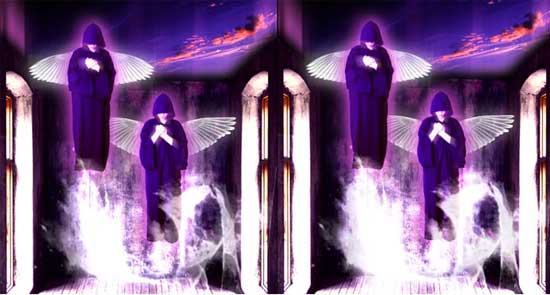
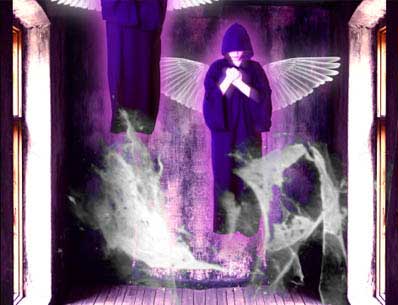
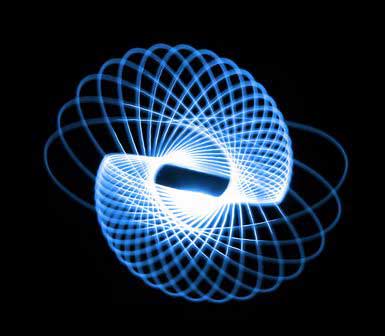
Choose now this picture.
Place it on the layer, under the monks’ layer.
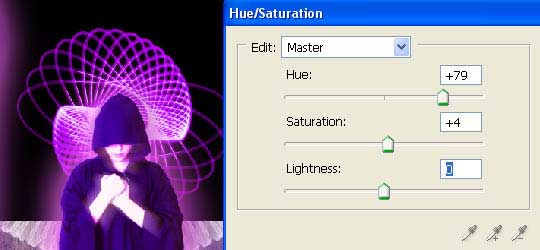
Change the layer’s type on Screen and the color also applying Image ? Adjustments ? Hue/Saturation (ctrl+u).
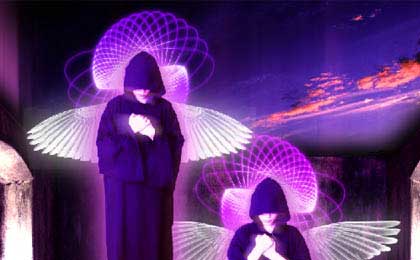
Place the mirror reflection of this layer behind the second monk’s head (Flip Horizontal).
Use now a certain cosmic texture with a bright center.
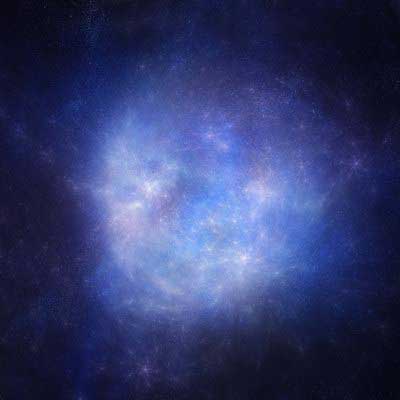
And place it out on the top layer. Change the layer’s type on Hard Light and minimize the Opacity also till 55%.

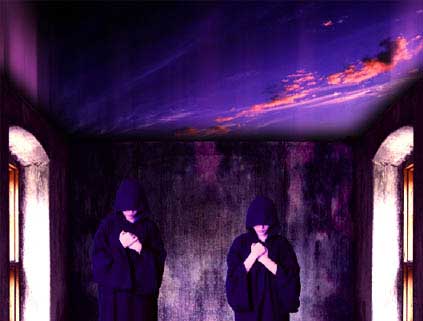
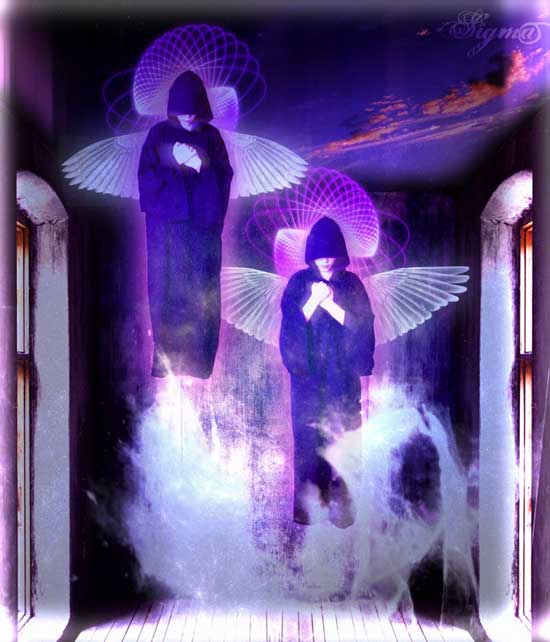
Combine all the layers: Layer ? Merge Visible (shift+ctrl+e) and stretch out a little the picture vertically (Free Transform). Using the Crop Tool, cut out everything unnecessary along the edges.
Finally use the Dodge Tool to make lighter the edges of the new picture, creating a distinctive frame.
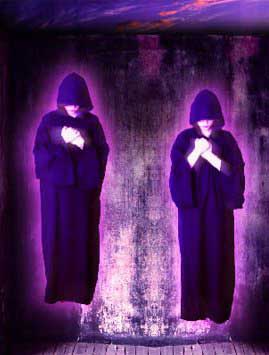
Finished!
Made by Sigma
Comments