
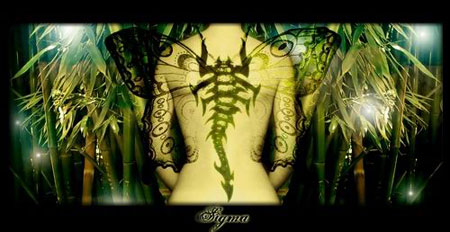
Scorpion Photo Effect
We will learn how to correct the skin’s tone, create the transparent wings’ effect, insert the pictures and transform a simple photo in a mysterious one.
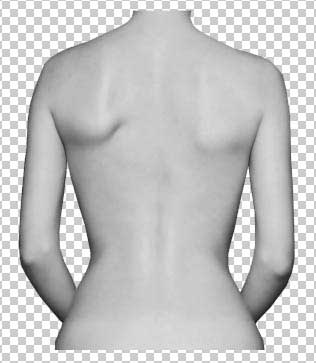
Open the girl’s skin photo: File ? Open (ctrl+o)
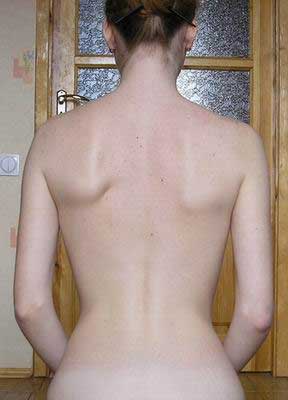
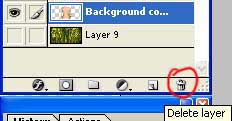
Outline it along the contour, using Polygonal Lasso Tool. Copy it: Edit ? Copy (ctrl+c) and insert it on a new layer, using the next command Edit ? Paste (ctrl+v). Erase the previous layer, using the button of fast erasing on the Layers window.
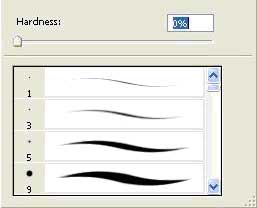
Take another instrument (Smudge Tool), preliminary setting brush’s hardness on 0% and paint the birthmarks and skin’s unevenness.

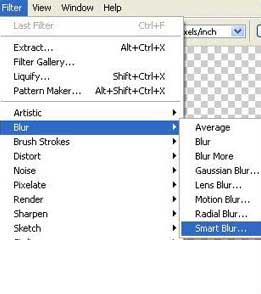
Apply Smart Blur filter.
Make the layer lighter using the command Image ? Adjustments ? Desaturate (shift+ctrl+u).
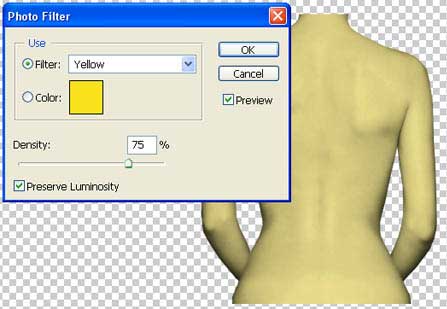
Give a tone to the skin, using a color filter: Image ? Adjustments ? Photo Filter. Choose the yellow color.
 Take two tattoo’s pictures and place each of them on a new layer.
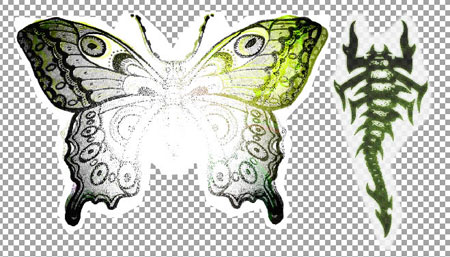
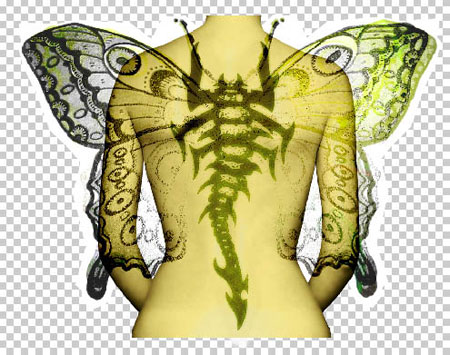
Put them over the girl, one above the other and change both layers’ type on Linear Blum.
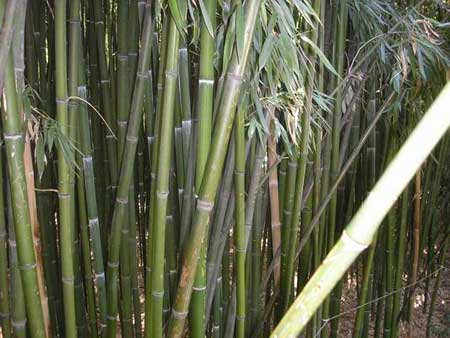
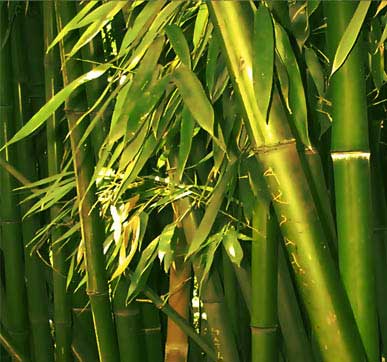
Make the background now. Take a bamboo photo and place it on a new layer. Open it like a new file, mark it out with Rectangular Marquee Tool and copy it using the command Edit ? Copy (ctrl+c). Get back to the photo under processing and insert the background on a new layer with the next command: Edit ? Paste (ctrl+v).
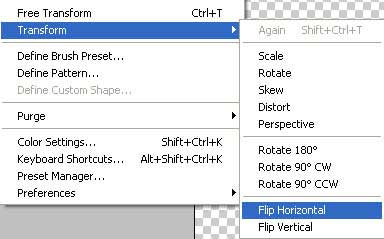
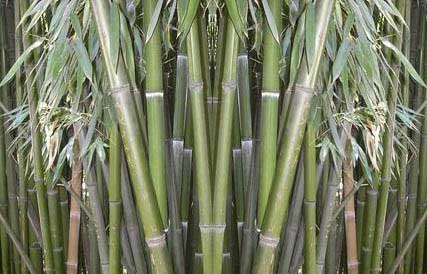
Mark the unnecessary part of this photo with Rectangular Marquee Tool and erase it: Edit ? Cut (ctrl+x). Double the remained part with the command Layer ? Duplicate Layer and transform it with Edit ? Transform ? Flip Horizontal.
Move a little the picture until it’ll connect with the turned photo’s part. Connect both layers with the command Layer ? Merge Layer (ctrl+e).
Apply the Smart Blur filter to this layer and make a kind of color correctness, using the command Image ? Adjustments – Curves (ctrl+m).
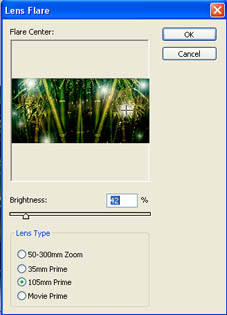
Add several highlights of different intensity, using Filter ? Render ? Lens Flare.
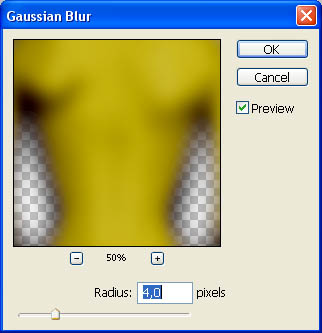
Create the girl’s shadow. Copy the girl’s layer (Layer – Duplicate Layer) and make it darker with the command Image ? Adjustments ? Brightness/Contrast. Move it lower then the basic one, just clicking on it and carrying over. Blur a little with Filter ? Blur ? Gaussian Blur.
Add the frame, using Rectangle Tool then copy the frame’s layer and blur it.
+ View full size image
That’s it!
Made by Sigma
Comments