
Professional Logo Design
Choose the Custom Shape Tool (U) to select out of the next table the appropriate pattern:


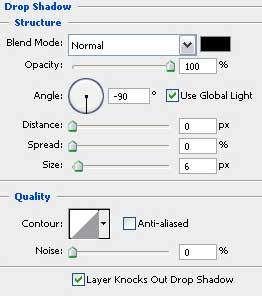
The layer’s parameters: Blending Options>Drop Shadow
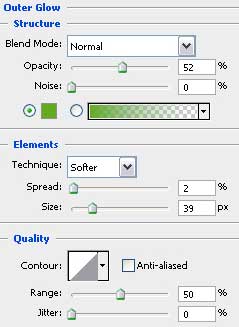
Blending Options>Outer Glow

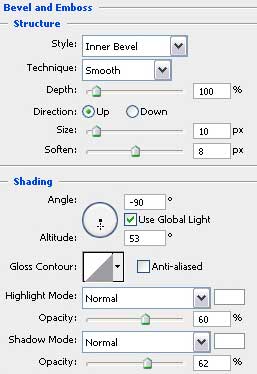
Blending Options>Bevel and Emboss
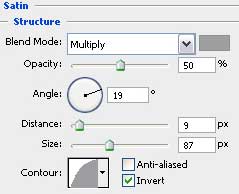
Blending Options>Satin
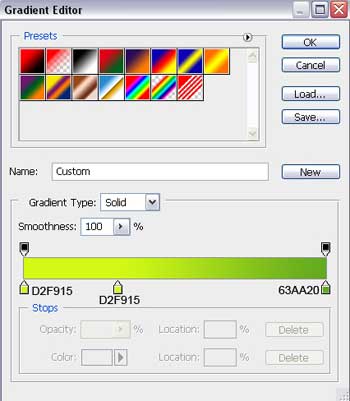
Blending Options>Gradient Overlay
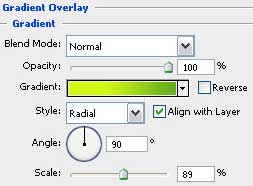
Gradient’s parameters:

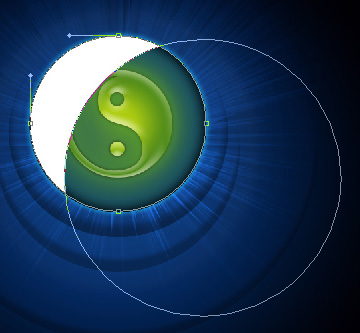
Next we need to create another layer (Create new layer) and select after that the Ellipse Tool (U) to picture firstly a circle of white color and then press Alt button to erase the unnecessary elements:
Apply the next parameters: Fill 5% 
Create new layer and select again the Brush Tool (B) with blurred edges to represent two white patches, each of them presented on a different layer as it is shown on the next picture:

Apply the Free Transform option on each patch for stretching it out and turn them over as it is demonstrated below:

The final result!
View full size here.
Comments