
Professional Logo Design
Create new layer and paint the layer in black color, selecting the Paint Bucket Tool (G) for this operation:

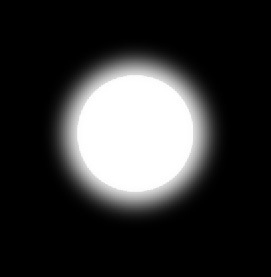
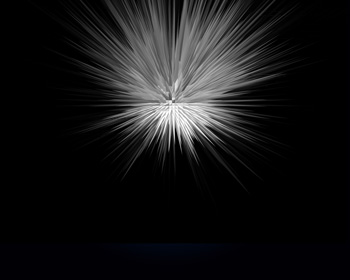
Choose on this layer the Brush Tool (B) with blurred edges and white color and make a mouse double click to get the same result as it is shown the next picture:
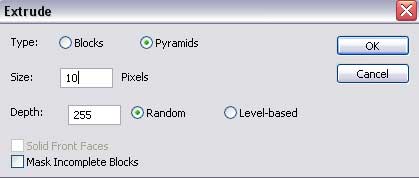
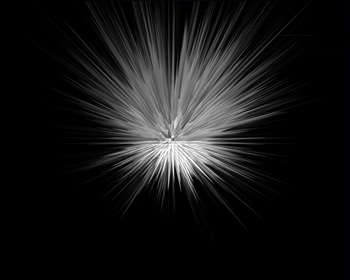
Apply for the last layer the next option which must be selected twice: Filter>Stylize>Extrude

Using the Free Transform option, it’s possible to lift up a little the layer:
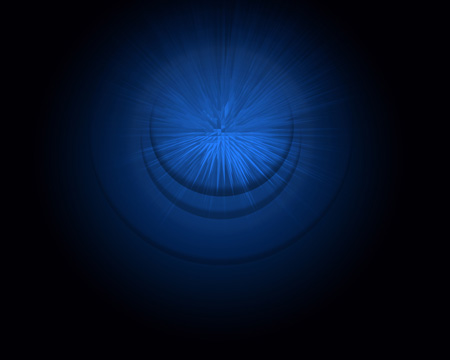
Apply the next parameters for the layer: Fill 50%
Blending mode-Color Dodge
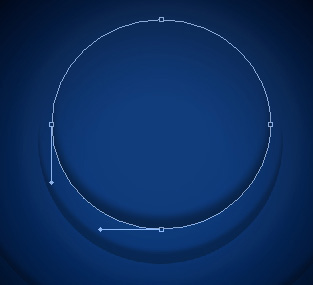
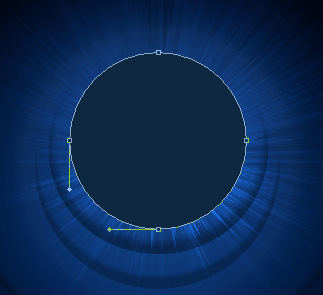
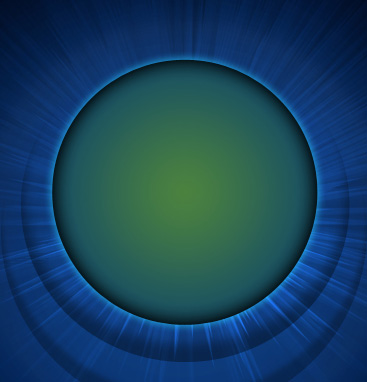
Next step includes choosing once again the Ellipse Tool (U) to represent another circle:
The layer’s parameters: Blending Options>Outer Glow

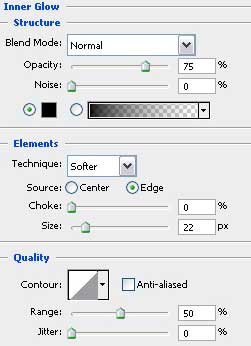
Blending Options>Inner Glow
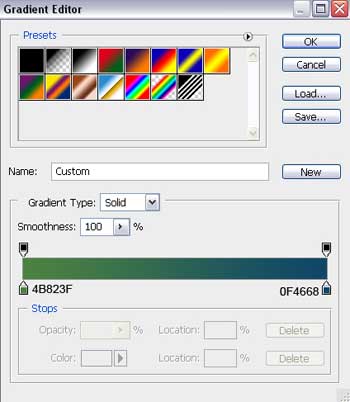
Blending Options>Gradient Overlay
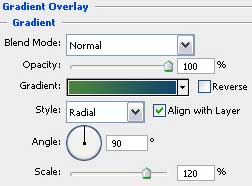
Gradient’s parameters:
Comments