
Prepare artwork for the web
Prepare artwork for the web
-
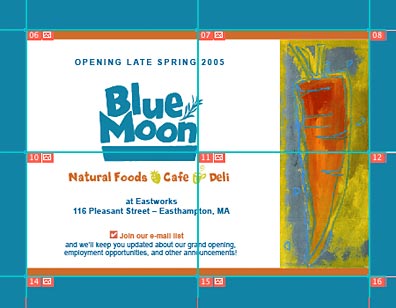
Next create slices of the graphics to use in your web page. Choose Object > Slice > Create From Guides. Illustrator automatically creates slices for all of the sections created by the guides. We’ll be using only the four slices created in the four quadrants of the splash area.
-
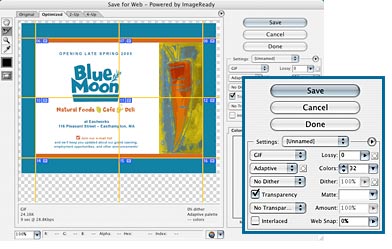
Choose File > Save For Web. This command brings up a window that allows you to optimize the graphics for the web. If you see only a portion of the graphic, use the Hand tool to move the graphic completely into the window. Select the Optimize tab at the top of the screen to see how the image and slices will look when optimized for the web.
-
In the Tools palette, select the Slice tool. Hold the Shift key down and select the four slices in the splash area (in our example, these slices are numbered 06, 07, 10, and 11). It’s not necessary to optimize the blue border since we’ll be making a border in GoLive.
Use the settings GIF, Adaptive, and No Dither. Other settings, such as Transparency and Colors, will depend on the image you’re optimizing, but the default settings should be sufficient. (We don’t cover details about optimizing graphics in this tutorial, but it is an important step in preparing images for the web.)
-
Choose Save, and then specify a file name and a location for the sliced images. From the pop-up menus, choose the following values: Format = Images Only, Settings = Default Settings, and Slices = Selected Slices. Click OK.
The optimized slices will be placed in the specified location within a new folder called “images.” The file names will be identified according to their slice number.


Comments