
Poker Machines
Hello. Our topic for today will be to create an illustration for poker or some kind machine. Why this one – I just don’t know ? the first thing that came in to my mind this morning.
So start as usually ? crate a new document with these parameters (ctrl+n) ? and create a new layer (ctrl+alt+n).
In this illustration I will basically use my Custom Shapes (U) with PS filters. Moreover I will use my Wacom tablet to create some amazing Glowing effects, so let’s get started.
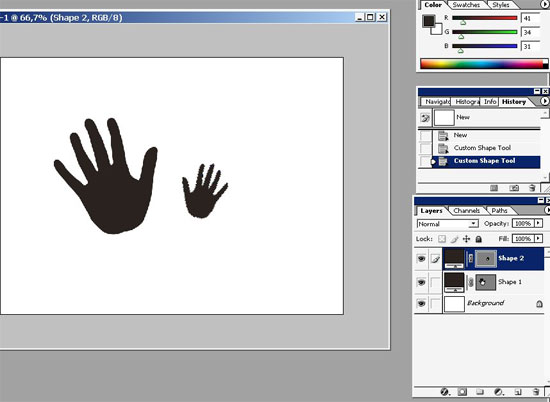
The concept ? some kind of Magic creature for the Poke machine Illustration, So I will begin by creating 2 hands (U) using my custom shapes ? one left and one right. Remember to set the option in the upper rights box ? Add to Shape Area (+).

Than comes the head. Outfit and the body (no the separate 3 layers, also using my Custom Shapes) ? set the option on ? Create a New Shape Layer.
Here is our result on custom shapes Choice:
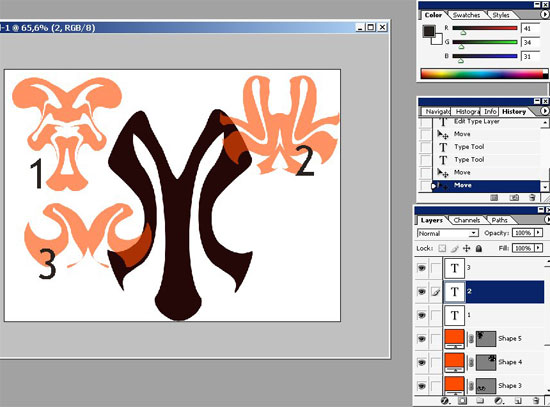
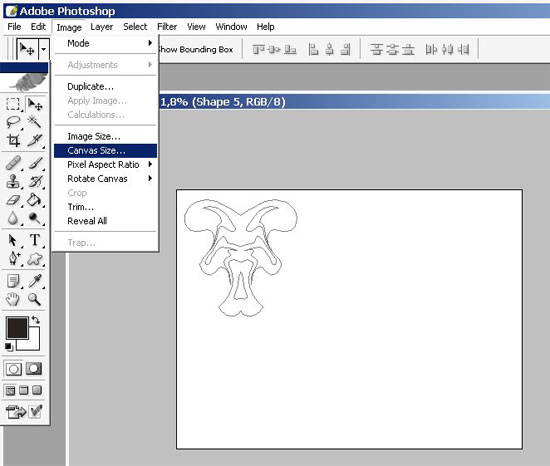
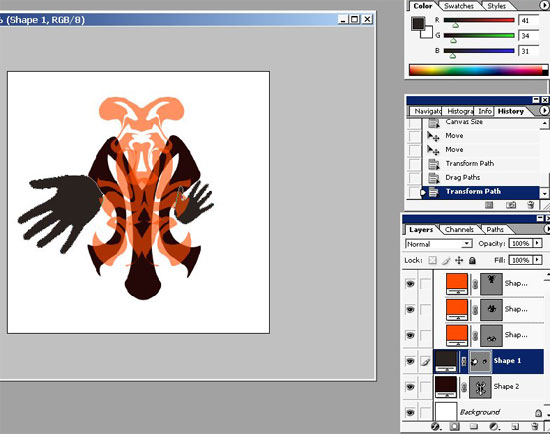
And here is the pre- layout (design) of our custom shapes. Or and one more thing ? Add some canvas size. I have fixed some object position issues (fix the hands using Path selection Tool and Ctrl+t command):
Result:
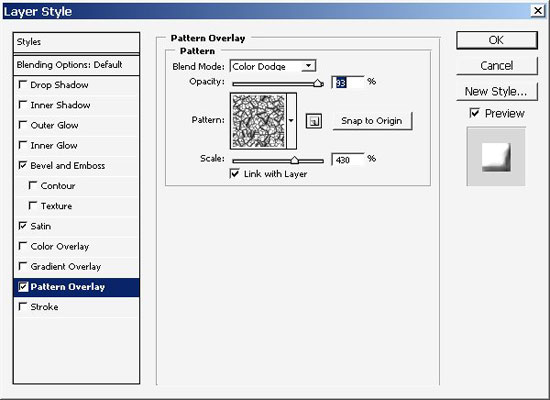
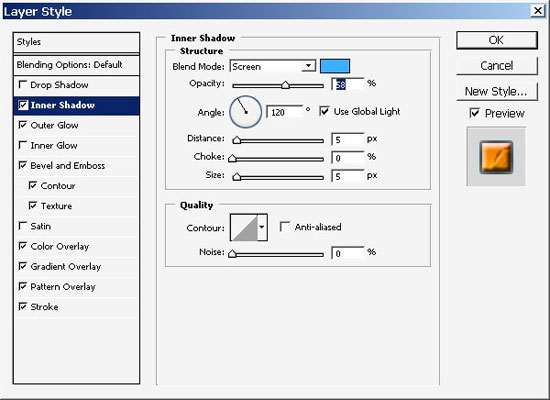
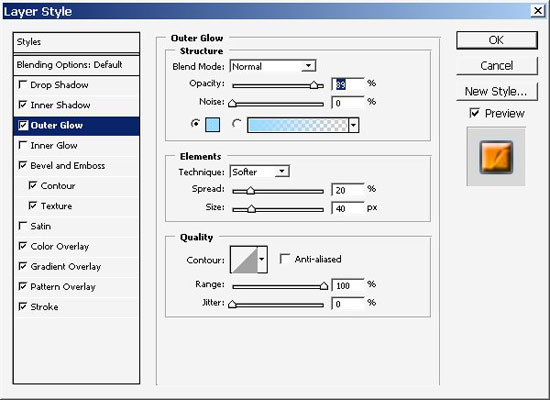
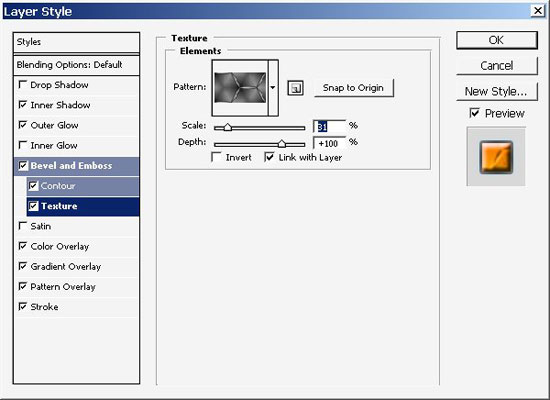
Let’s texture all the objects.
Hands:
Lower outfit detail:

Upper Outfit detail ? has the same settings like the lower.
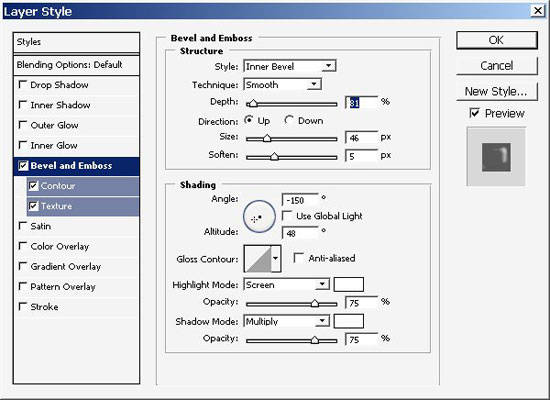
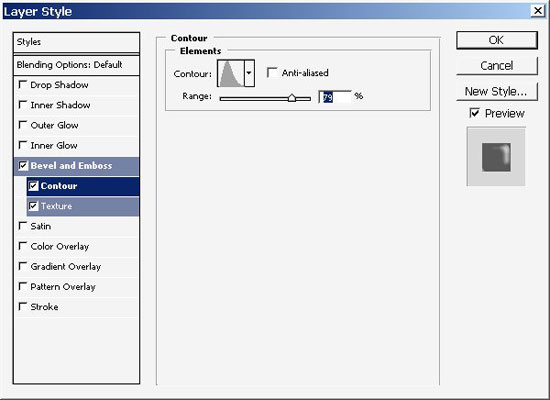
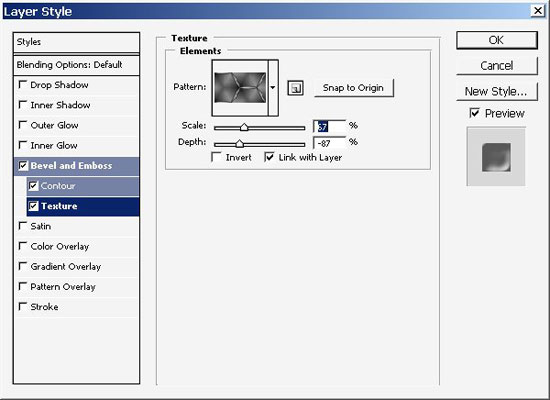
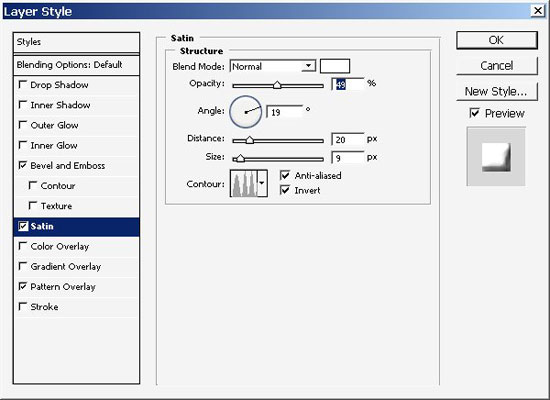
Head: (60-50%) major flow opacity:

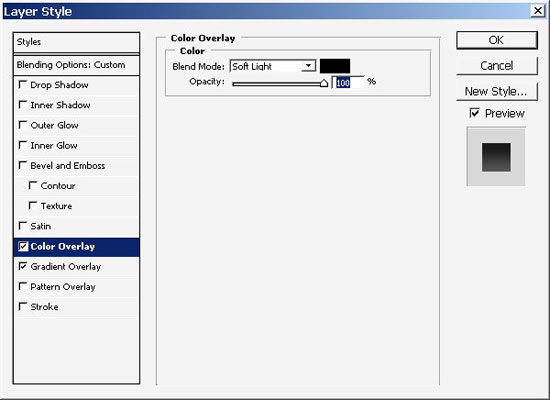
The Outfit itself:
I’ve looked at the composition and decided to fix the shape of the left hand. Just make it look like the right hand – + now u need to fix the texture appearance… Yes, I thing it’s good.

Now it is time to take care of or background… Let’s experiment a little bit. Make a layer (ctrl+alt+n) and put in under all the layers ? near out BASE background (white – document).
So here is our little experiment results. I have created 2 separate layers and put them on the bottom of the layer box + to that I have created a new layer GROUP ( can be fount in the bottom of the layer box ) ?looks like folder icon , and put all the parts of our character in there.
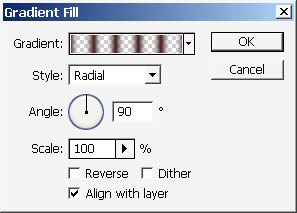
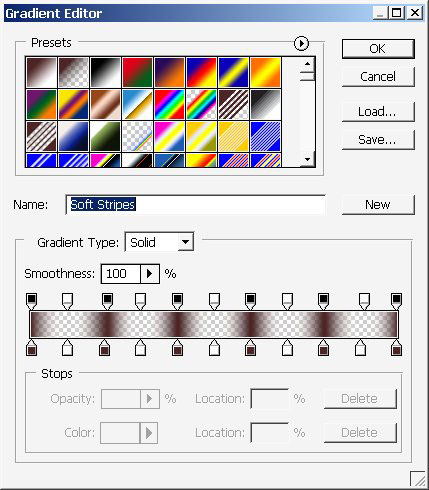
Gradient layer settings:
Our first layer (bottom) was filed with Rounded gradient. Layer blending mode is set to Exclusion (overall Opacity – 88% – Fill ? 100%).
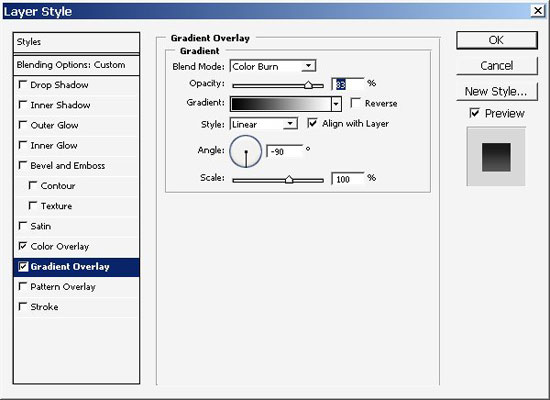
2nd Gradient Layer settings ? blending mode is set to Multiply (Overall opacity 100%, Fill – 58%).
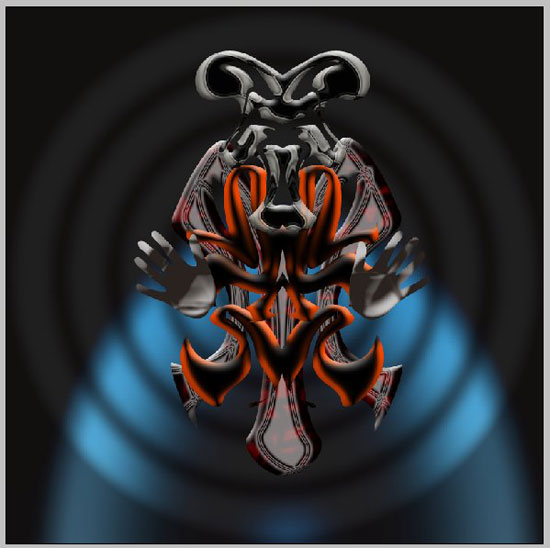
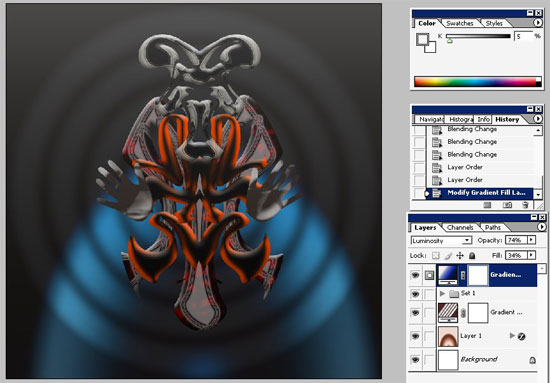
Current result:
I have also decided to put a simple Black-blue ? white Gradient on the top of the layer box because I find the picture too dark (layer mode ?Luminously) ? (overall Opacity 74%– Fill 34%).
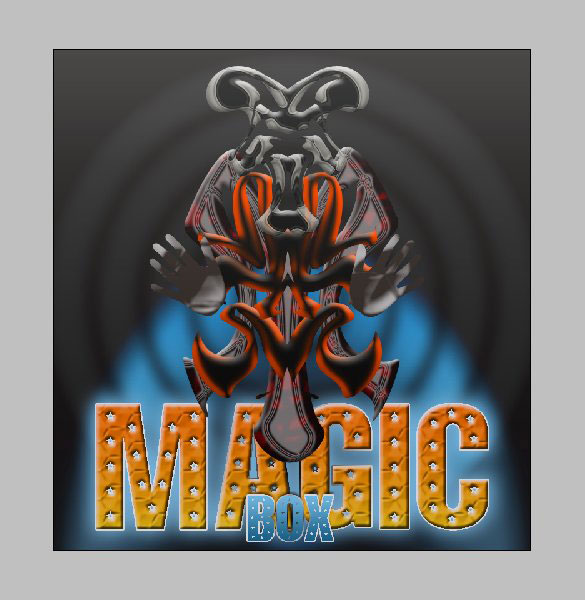
Our illustration is nearly ready ? now all that remains is to put some text and hand painter effects.
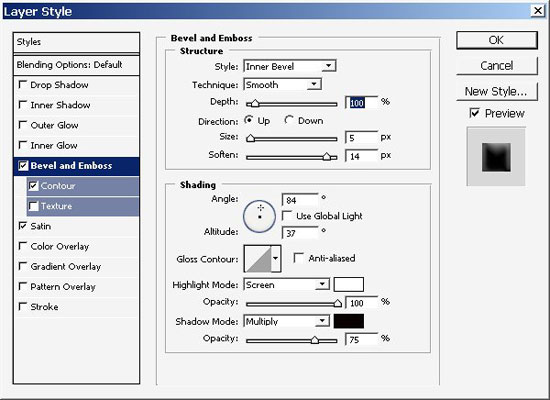
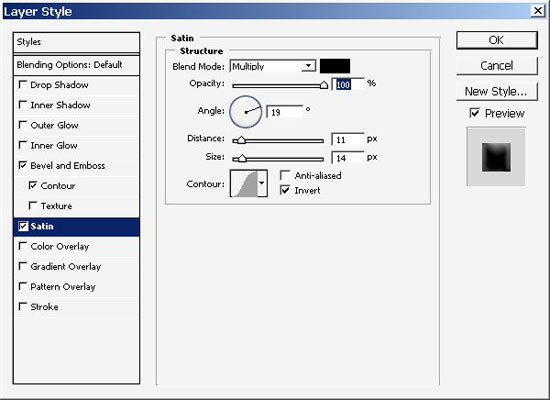
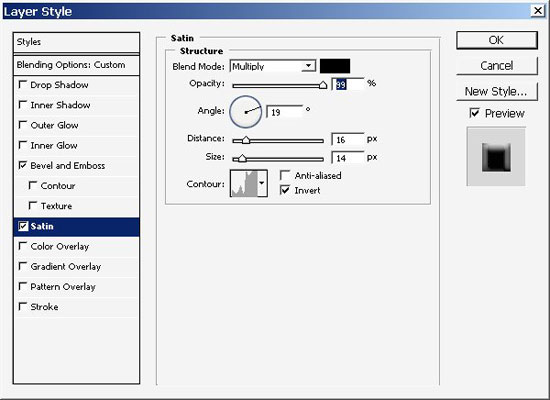
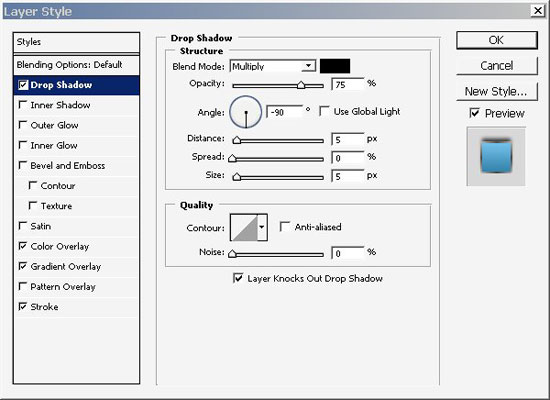
So create a new layer it will be out text layer (position behind all the Character layers) For my first word I use 200 pt 101! Star Studded Font with following layer styles.

Result:
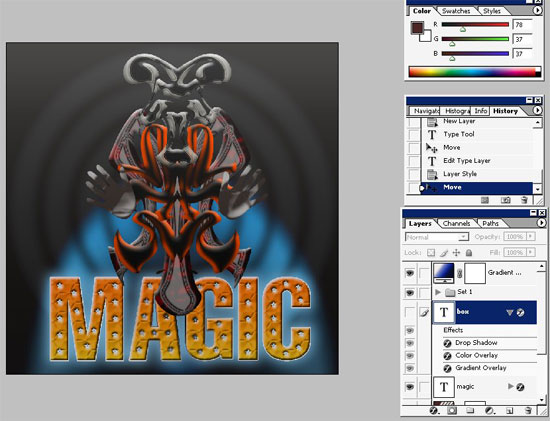
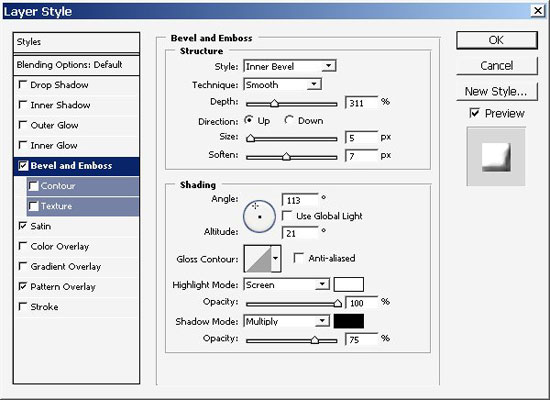
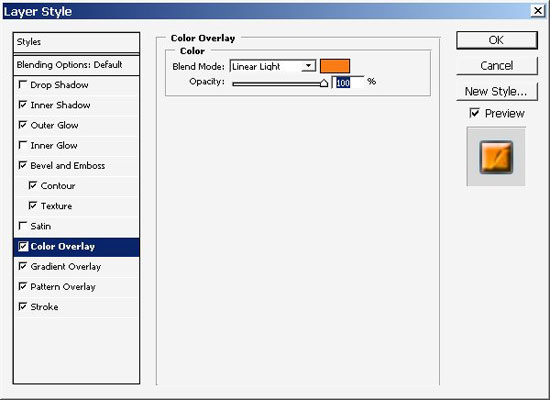
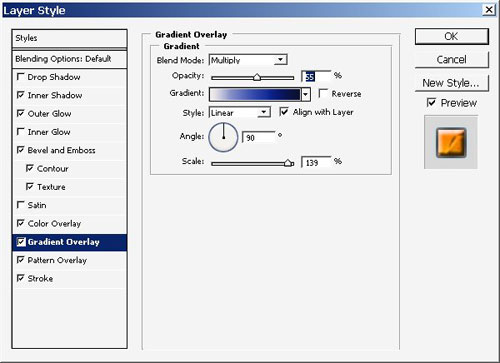
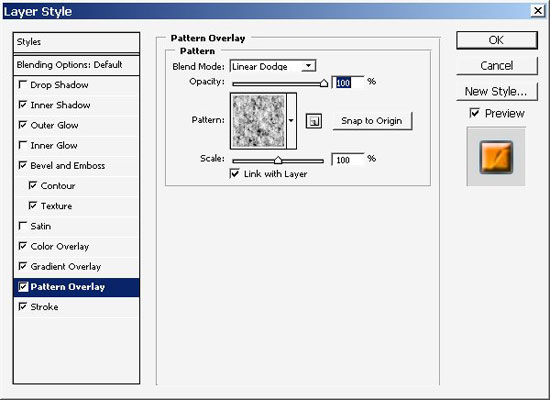
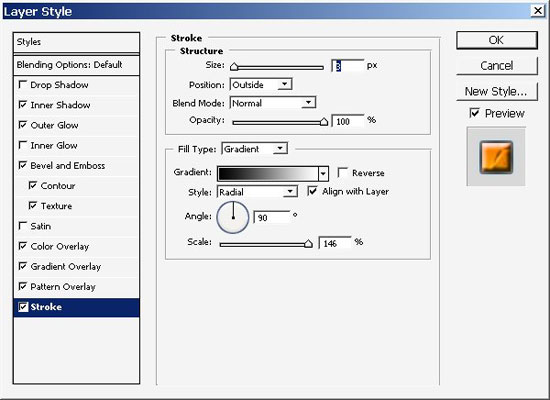
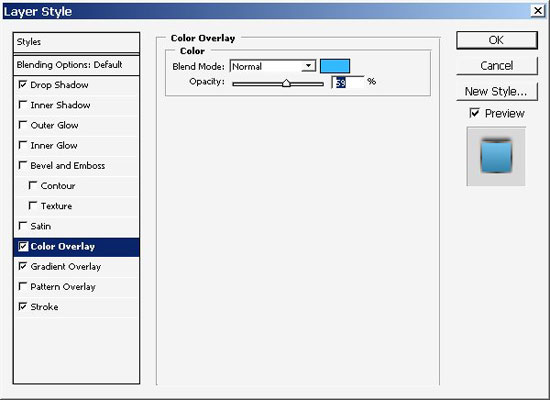
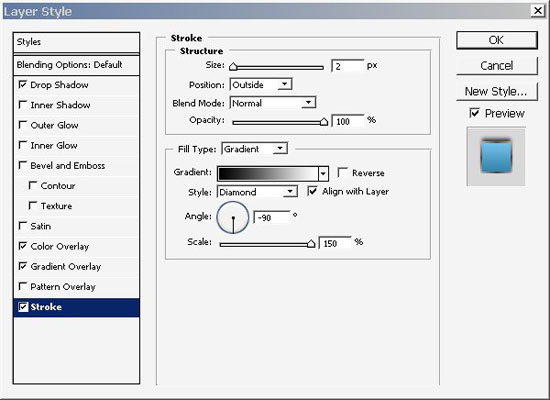
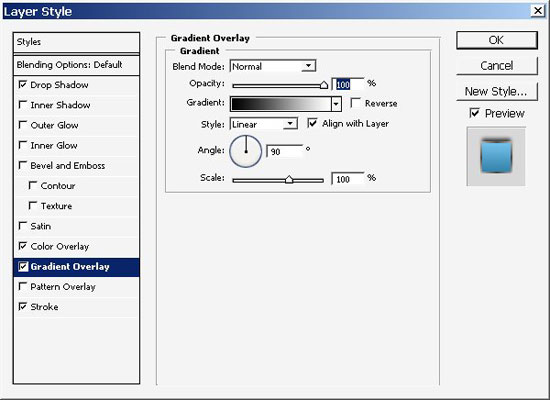
Now the second word ? box.
Layer settings on box:
And this is it for our text:
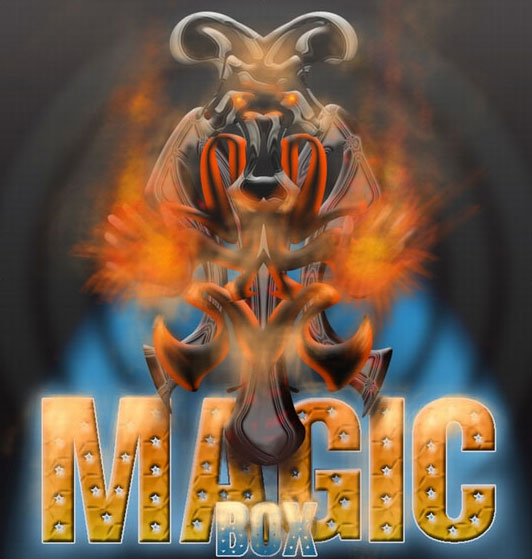
Now all that remains is to paint some SFX.
So create a new layer and begin to paint.
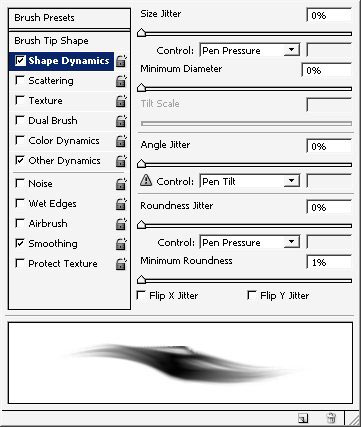
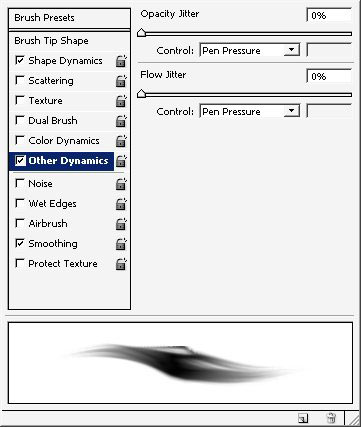
Brushes and brush settings.
I’ve used basic orange and yellow color ? to paint all this- the brush flow is turned to 12 ? 14 % and the Mode is set to Screen and Vivid Light.
Final steps use a black ? to transparency gradient on a separate layer (blending mode- Color Dodge).
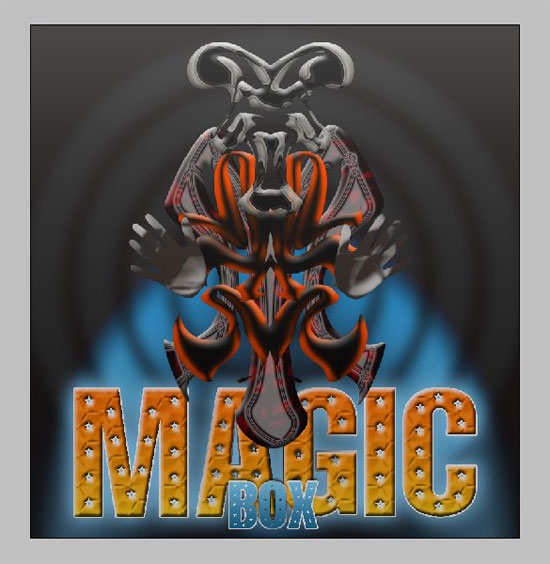
So we are basically done here. A little crop for better composition .and Out Illustration for the Poker machine is done ? Do not Gamble).
DIFFERENCE:
Enjoy :)!
Comments