
Plazma
1. New Document (500×500 Pixels)
2. Fill the document with Black.
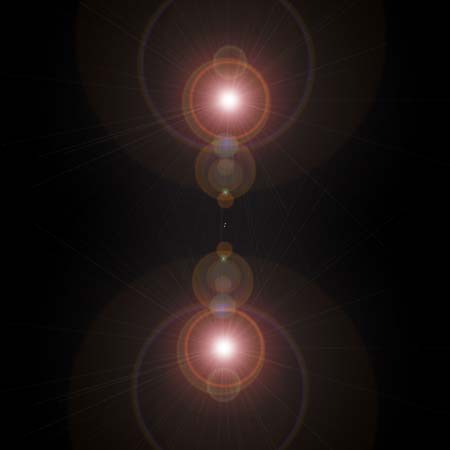
3. Now go “Filter > Render > Lens Flare” (With Default Settings) and place lens flares as shown in the picture below.
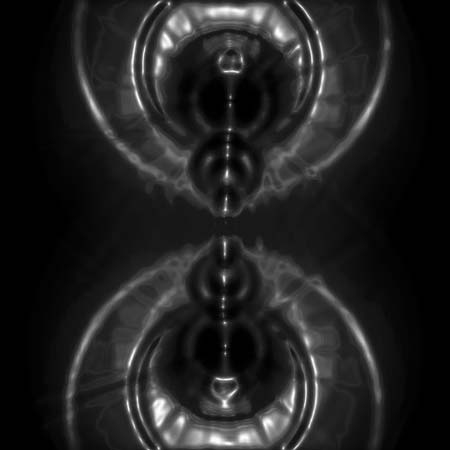
4. Now go “Filter > Sketch > Chrome” with these settings :
Detail: 10
Smoothness: 5

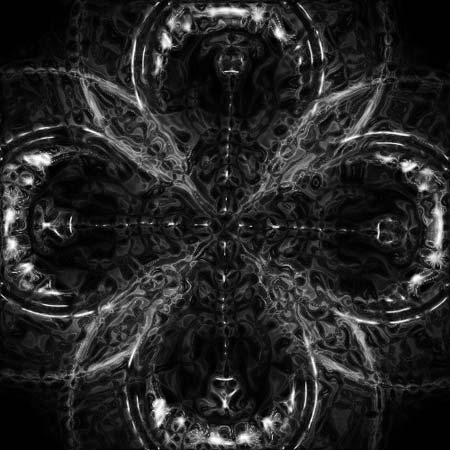
5. Now Duplicate that Layer “Layer > Duplicate Layer”
6. Now Go “Edit > Transform > Edit 90 CW” and change the layers blending mode to “Screen”

7. Now with the top layer selected, press “Ctrl + E” to merge the two layers.
8. Now Duplicate the layer, “Layer > Duplicate Layer”
9. No on the top layer, press “Ctrl+F” (that should redo the Chrome filter that we did earlier. If it doesn’t, just use the same chrome settings as earlier) and set the layers Blending mode to “Overlay”
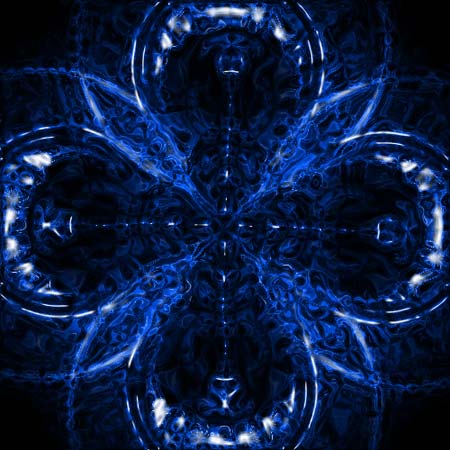
10. Now its time to add some color. I will give you a list of 3 different color settings you can use. Or you can be unique and choose your own!
Press “Ctrl+U” to bring up the Hue/Saturation Settings:
For a Fiery Look Use These Settings:
Hue: 40
Saturation: 100
Lightness: 0

For a Green Plasma Look Use These Settings:
Hue: 115
Saturation: 100
Lightness: 0

For a Cool Blue Use These Settings:
Hue: 220
Saturation: 100
Lightness: 0
Comments