
Plasma Bubbles
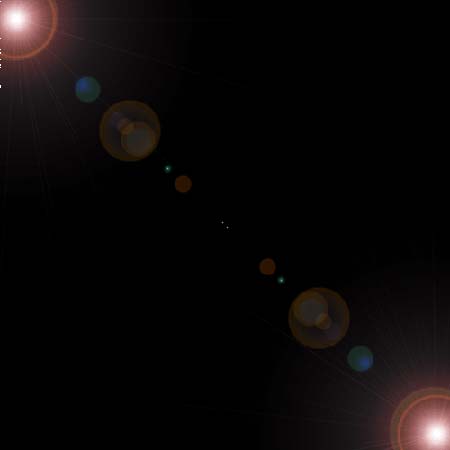
1. New Document (500×500) Fill it with Black. And position two lens flares in the following positions (Filter > Render > Lens Flare) (Use default lens flare settings)
2. Now, go “Filter > Sketch > Chrome” (Detail: 10 | Smoothness: 4)
3. Now, press “Ctrl+I” to invert the colors.

4. Now, duplicate the layer (Layer > Duplicate Layer) and go “Edit > Transform > Flip Horizontal”. Also, set the blending mode to “Linear Burn”

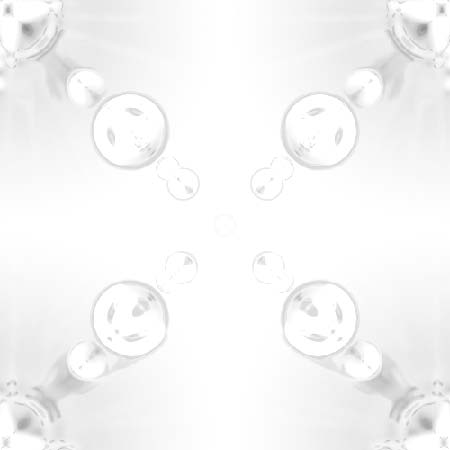
5. Merge those two layers together by selecting the top layer and pressing “Ctrl+E”
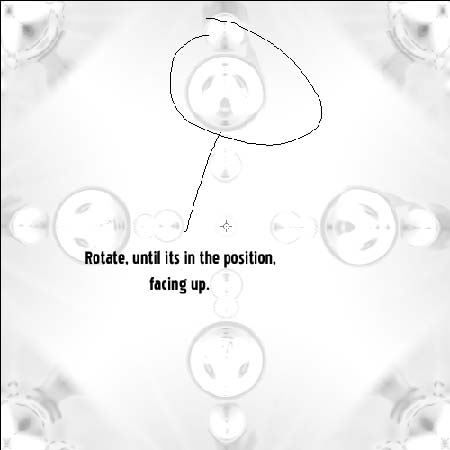
6. Now duplicate that layer, (Layer > Duplicate Layer).
7. Ctrl+Click the new layer (It should make a selection around the layer). Right+Click inside the selection, and select “Feather” with a “7” Pixel Radius.
8. Now, right+click inside the selection again, and click “Select Inverse” and press “Delete” 3 times.
9. Now, press “Ctrl+T” and rotate the layer so that it’s the bubble’s are facing up, as indicated in the picture.
10. Now, Change the blending mode of that layer to “Linear Burn”
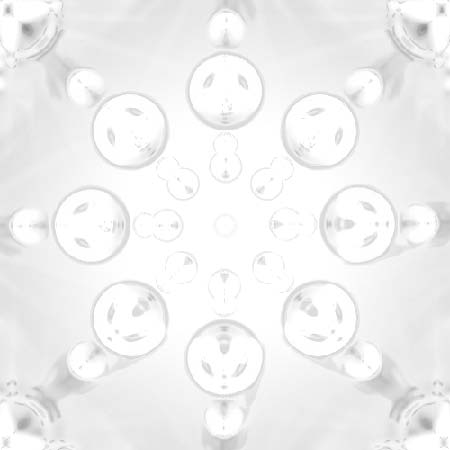
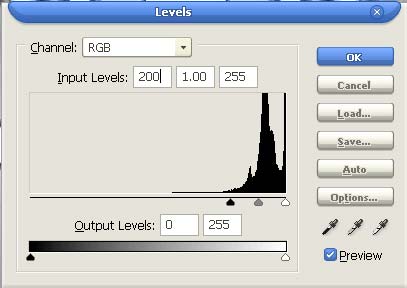
11. Now Press “Ctrl+L” to bring up the levels, and use these settings, or adjust them to your liking.
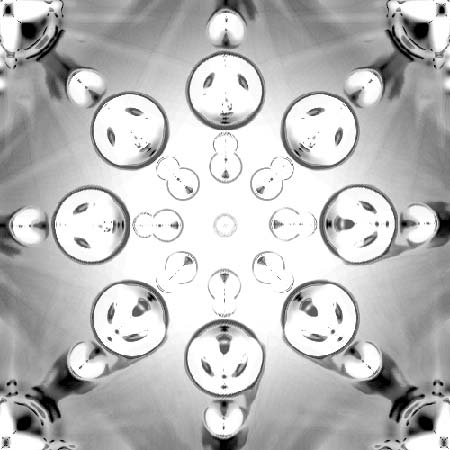
12. Now duplicate the layer, and go “Filter > Sketch > Chrome” (Detail: 0 | Smoothness: 10) and set the blending mode to “Linear Burn”
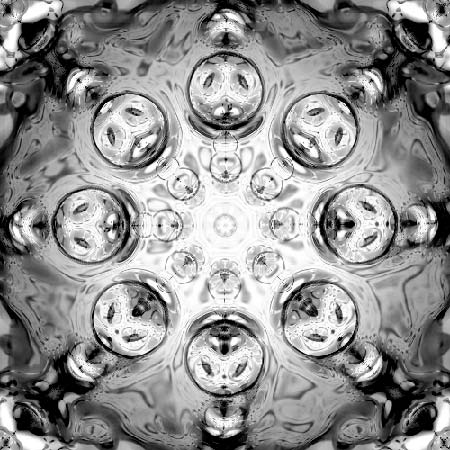
13. Now, for the final step, go “Layer > New Adjustment Layer > Color Balance” and use these settings:
Midtones:
Color Levels: -100 | 0 | 0
For Highlights:
Color Levels: -50 | 0 | -50
(Make sure “Preserve Luminosity” is checked)
Comments