
Photoshop’s Linear Burn
Photoshop’s Linear Burn blending mode results in an effect similar to Multiply Mode, where lighter areas in the blend layer allow the bottom layers to “show through,” but is a little different in that it actually darkens the bottom layer’s colors.
Sounds almost identical to the Color Burn description, except that instead of “increasing the contrast,” Linear Burn “decreases the brightness” and darkens the base layer(s). In fact, unless you have a completely white area on the blend layer, the base layer will always be darkened; using linear burn will always result in a darker picture.
For example, starting with this picture of a rose:
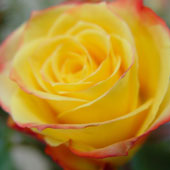
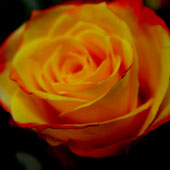
Duplicating the layer and setting the top layer to Linear Burn results in an overall darker picture, although the darker areas are “more dark.”

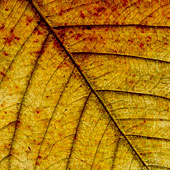
Now for the practical application. I’ll start with these two (cropped) images:
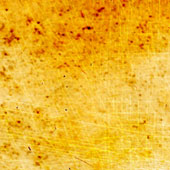
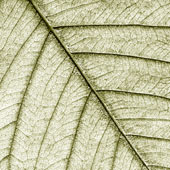
Putting the leaf layer on top, I set it to Linear Burn, and this is what I get:
Contrast this to Multiply mode:
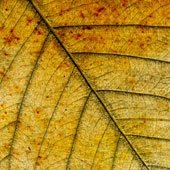
The Linear Burn example is slightly darker—linear burn tends to give you more “blacks” than multiply mode would. Either effect is useful… for me, it just comes down to what “mood” I’m in that day!
Comments