
Photoshop Elements Fade In
This is a continuation of the Holes tutorial. Though both use the same editing technique, that probably isn’t obvious to new users, so I am making this a separate lesson.
If you have two pictures that you would like to merge gradually into each other to create a single blended image, you could put one image above the other and erase half of the top picture. However, there is no need to destroy your picture (and lose most of your editing options) in that way.
The best way to do this is with a black to white gradient on a layer mask, but we will pretend that you can’t make layer masks in Elements and use Group With instead.
Before you get into combining your two pictures, make sure they are at the same resolution. To find out your picture’s resolution, choose Image > Resize > Image Size and look at the Resolution box at the bottom of the Image Size dialog. If the two pictures are at different resolutions, you can still drag one onto the other, but it will acquire the resolution of the destination document when you drop it, which will make it resize accordingly.
Before you can merge your two pictures, they have to be in the same document. Do this by opening both pictures so you can see both at the same time. With the move tool (top right corner of your toolbox) click anywhere on one of the images and drag it across onto the other. Don’t worry about harming the original; Elements is smart enough to know that once you have dragged a picture out of its own window, the original should be left as it was.
If you press the Shift key before dropping the dragged image onto the second document, it will be centered on that file. In any case, the dragged image will be put onto its own layer in the new document, so you can drag it with the move tool to reposition it after you have dropped it. Just be sure its layer is selected in the Layers palette before you use the move tool. To see the Layers palette, choose Window > Layers.
After you have dropped the first picture on top of the second, you will only be able to see the first one since it is covering the one on the layer below. That’s fine.
The next step is to create a new layer between the two pictures. Get the Layers palette open where you can see it. If it is in the palette well, grab it by its name tab and drag it out. That way it will stay open.
Click on the bottom layer in the Layers palette to select it. New layers are created above the currently selected layer and we want this new layer to be between the two image layers.
Either click the Add New Layer button at the bottom of the Layers palette (the middle icon that looks like a little page) or choose Layer > New > Layer. If you use the latter method, you will get the New Layer dialog. Click OK or give it a name, if you like.
You now have three layers in the Layers palette. Click on the top layer in the Layers palette, which is the only layer that you can see at this point (it’s the image that you dragged on top). Choose Layer > Group with Previous. As soon as you do this, that layer will disappear and you will now only be able to see the bottom image layer. Again, that’s fine. Those of you who have done the Holes tutorial know how this works.
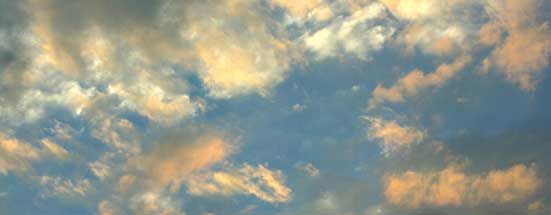
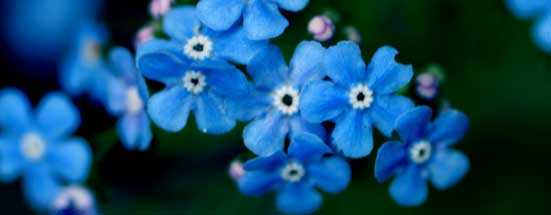
At this point, this is how your Layers palette should look. I have my clouds picture on top, my empty grouped layer in the middle, and my flowers picture at the bottom. The clouds picture is the one I dragged with the move tool to be on top of the flowers picture. The little down-pointing arrow that the cursor is pointing at indicates that the top layer is grouped with the (empty) layer below it.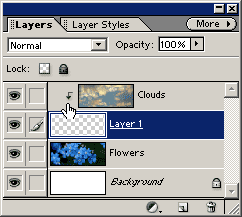

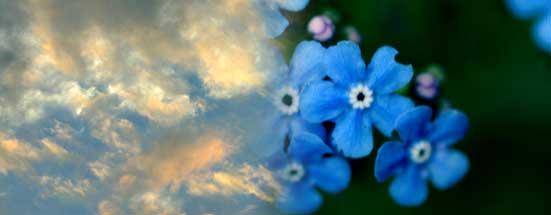
Start your gradient drag at the red X. End at the black X.
When you group two layers together, all layers above the base layer in the group are only visible where that base layer has content. Wherever and to whatever degree the base layer is transparent, the layer(s) above will not be visible.
Therefore, to reveal the layer above, we need to add some content to the empty layer that is the base layer of its group. If we want to make a gradual blend or fade from hidden to visible, we need to use a gradient that goes from fully transparent to fully opaque.
When using the gradient tool, it applies the gradient over the area where you drag. If you start and/or end your drag over a limited area of the image (i.e. don’t drag all the way across the document) then it fills the area before the start of your drag entirely with the first color of the gradient (before the start) or last color of the gradient (after the end). The gradient itself is applied only over the extent of your drag. This will make more sense when you see it in action.
In the toolbox, choose the gradient tool. It’s fifth from the top on the right side.![]()
Click on the little down arrow next to the gradient thumbnail on its options bar to get the gradients pop-up palette. If you click on the gradient thumbnail itself, you will get the Gradient Editor, which will also work though it’s a much bigger dialog.
In the default gradients palette, choose the foreground to transparent gradient. It makes no difference what your foreground color it. The only thing that matters is that it be an opaque to transparent gradient. The color is irrelevant.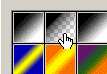
On the gradient tool’s options bar, make sure the Mode is set to Normal, Opacity is at 100 %, Reverse is not checked, Dither is checked, and Transparency is checked.![]()
In the Layers palette, click on the middle, empty layer to select it. The make a short left to right drag across the center of your image. See my illustration above to get an idea of where and how far to drag. Start at the red X and drag to the black X. The foreground color will fill all of the area before the start of the drag (the red X) and transparency (the end color) will fill all of the area after the end of the drag.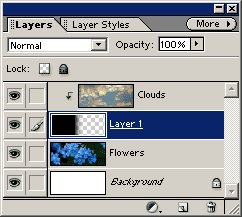
If you don’t like where your blend shows up (i.e. what part of the grouped image is revealed), make sure the middle layer is selected in the Layers palette, then choose Select > All followed by Delete, then Select > Deselect and try again. If the transition is in the wrong direction, then drag in the other direction (from the black arrow to the red arrow).
In the two big illustrations below, you can see, first, the gradient layer by itself. Note how the gradient only covers the extent of the dragged over area. The rest of the layer is filled with the gradient start color and gradient end color (or in this case, transparency).
As you will surely have guessed, you can drag your gradient anywhere you like. It does not have to be side to side, or in the middle of the picture. You can make a more gradual blend by making the gradient drag longer (start farther to the left and end farther to the right), or make the blend more abrupt by making the gradient drag very short. You can also experiment with the other gradient forms (radial, reflected, diamond, etc.).
If you are clever and have read the Holes tutorial, you will realize that you can also use the brush and the eraser tool to edit the transition areas if you want particular objects to be more or less visible in the transition.
The top image can be moved around after it is grouped if you want to have a different part showing through its side of the picture. Just make sure its layer is selected in the Layers palette before dragging with the move tool.
If you are wondering why this isn’t as good as a layer mask (aside from the upside-down-ness of the concept), it’s because content on the base layer will be visible if there is transparency in the layers above it. You may or may not want that.

Comments