Photoshop Elements 2 Sponge Tool
Photoshop Elements 2 Sponge Tool |
|
|
|
|
| Used to change an image’s color saturation |
|
  |
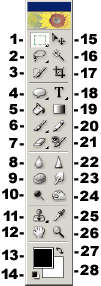
The sponge tool will increase or decrease the color saturation of areas you drag over. How rapidly the effect occurs is determined by the setting in the Flow (formerly known as Pressure) box in the tool’s options bar. To use the sponge tool, select it in the toolbox, choose your settings, and pick a brush in the options bar, then drag in the image. This tool has an effect on click, but does not do any additional work until it’s moved. However, repeated stroking over the same area does have a cumulative effect. A shortcut for changing brush sizes while using this tool is to press the left bracket [ to decrease brush size, and the right bracket ] to choose a larger brush. When editing an image with any tool that uses brushes, you can right click on the image and the brushes pop-up palette will appear right next to your cursor. Note that these tools cannot be used on 1 bit Bitmap mode, or Indexed color mode images. The keyboard shortcut for the sponge tool is the letter Q.
|
|
The illustration below is the sponge tool’s options bar. To choose a brush size and type, click on the brush thumbnail. A pop-up palette of available brushes will appear. For more information on brushes, please see the Brushes page. The Mode box is shown with its menu open. Choose Desaturate to cause colors to move towards gray, or become less “colorful.” Choose Saturate to cause colors to become more intense, rich, and pure. The Flow value can be set by typing a value into the text box, or by using a slider. To use this slider, click on the arrow at the right side of the text box. This setting determines how fast the dragged over colors are affected. Higher values give faster results. I think it’s better to use a very low setting and stroke repeatedly, as needed. . |
|
|
|
|
|
If you have doodled with a tool’s options and want to get back to the default settings, click that tool’s icon at the far left end of its options bar. Choose either Reset Tool to reset only the current tool, or Reset All Tools to restore default settings to every tool. Please note that all descriptions, and illustrations featured refer to files which are in Photoshop’s .psd format, and which are in RGB color mode. Other file formats, and color modes may generate different options. Some Photoshop features are not available for images not in .psd format, or RGB color mode. To find what color mode your image is in, choose Image > Mode. |
|


Comments