
Photoshop Elements 2 Redeye Brush
Photoshop Elements 2 Redeye Brush |
|
|
|
|
| Used to remove red eye caused by camera flash |
|
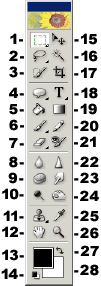  |
[In Elements 1 the red eye brush is found at position #10 on the toolbar.] When editing an image with any tool that uses brushes, you can right click on the image and the brushes pop-up palette will appear right next to your cursor. 
A shortcut for changing brush sizes while using any of the painting tools is to press the left bracket [ to decrease brush size, and the right bracket ] to move to the next larger brush. Note that the red eye brush works only on colors. It does not affect the luminosity values (the grayscale) details of the eye. The red eye brush has a funny brush icon with a target mark to help you see precisely what you’re clicking on. The keyboard shortcut for the red eye brush is the letter Y.
|
|
The illustration below, is the red eye brush’s options bar (split in two because it’s so long). Choosing Current Color from the Sampling menu (instead of First Click) allows you to pick both your target and replacement colors by clicking on either color square in the options bar, and picking any color you like using the Color Picker. When the Color Picker is activated, you will be switched over temporarily to the eyedropper tool (and its options bar). With the eyedropper, you can pick up any color from anywhere on your screen. Or you can choose a color from the Picker without using the eyedropper. Clicking OK after picking a color returns you to the red eye brush. Clicking the Default Colors button will return the two colors to the default setting of black for foreground, and red for background. This button resets both colors. If you choose First Click, you can click in the image to set the target color (the one you want to remove). Please note, that all clicks after the first click will be painting the replacement color over the target color you set with first click. If you make a mistake and get the wrong color with your first click, click the Default Color button, and then try using First Click again. The color you click on will appear in the Current color box at the left end of the options bar. The Tolerance percentage determines how much variation in the target color will be included in the removal process. A higher setting allows more shades of red to be replaced. A lower value limits replacement to the precise shade of red that you chose as your target, and which is showing in the Current color square. If you have a red faced, person with red-rimmed eyes, you might want to use a very low tolerance so as not to repaint his or her entire face. |
|
|
|
|
|
If you have doodled with a tool’s options and want to get back to the default settings, click that tool’s icon at the far left end of its options bar. Choose either Reset Tool to reset only the current tool, or Reset All Tools to restore default settings to every tool. Please note that all descriptions, and illustrations featured refer to files which are in Photoshop’s .psd format, and which are in RGB color mode. Other file formats, and color modes may generate different options. Some Photoshop features are not available for images not in .psd format, or RGB color mode. To find what color mode your image is in, choose Image > Mode. |
|

Comments