Photoshop Elements 2 Paint Bucket
Photoshop Elements 2 Paint Bucket |
|
|
|
|
|
Used for adding and changing fill color |
|
  |
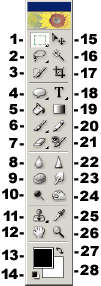
[In Elements 1, this tool is found at the #6 position in the toolbox.] If you want to fill a limited area, make a selection before choosing the paint bucket tool. Only pixels within that selection will be recolored. If you want to completely fill a selection or layer you may prefer using the Edit > Fill dialog which gives more options. You can also use shortcuts of Alt-backspace to fill a selection with the foreground color, Alt-Shift-Backspace to fill only areas containing pixels (leaving transparent areas untouched), Ctrl-Backspace to fill with the background color, and Ctrl-Shift-Backspace to fill only areas containing pixels with the background color. Note – if your Alt key does not appear to be working in Elements, you may have another program running in the background that has taken over that key. GuruNet (Atomica) and FlySwat are two such applications. Uninstall them, or reassign the hot key in those programs to regain use of the Alt key in Elements. Please note that the paint bucket tool cannot be used with images in 1 bit Bitmap mode color mode. The keyboard shortcut for this tool is the letter K.
|
|
The illustration below is the paint bucket’s options bar (split in two to avoid stretching the window). The box titled Mode, and showing Normal contains a drop down menu of all the blend modes available for how the applied colors will interact with the current colors. The Opacity value can be set by either typing a number in the text box, or by using a slider. To access this slider, click on the arrow to the right of the value box, and drag. In the box titled Tolerance, the number entered will determine if a color is close enough to the selected one to be recolored. You can enter value from 0 to 255 with higher numbers causing a broader range of shades to be included, and recolored. Choose Anti-aliased for smoother edges on the newly colored areas. If Contiguous is not checked, any pixels of the clicked-on color will be recolored. If checked, only pixels adjacent to the one clicked will be recolored Check the All Layers box to evaluate colors from all layers when looking for which pixels to recolor. When unchecked, only colors on the active layer which are the same color as the one clicked with the paint bucket, will be filled with the new color. The third illustration shows the options bar when Pattern has been chosen from the Fill menu. That menu only has two options; Foreground, and Pattern. By clicking on the pattern thumbnail, you will find the patterns palette. If you want to create your own pattern, make a rectangular marquee selection of a small area that you would like to use, and choose Edit > Define Pattern. You will be asked to name it, and it will then appear in the patterns pop-up palette shown below.
|
|
 |
|
|
If you have doodled with a tool’s options and want to get back to the default settings, click that tool’s icon at the far left end of its options bar. Choose either Reset Tool to reset only the current tool, or Reset All Tools to restore default settings to every tool. Please note that all descriptions, and illustrations featured refer to files which are in Photoshop’s .psd format, and which are in RGB color mode. Other file formats, and color modes may generate different options. Some Photoshop features are not available for images not in .psd format, or RGB color mode. To find what color mode your image is in, choose Image > Mode. |
|


Comments