Photoshop Elements 2 Blur Tool
Photoshop Elements 2 Blur Tool |
|
|
|
|
| Used to apply blurring with a brush |
|
  |
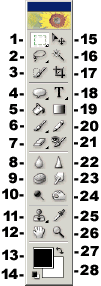
The blur and sharpen tools are referred to as the “focus” tools as they work to harden, or soften edges within an image. I often use the blur tool to smooth over uneven transition areas after retouching, or to reduce unwanted spots in areas that don’t offer a good sampling location for the clone stamp. To use the blur tool, select it in the toolbar, set desired values and settings in its options palette [see below], choose a brush from the pop-up palette in the options bar, and then drag in the image over the area you wish to soften. Be aware that blurring occurs even when the cursor is not moving, as long as the mouse button is held down. The speed of the effect is determined by the Strength setting in the tool’s options bar. A shortcut for changing brush sizes while using a brush is to press the left bracket [ to decrease brush size, and the right bracket ] to choose a larger brush. When editing an image with any tool that uses brushes, you can right click on the image and the brushes pop-up palette will appear right next to your cursor. Note that these tools cannot be used on 1 bit Bitmap mode, or Indexed color mode images. The keyboard shortcut for the blur tool is the letter R. |
|
The illustration below, is the blur tool’s options bar. To choose a brush size and type, click on the brush thumbnail. A pop-up palette of available brushes will appear. For more information on brushes, please see the Brushes page. The box titled Mode, and showing Normal is a drop down menu of the blend modes you can choose from. Beside this is the Strength value box. You can type in a number, or access a slider by clicking on the arrow on its right side. The speed of the blurring effect is determined by this setting. Choose the Use All Layers check box if you want to use data from all layers. When unchecked, only the active layer’s edges trigger blurring. |
|
|
|
|
|
If you have doodled with a tool’s options and want to get back to the default settings, click that tool’s icon at the far left end of its options bar. Choose either Reset Tool to reset only the current tool, or Reset All Tools to restore default settings to every tool. Please note that all descriptions, and illustrations featured refer to files which are in Photoshop’s .psd format, and which are in RGB color mode. Other file formats, and color modes may generate different options. Some Photoshop features are not available for images not in .psd format, or RGB color mode. To find what color mode your image is in, choose Image > Mode. |
|


Comments