
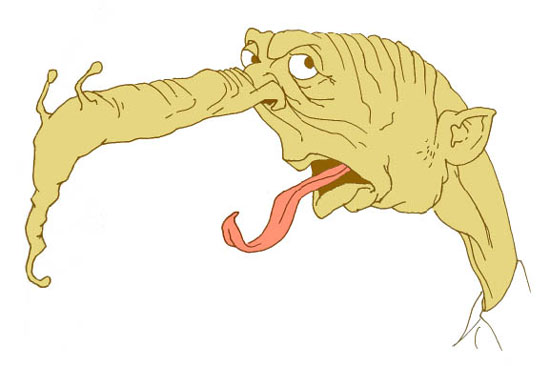
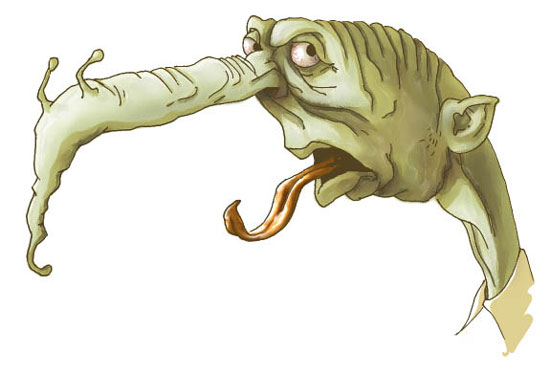
Old Freak Drawing
This task I’ll show you how to represent an old freak (alien).
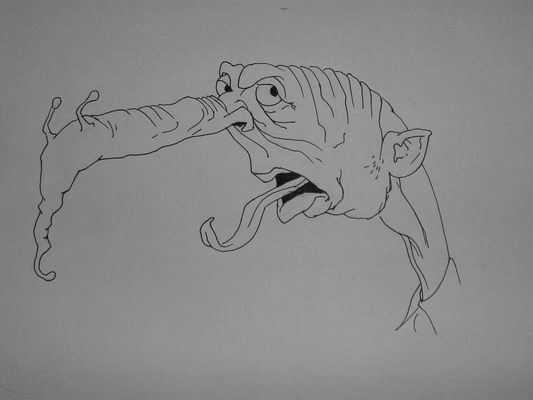
Open firstly in a new window the scanned contours: File – Open (ctrl+o).
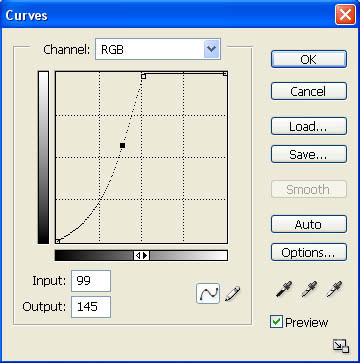
Just to make the work easier, you’ll have to copy the layer (Layer – Duplicate Layer). The previous layer must be erased with the fast button on the Layers window. Then decolorize the layer with the next selection: Image – Adjustments – Desaturate (shift+ctrl+u) and change its brightness and the contrast, making use of the next options: Image – Adjustments – Curves (ctrl+m).
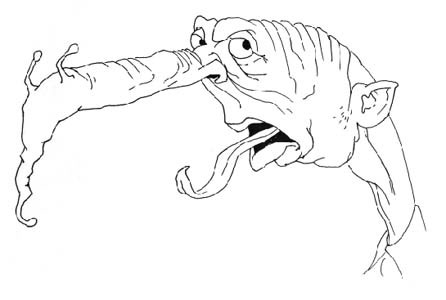
Choose after that the Brush Tool of the white color and paint out the dirt and the dust, except the contours.

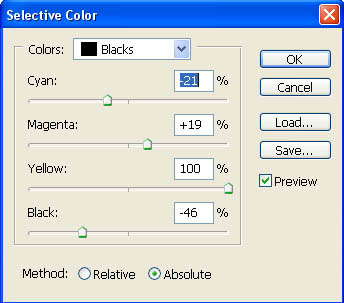
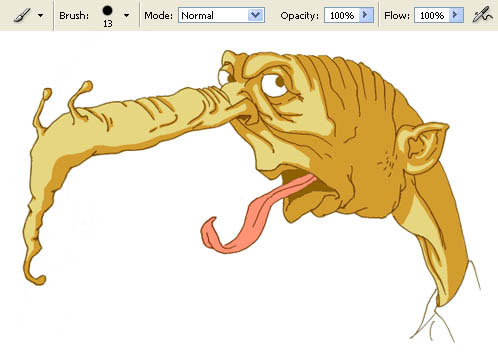
Then you should change the color of the contours on brown, applying this command Image – Adjustments – Selective Color.
Then create a new layer (Layer – New – Layer). Move it lower than the contours’ layer and change the contours’ layer’s type on Multiply. Choose after that the Brush Tool and colorize the skin and the tongue of the character with the basic colors.
Start introducing the shadows on the skin, using the same instrument Brush Tool.
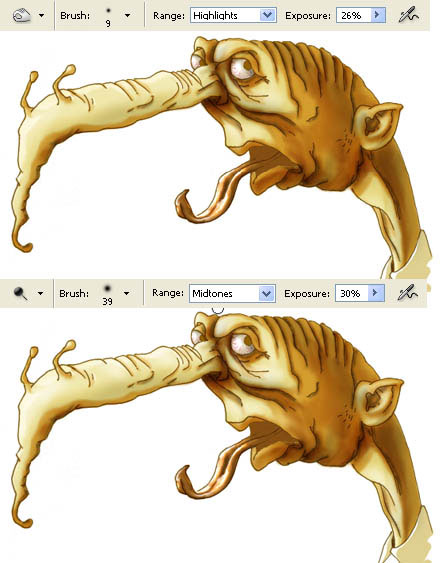
Add then the light:
Next step includes adding the volume to the eyes and the shadow, applying the Brush Tool. Blur it out with the Smudge Tool.
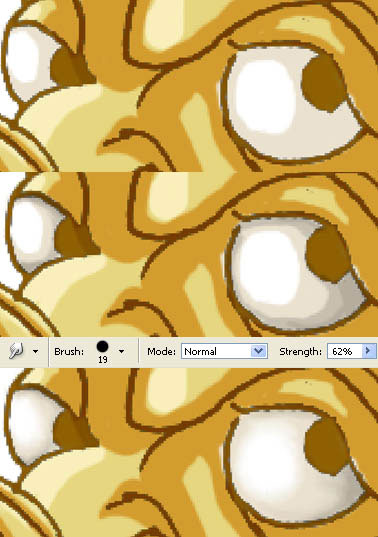
Take the smallest brush’s size and represent several blood vessels on the eye’s white.

Select now a different brush’s type (Brush Tool) and changing its color size, just draw the tongue.
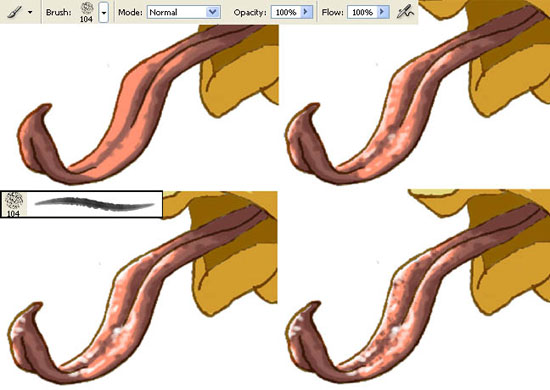
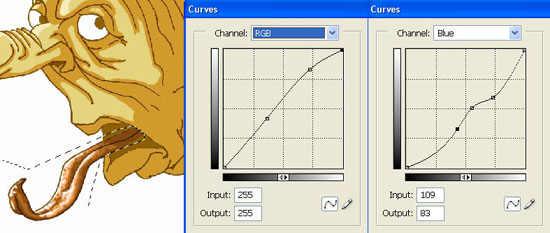
As you see, the tongue’s color has to be changed. It’s possible to do that with this selection: Image – Adjustments – Curves (ctrl+m).
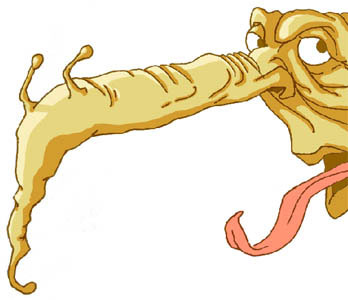
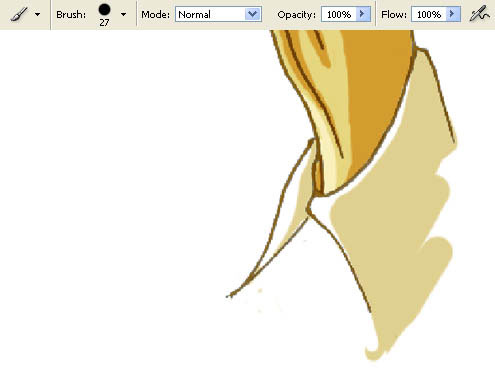
Outline the collar now:
Start outlining the skin. Using the Burn Tool and the Dodge Tool, add more shadows and more light.
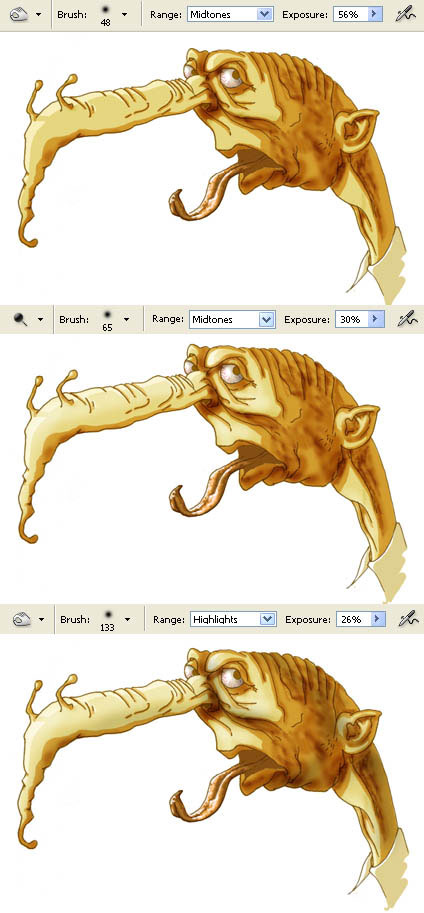
Smooth them out with the Smudge Tool.

The tongue must be processed the same way.
Represent then the deepest shadows on the skin and on the lightest face’s parts.
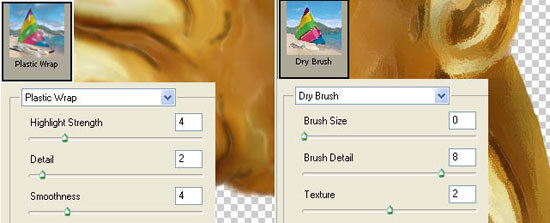
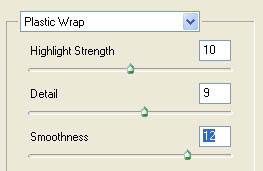
Mark out the entire skin with Polygonal Lasso Tool and apply two kinds of filters. First you have to use Filter – Artistic – Plastic Wrap, then: Filter – Artistic – Dry Brush.
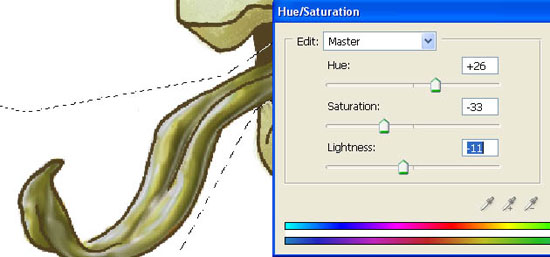
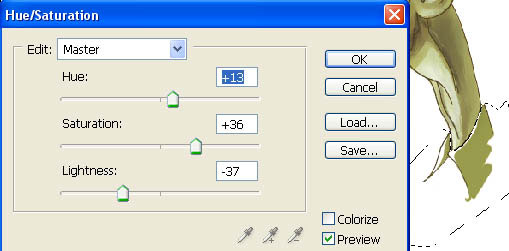
Try to change the skin’s color now, making use of this selection: Image – Adjustments – Hue/Saturation (ctrl+u).
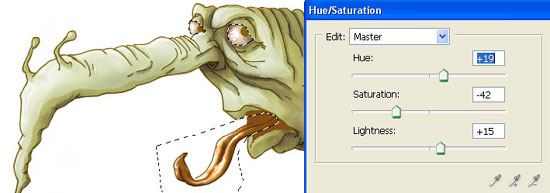
Move off the markings with Select – Deselect (ctrl+d). Pass to the contours’ layer and change their colors too.
Accentuate the tongue after that and apply the filter (Filter – Artistic – Plastic Wrap), by changing a little the adjustments of the option.
Change the tongue’s color too (ctrl+u):
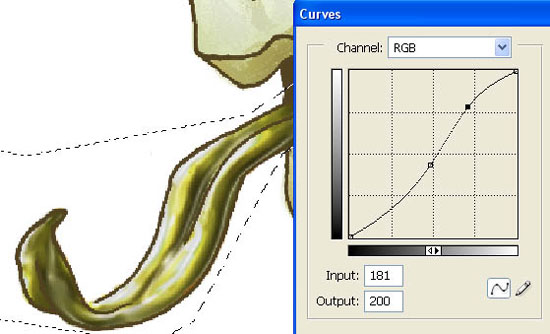
Increase its brightness and the contrast: Image – Adjustments – Curves (ctrl+m).
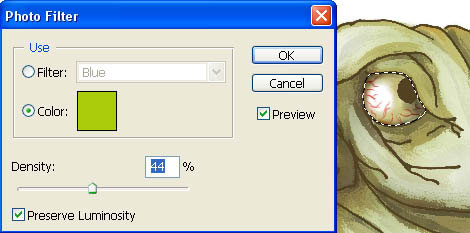
Accentuating the eyes, apply the color filter of the appropriate nuance: Image – Adjustments – Photo Filter.
Change the collar’s color:
Creating a new layer, lower than the rest, paint it out with the appropriate color by using the Paint Bucket Tool. Apply then the Brush Tool and place our character on the first plan.
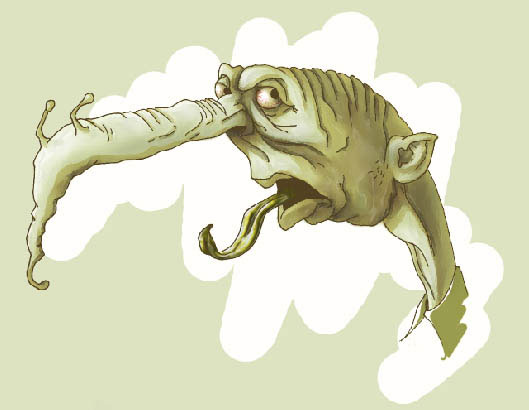
Finished!
Made by Sigma
Comments