
Oblivion. Part 1
Royalty free
stock
backgrounds
This lesson I want to share my experience of representing difficult pictures. Usually I use standard brushes, changing sometimes their thickness, softness and transparency. This lesson includes representing in an easy way the human body (or almost human one), a portrait, clothes and accessories.
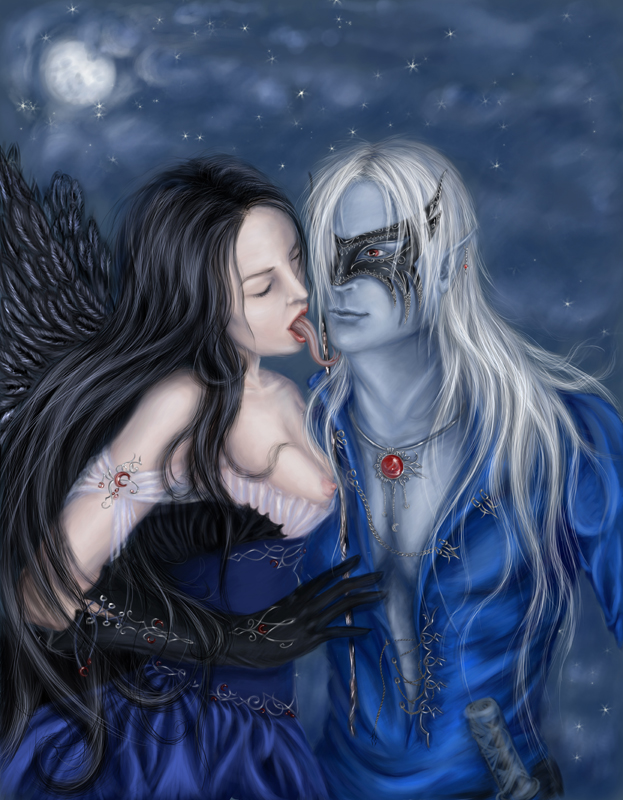
1) This lesson I’ll try defining the process itself. For the beginning the mood is very important. So is the draft. It’s good to begin representing it on a paper and then working with it in Photoshop. I tried to have an eye on the right construction of the characters on this stage, just not to be too late after that.
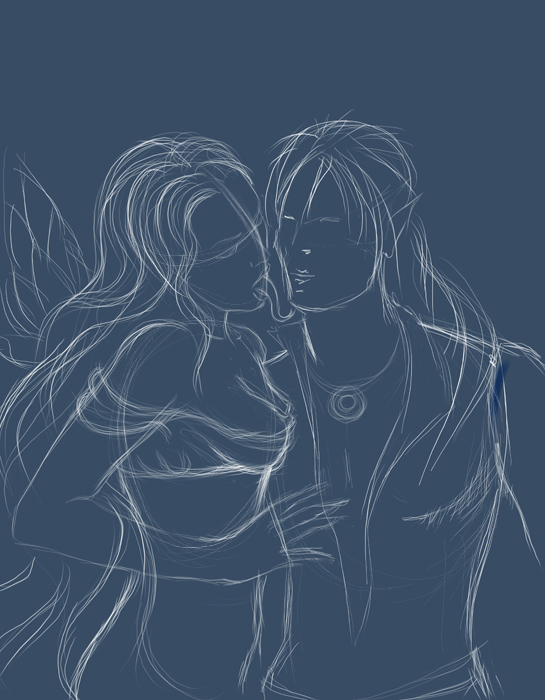
2) Let’s begin by explaining how to draw the boy’s character. Usually I start working by drawing the skin and then clothes. The hair and other small details can wait till the end, but now I need to have a good representation of shapes and colors.

3) Drawing the skin needs about four colors and many other nuances and reflexes. As you may see the boy was transformed into an ugly elf with exotic colors and that explains my colors’ choice. It’s necessary to mention that to whole body shouldn’t be so trivial. It should contain different prominences and convexities. Each muscle has its own shape and it is represented on the picture.
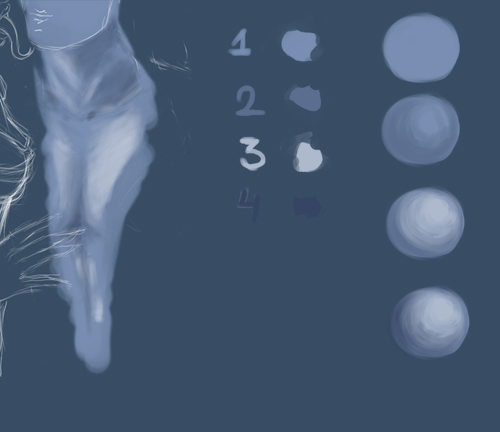
4) It’s necessary also to give a kind of texture to the skin that is important for giving to the picture more realness.
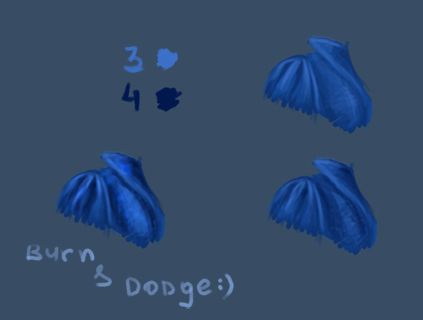
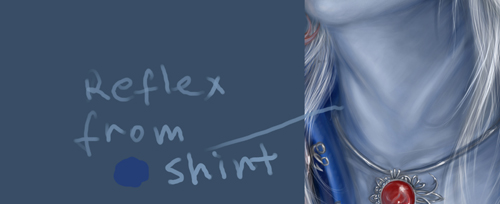
5) Now it’s time for the shirt. I like a deep blue color. It fits with the planned silver hair. For the beginning I’ll mark the zone with the basic color. After that I choose a lighter nuance for picturing the more lighted zones on the picture.
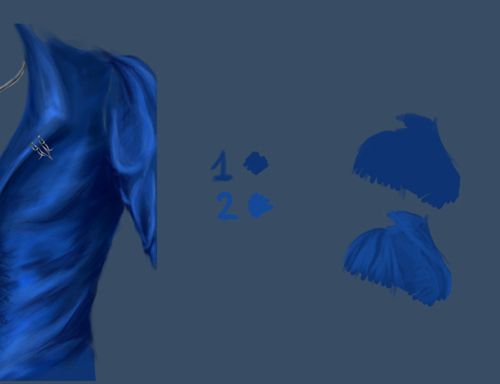
6) Let’s represent now the flares with even lighter colors and pass to the shadows. I choose the blue – dark color. Don’t forget that the silk is characterized by the contrast between the light and the shadow. The instrument Burn Tool is helpful to thicken the shadows and then selecting the Dodge Tool helps to represent lighted “silk” flares. It’s necessary to work also with the nuances’ playing and the shirt’s textile is finished.
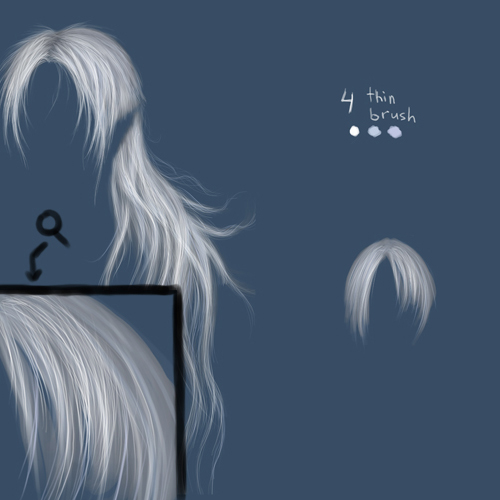
7) And now the hair. I like boys with long hair. That is why I decided not to make an exception this time too with my elf. I choose silver color as the basic one. And the basic zone must have a darker color than the hair has. Mark out with color Number 2 several of the hair locks. Select after that a thinner brush to represent a part of the most visible locks. It’s not necessary to stop on each hair; it’s enough having marked several of the zones, just for the back plan of the picture not to be so evident.
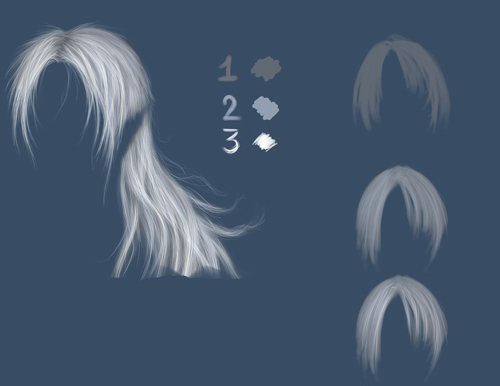
8) Choose next step a thin brush of light color and try to give some shape for the hair, making the element more detailed. Don’t forget about hair ends that must not show some bad worked lines on the picture. The hair may be processed also with a dark color. You may see on the picture an enlarged fragment.
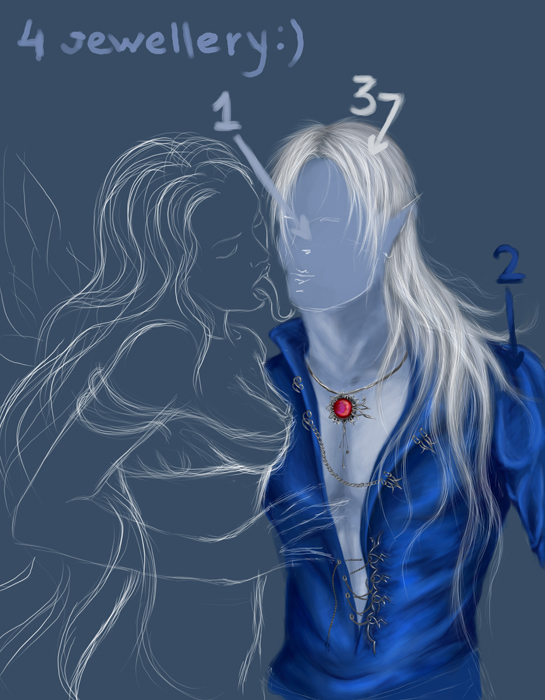
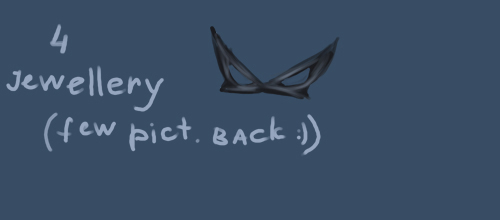
9) Let’s work now with the small details. It’s time for the jewelry. The red medallion on the elf’s neck is easy to make. You may see below a simple version of it. For the beginning I’ll mark the zone with the basic color and then picture the flares.
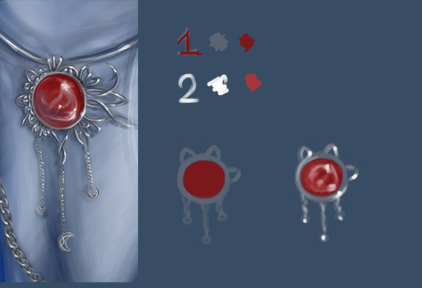
10) Represent the shadows now and reflections. The blue color is predominant on the picture. The bright red medallion must reflect the other colors on the picture and fit the composition which is why I choose to introduce more blue color. The black is used for the metal, the dark – red color – for the stone. Then we have to select the Burn Tool and the Dodge Tool for inserting more contrasted elements on the picture.

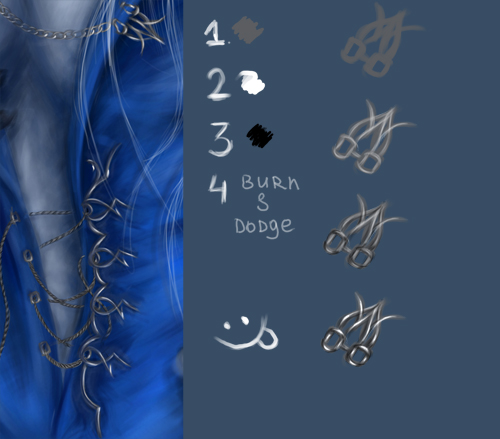
11) You may see on the picture a lot of small metallic things. I’ll
show you the process of drawing a small clamp on the shirt’s collar.
Mark out for the beginning the shape with basic silver color and then
insert white color with a transparent brush. Next represent the
shadows. Select after that the Burn Tool and Dodge Tool and use the
instruments for finishing the clamp.
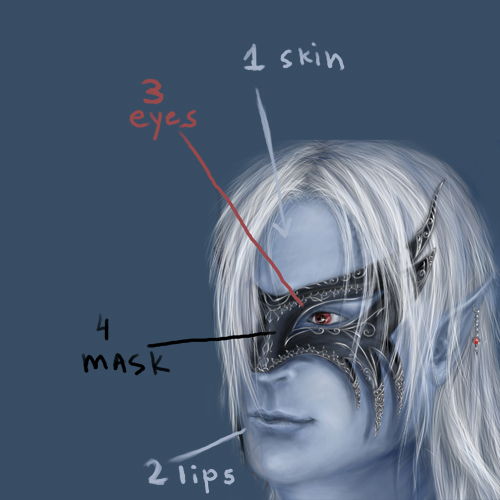
12) Start working with the face by representing the skin firstly and
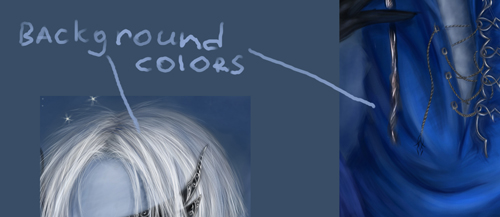
then the lips and the eyes. The mask as an accessory may be done on the
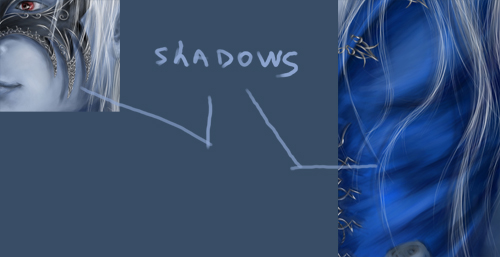
final stage.
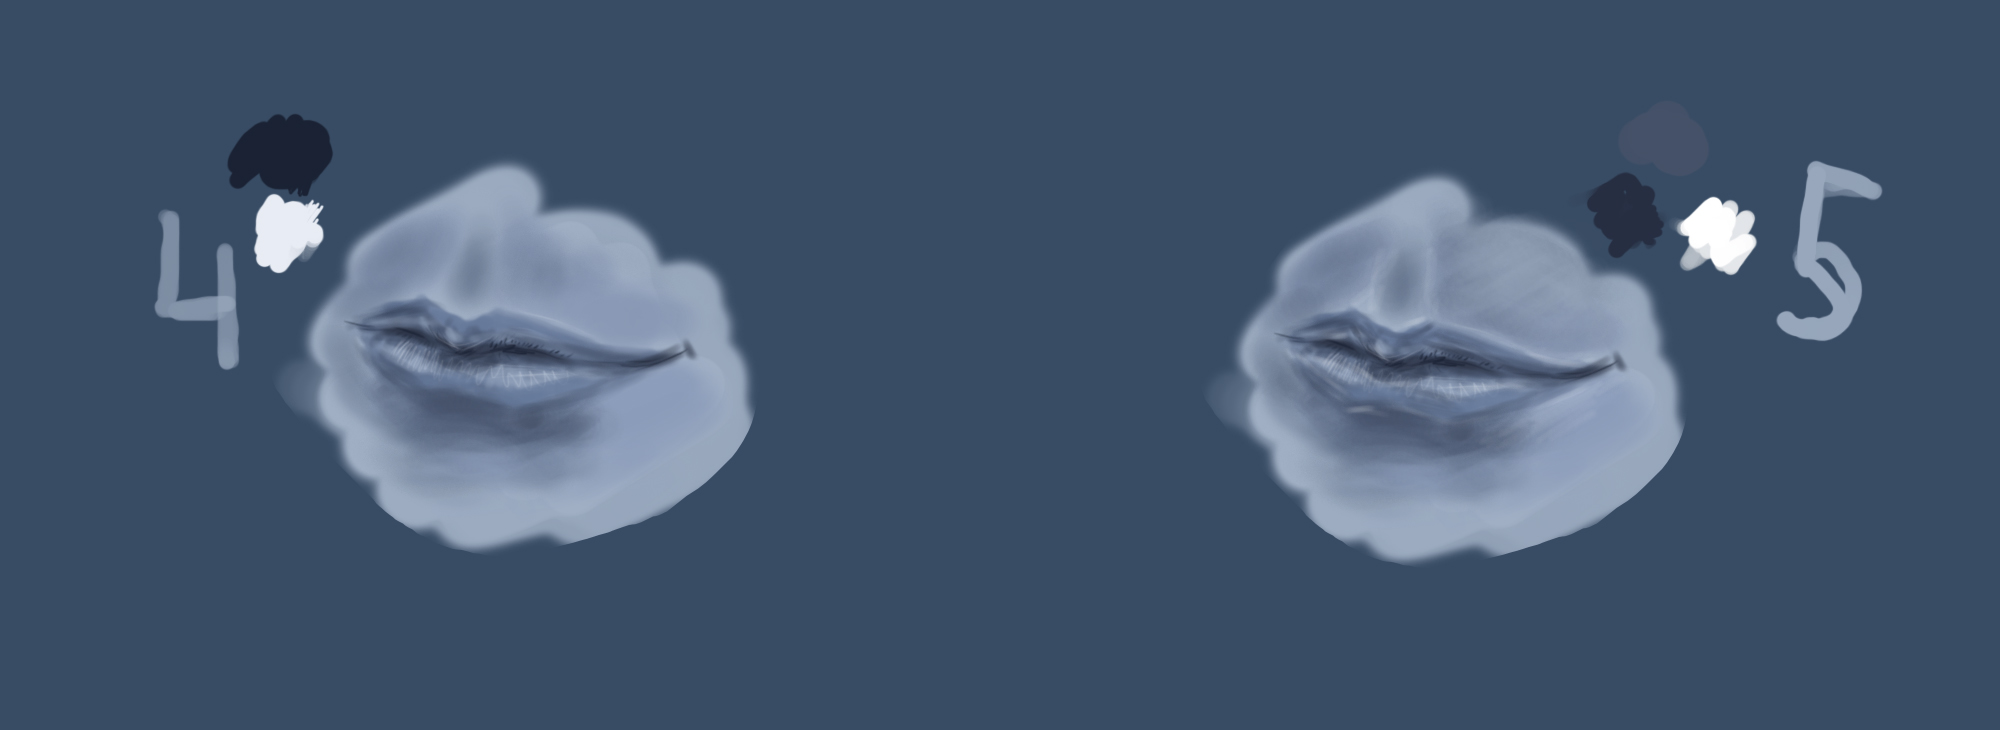
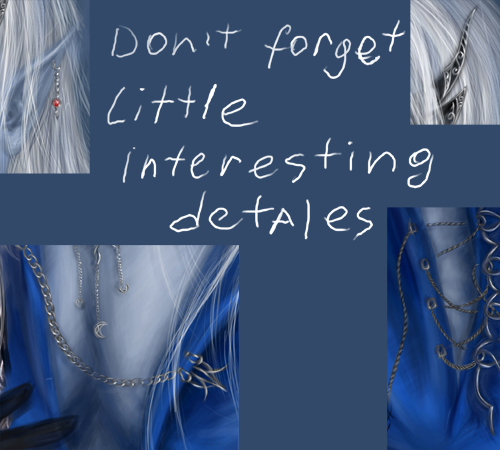
13) Usually the man’s lips are thin. Represent the basic layer firstly
and then a deep shadow under the upper lip. Continue by picturing the
light flares on the low lip.
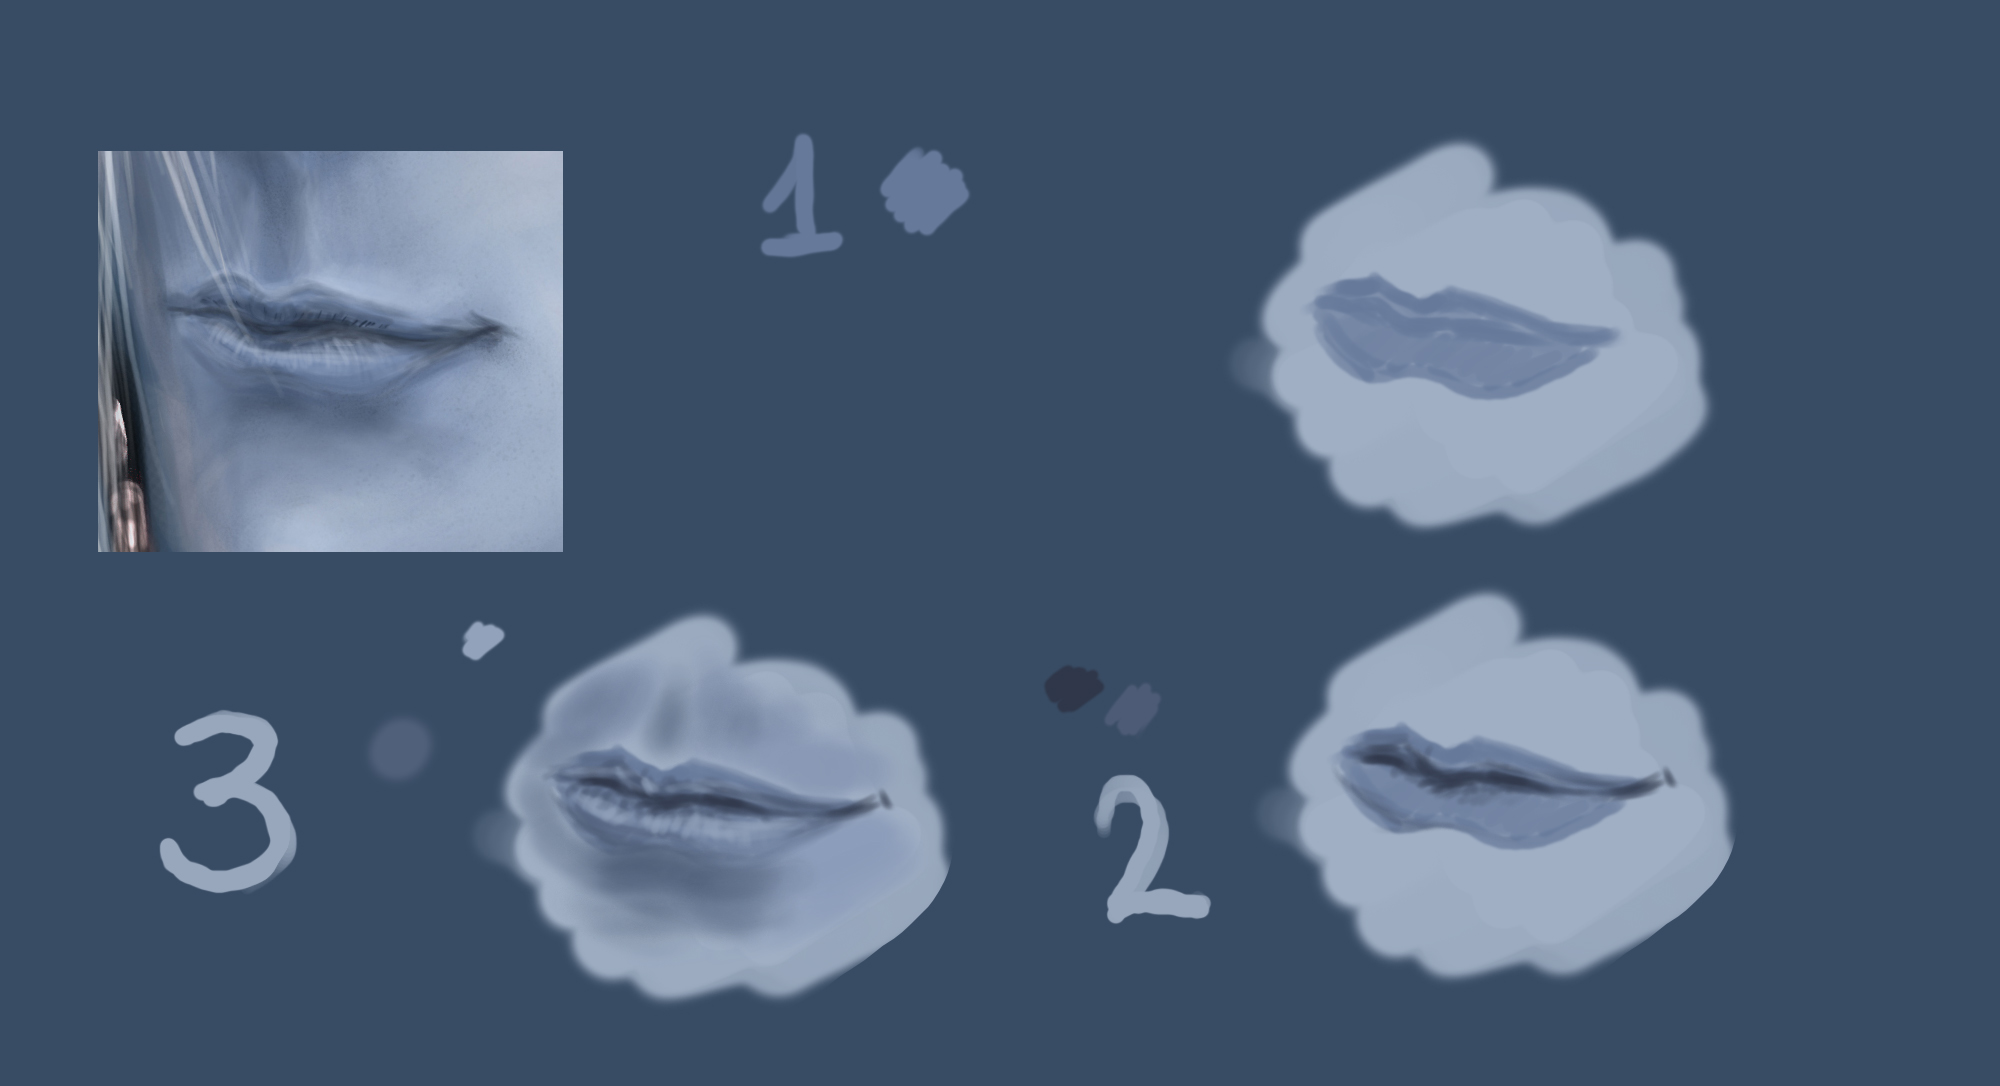
14) Select a thin firm brush with black color to insert several creases
on the lips. Do the same operation, but this time with lighter colors
on the flares. Select a thicker brush now to give the final shape for
the made element. Picture out the skin around the lips. Usually under
the low lip the shadow is more prominent, but above the upper one is
situated a lighter zone.
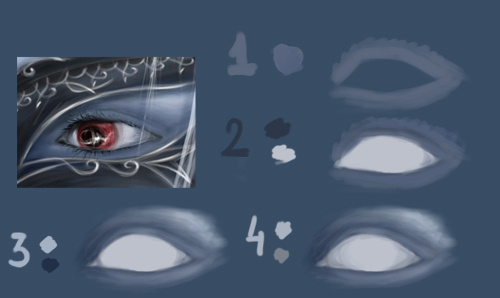
15) It’s time for the eyes. Choose the red color for them that shows
aggression and it fits with small details on the clothes. Select an
intermediary nuance of the skin to represent the eyelids and the zone
under the cornea. It’s necessary to remember that the eye has a convex
shape. That is why we need to light out the skin above the eyelid the
lights falls usually on.
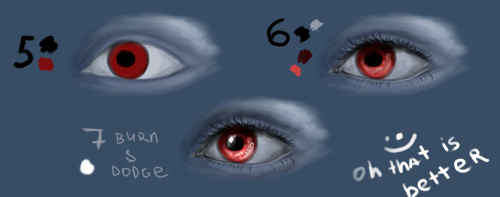
16) The pupil of the eye. Represent firstly the dark – red cornea and
the black outline. Mark with black color the eye’s iris. Dark out the
zones under the eyelashes. Picture out with dark – red color the upper
part of the iris, the lowest half – with the light – red. Insert a
flare with white color. The corrections may be done with the Burn Tool
and the Dodge Tool.
17) It is very easy to make the mask also. The main thing is to
determine the shape. On the scheme I have shown the process of
introducing the nuances. Select the black nuance for the flare and then
the light – blue ones.
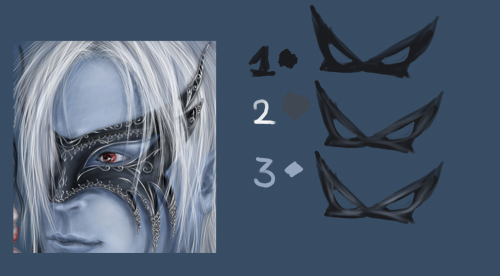
18) The finished mask may be filled with ornaments and I already explained the process of inserting them.
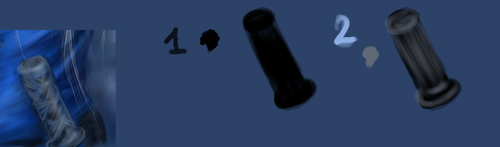
19) Try to draw now the sword’s handle. Fill the shape with grey color
by selecting a transparent brush. Next choose the light – blue color
for drawing the threads, composing a simple ornament.
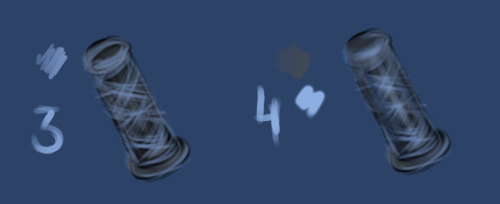
20) Choose a smooth brush for introducing light nuances on the middle part of the handle.
21) Insert the last features. Don’t forget about the reflections on the clothes. Fill the shadows with colors and flares.
22) The character should blend the background. His clothes, face and the hair reflect the background’s nuances.
23) Don’t forget about shadows coming from small objects and jewelry.
24) Usually the small interesting details fill the picture with
diversity. But everything depends on the mood and style, sometimes it’s
even necessary to take care of them.
25) The third part of the picture is finished. Next lessons I’ll show
you how to represent the woman and make some general corrections on the
picture.
Comments