
Naming Names
Naming Names
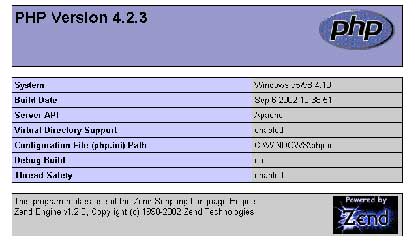
Once your site has been set up, it’s time to get started with a simple example – a page that display PHP environment settings via the phpinfo() function.
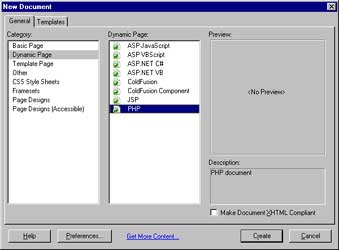
Dreamweaver provides you with an easy way to get started with building a PHP script – pop open the File -> New menu, and select “Dynamic Page” and “PHP” from the pre-defined templates.
You can now add the function call to phpinfo() in this page – switch to the code view using the View -> Code menu option, and type the following code into your document:
<?php phpinfo(); ?>
Save the file, and have Dreamweaver preview it for you via the toolbar icon (you can also hit the F12 key) and a new browser window should pop up with the output of the script.

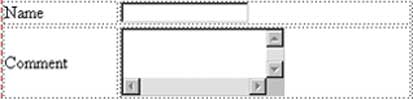
If you’re using PHP, you’re going to be doing a lot of form processing – let’s see how you can speed up the process in Dreamweaver. First, create a simple, properly-formatted HTML form using a combination of the “Tables” and “Forms” tabs on the “Insert” panel – this form should contain two text input areas, one named “name” and the other named “comment”.
Add a couple of submit and reset button and the form is ready for action.
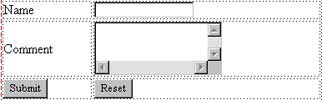
Here’s the code:
<html>
<head>
<title>Untitled Document</title>
</head>
<body>
<form action="this.php" method="post">
<table width="75%" border="0">
<tr>
<td>Name</td>
<td><input name="name" type="text"></td>
</tr>
<tr>
<td>Comment</td>
<td><textarea name="comment" cols="" rows=""></textarea></td>
</tr>
<tr>
<td><input name="submit" type="submit" value="Submit"></td>
<td><input name="Reset" type="reset" value="Reset"></td>
</tr>
</table>
</form>
</body>
</html>
Comments