
My fair lady butterfly picture effect
In this Tutorial we’ll learn to combine several pictures, place different objects on the grass, correct the colors and improve the quality of the picture. We’ll see also how is it possible to use the layers’ masks, enliven the hair and create the shadows or change the eyes’ color.
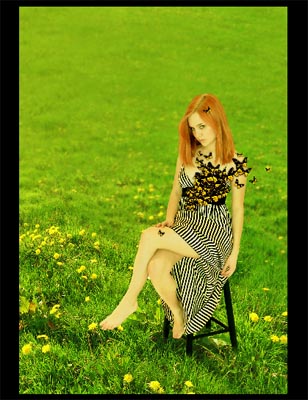
Open in a new window a girl’s picture: File ? Open (ctrl+o).
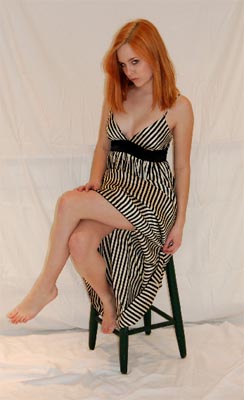
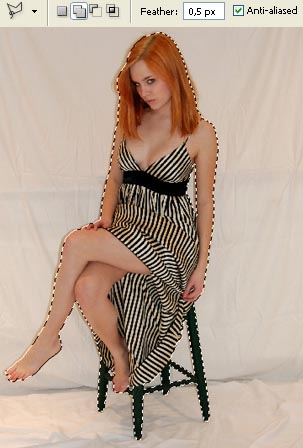
Make a copy of this layer to be possible working with it: Layer ? Duplicate Layer (ctrl+j). The previous layer should be deleted, using the corresponding icon in the Layers window. Mark out the background the girl is situated on and select the Polygonal Lasso Tool to move it off.
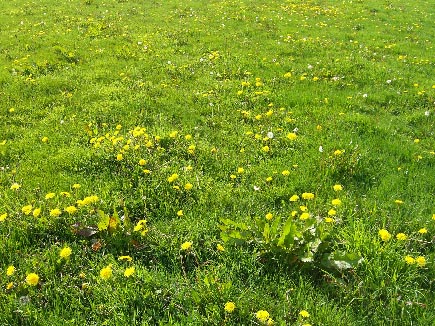
Enlarge after that the picture’s surface, using the Crop Tool and open in a new window the picture we’ll use for the background (ctrl+o).

Mark it our with Rectangular Marquee Tool, make a copy of it: Edit ? Copy (ctrl+c) and get back to the previous window to insert it on a new layer: Edit ? Paste (ctrl+v). Place this layer under the girl’s one and make the corrections on its size and on the background’s placement, applying Edit ? Free Transform (ctrl+t).
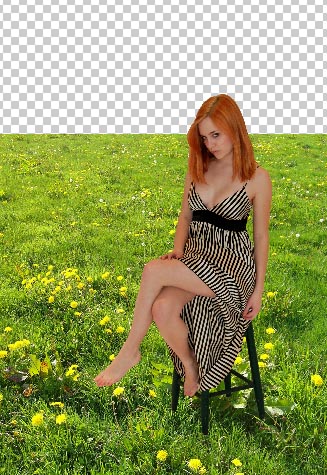
We have to fill the rest of the empty background, but for the beginning mark out and copy (ctrl+c) the upper part and insert it on a new layer (ctrl+v) that will be placed above:
Merge down these layers: Layer ? Merge Down (ctrl+e) and select the Stamp Tool of a big size to copy the grass on that place it was removed and fill the combined part:
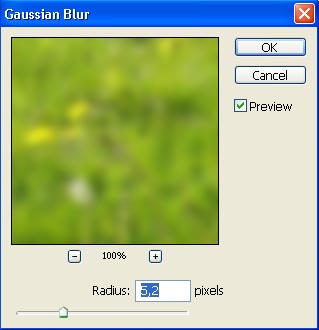
Copy this layer (ctrl+j) and blur out the copy, using Filter ? Blur ? Gaussian Blur.
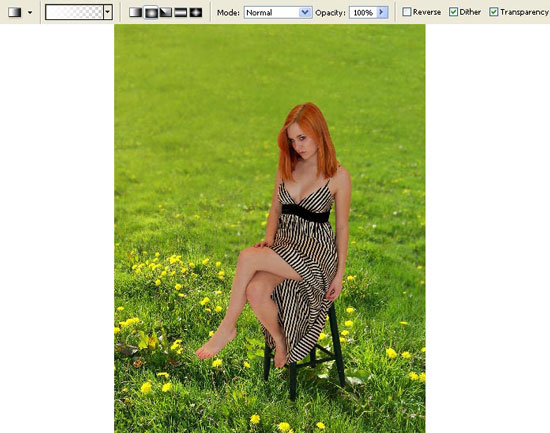
Create a mask out of this layer: Layer ? Add Layer Mask ? Hide All and then select the Gradient Tool of white color to make the blurred layer visible only on the backside.
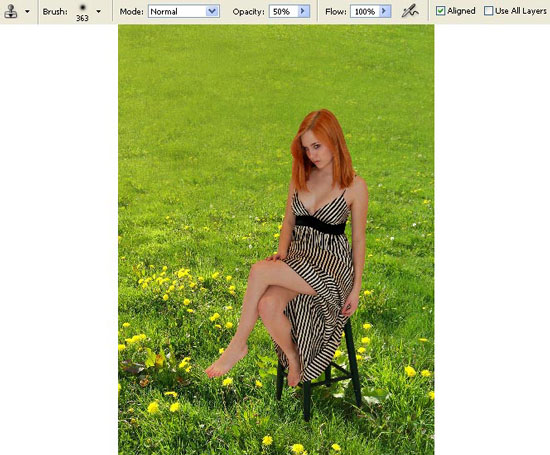
Combine the layers (ctrl+e) and start operating with the girl’s layer. Here we have to use the Stamp Tool as a brush for making girl’s hair livelier on the edges:
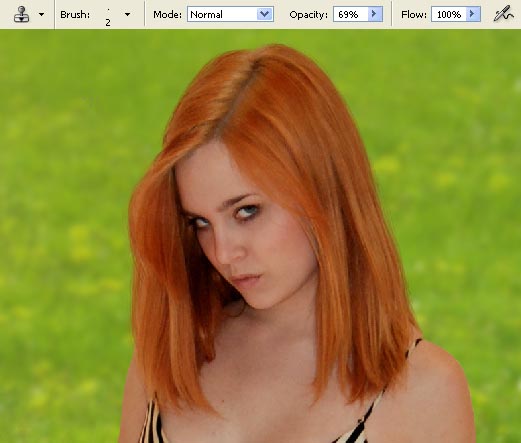
Select now the Blur Tool to blur out a little the entire girl’s contour.

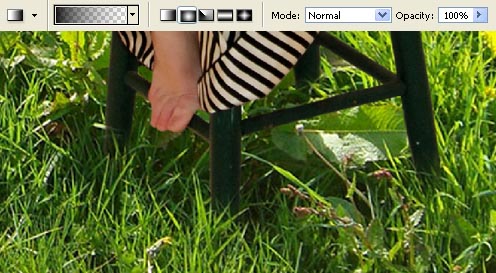
Now we have to create a mask out of the layer: Layer ? Add Layer Mask ? Reveal All and use the Gradient Tool of black color to hide the visibility of the chair’s legs.
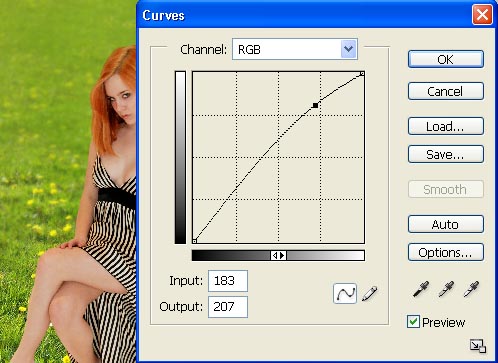
Apply now the command Layer ? Remove Layer Mask ? Apply to correct the brightness and the layer’s contrast, using Image ? Adjustments ? Curves (ctrl+m).
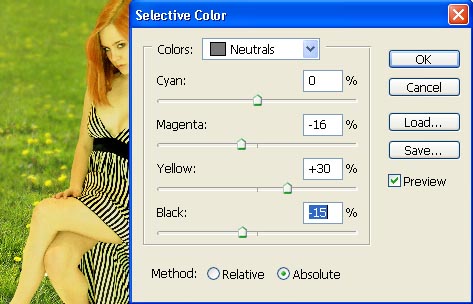
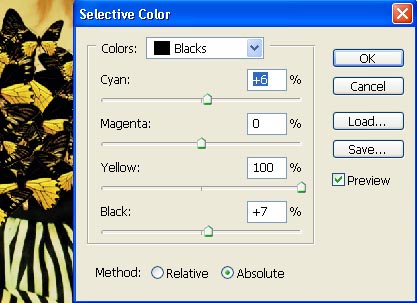
The colors should be corrected also with Image ? Adjustments ? Selective Color.
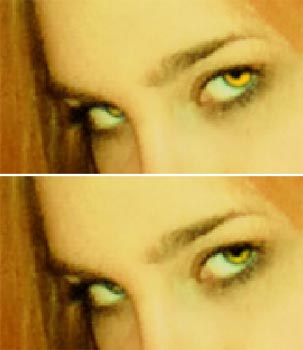
To change the eyes’ color we have to create a new layer. Paint them in the necessary color with the Brush Tool and blur the edges out after that, using the Blur Tool. Finally we have to change the layer’s blending mode on Overlay.
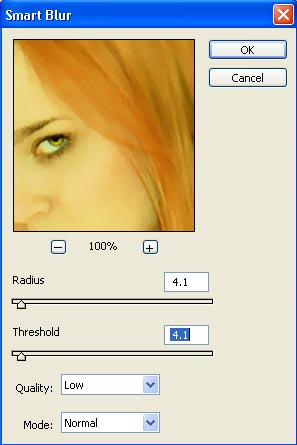
Merge down the layers (ctrl+e) and apply the here shown filter on the new layer: Filter ? Blur ? Smart Blur.
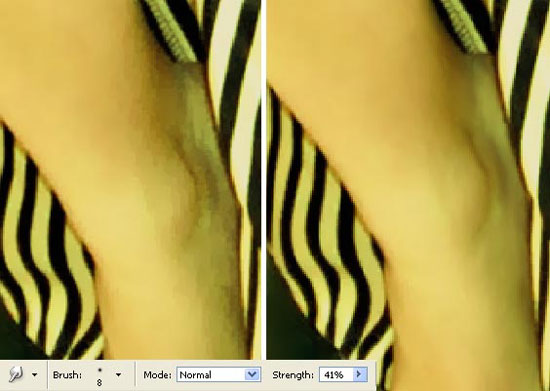
Choose now the Smudge Tool and smooth out the unevenness on the girl’s skin and on her hair that have appeared when using the last filter. Here we have an example:
Open a butterfly picture in a new window: (ctrl+o).
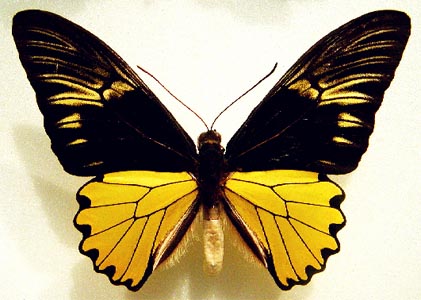
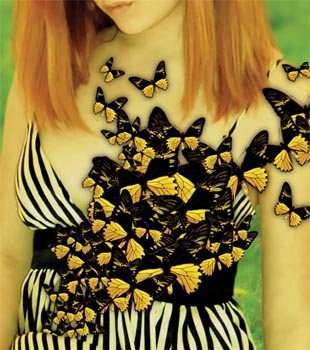
Mark it out with the usual Polygonal Lasso Tool, make a copy of it and place it above the girl’s layer. Make a lot of copies of this layer (ctrl+j), changing the size, the angle (Free Transform) and the butterfly’s level of distort (Edit ? Transform – Distort). Place the copies on the girl’s dress and on her skin.

Combine all the layers containing the butterflies (ctrl+e) and make the corrections on the color (Selective Color).
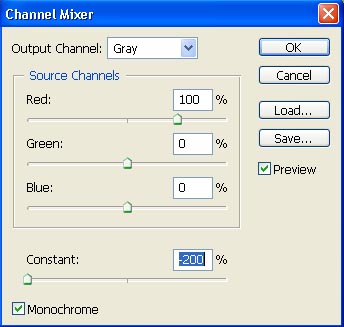
Make a copy of the butterflies’ layer to make the copy entirely black, using Image ? Adjustments ? Channel Mixer.
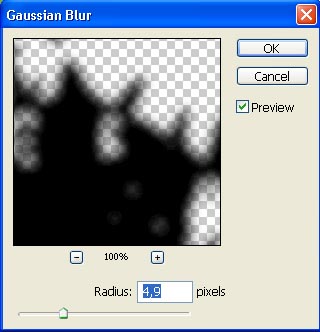
Place this layer above the girl’s layer and group them out (the shadow shouldn’t get outside its contours): Layer ? Create Clipping Mask (ctrl+g). Blur out the layer (Gaussian Blur).
Make the Opacity smaller till 80%.
Merge down all the layers now: Layer ? Merge Visible (shift+ctrl+e).
Using the Crop Tool and the Rectangular Tool, it’s possible to insert the picture in a frame (place it on a new layer).
Select a set of ready to use brushes (downloaded on: http://www.deviantart.com/deviation/33101426/ ?qo=15&q=by%3Aanarasha-stock&qh=sort%3Atime+-in%3Ascraps) and insert several ornaments, by applying this combination: Edit ? Transform ? Flip Vertical.
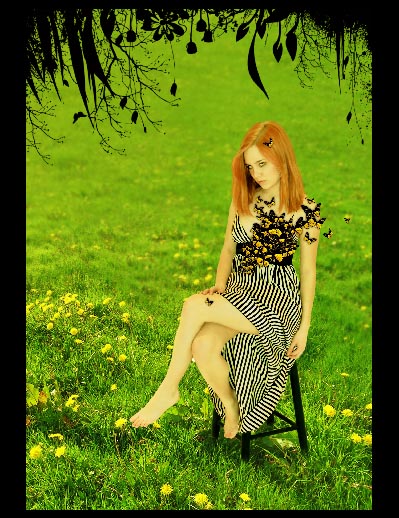
Make a copy of the layer containing the frame and the ornaments and blur out a little the copy:

Minimize the layer’s Opacity till 55%.
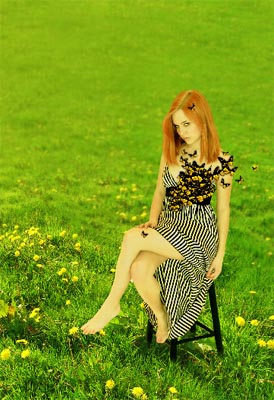
The picture is finished!
Made by Sigma
Comments