
Making of nine and venue wallpaper
In this tutorial we will make nine and venue wallpaper. About the name – well I really don’t know where it came from but this naming just popped into my mind then – so here we go. I will use Photoshop as my main App for creating this one.
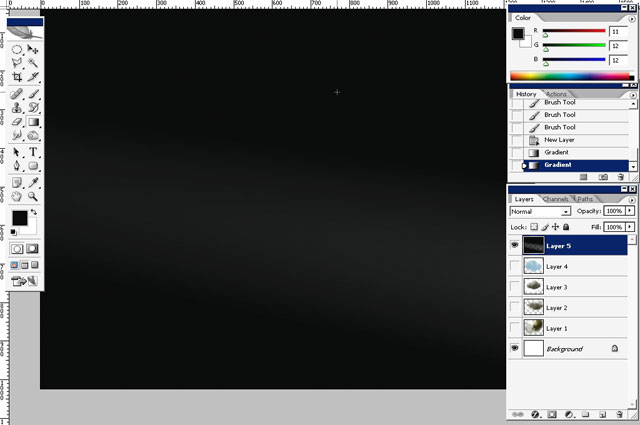
Start by creating a document let’s say something like 1280 x 800 or whatever fits your screen the most.
Fill the area with black – but do it with gradient and Pin Light – blending mode – it may come with some interesting moments like maybe this lighter gradient string in the middle. Still totally black tone we have here.
I really want to start from font work this time, so I will experiment with some font here.
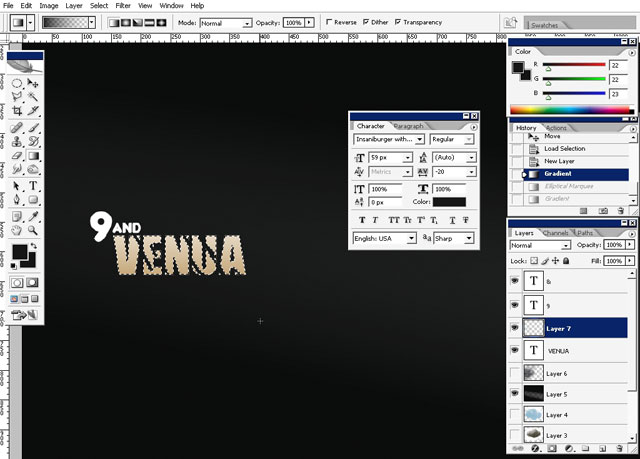
I really like this font for VENUA.

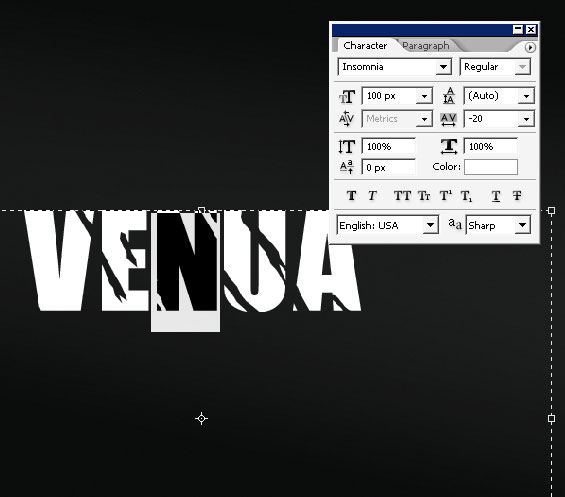
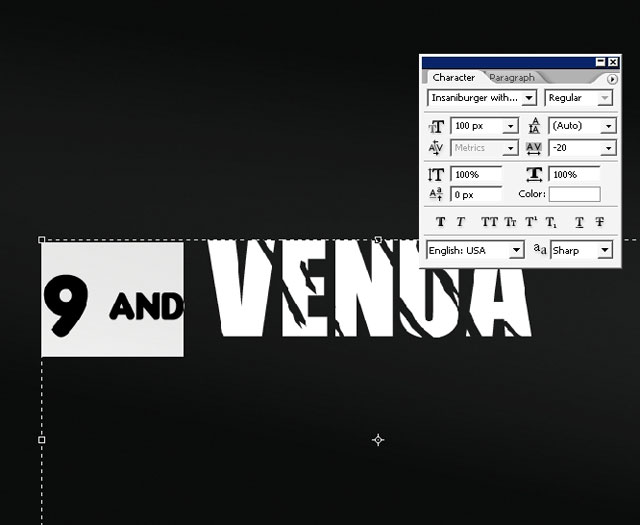
9 and – AND – Is done with another font.
Now font color work:
Select the whole line – venue by clicking on the layer holding the Ctrl key. Select Gradient (G) – and fill the font with gradient like so. You can choose another colors if you want.
Leave the selection on and choose Elliptical Marquee tool, hold
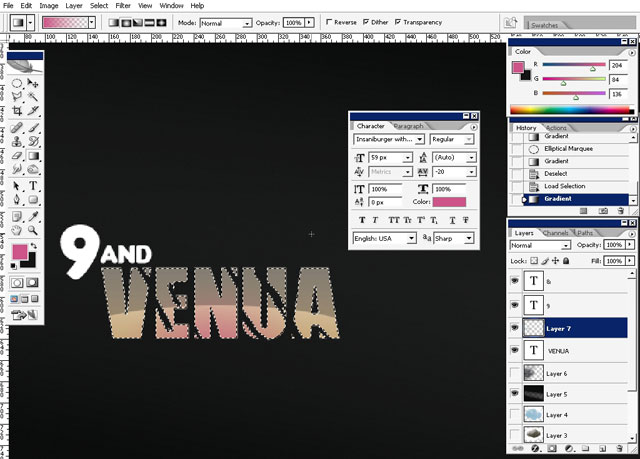
And darken the font by filling it with black to transparency gradient.
Select the font once again and change the gradient mode from linear to round – choose Fink to transparency gradient and do this little pink color on the bottom of the text.
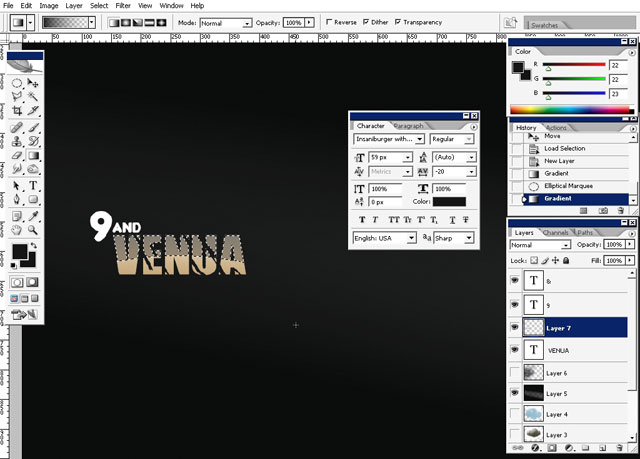
Change the color of the – AND – as well.
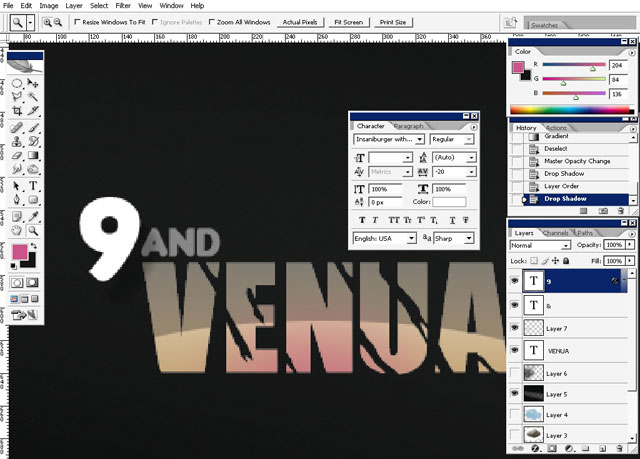
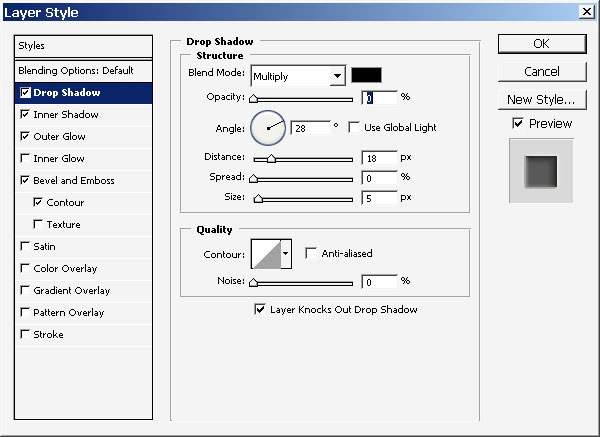
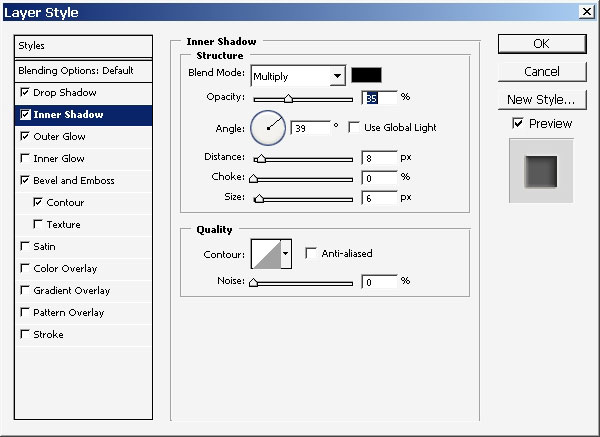
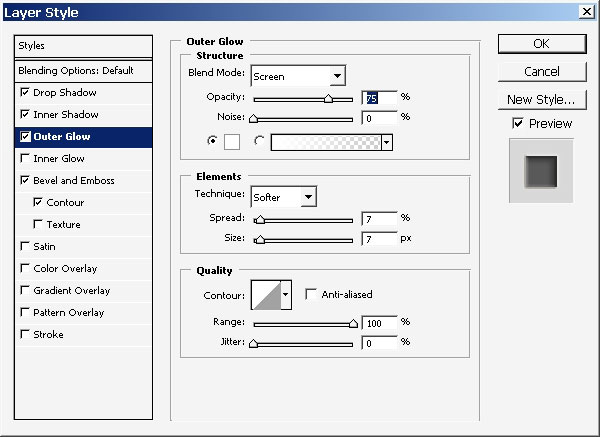
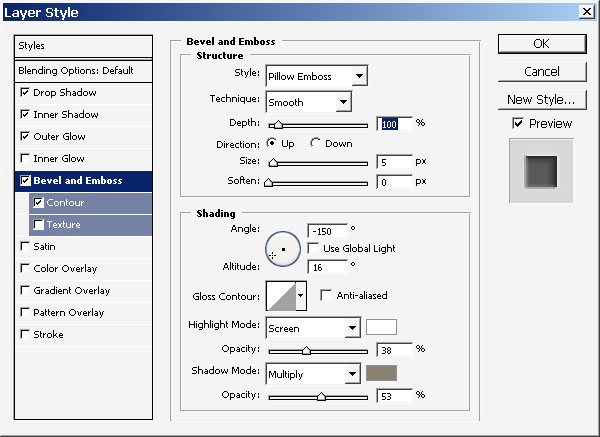
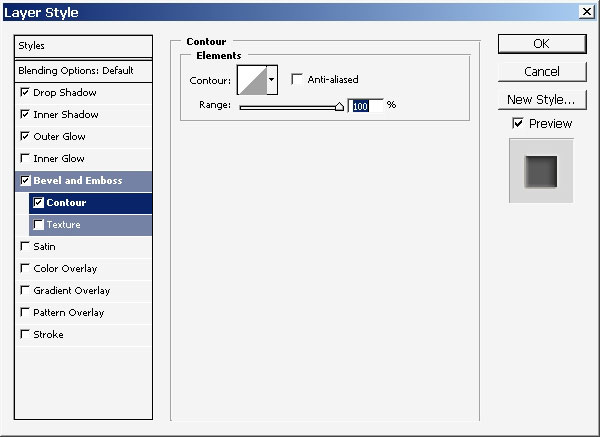
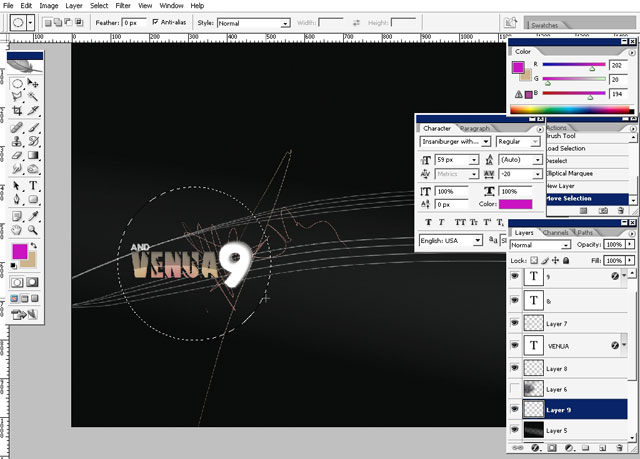
Now for the Nine: I wan to leave it white but to play with different layer styles. So here are my layer styles for – 9 – .
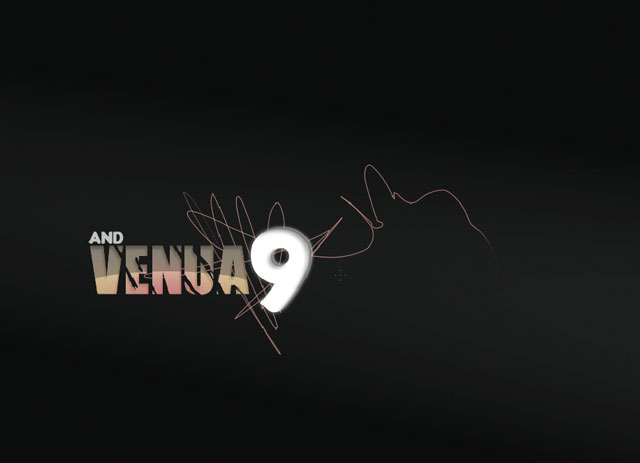
Here is the result for 9 – and I’m also beginning to work with my background. The first step is : select 1px (no brush setting turned on).
Just some crazy strokes:
I really liked how this simplest brush works so I really want to do 4dotx brush.
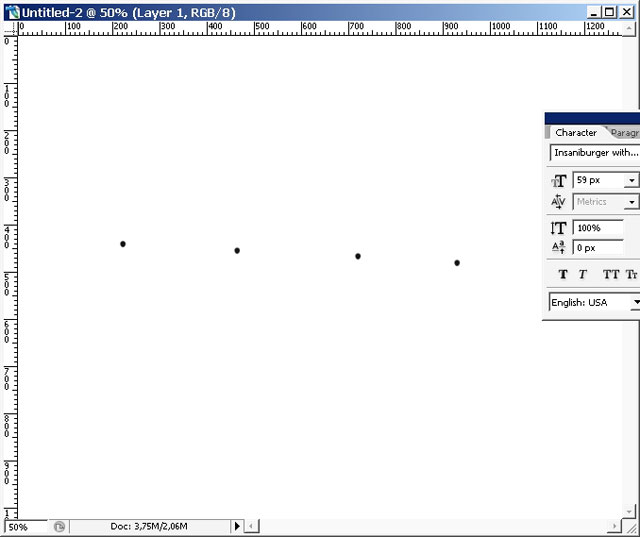
We need a new document for this, paint 4 equal dots
Make a selection so the dots are inside the selection:
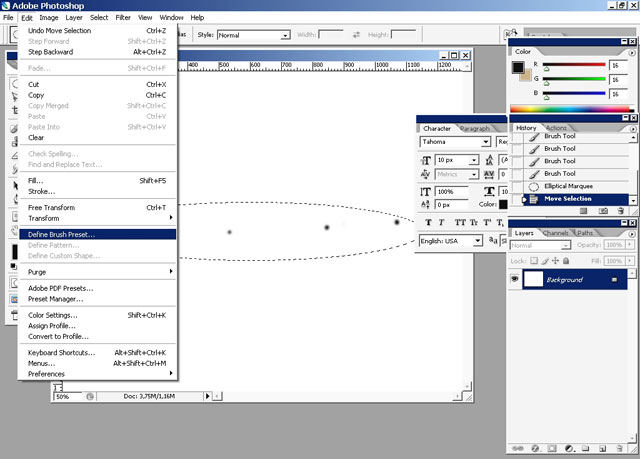
Define it as a brush preset.
Here is our brush in action:

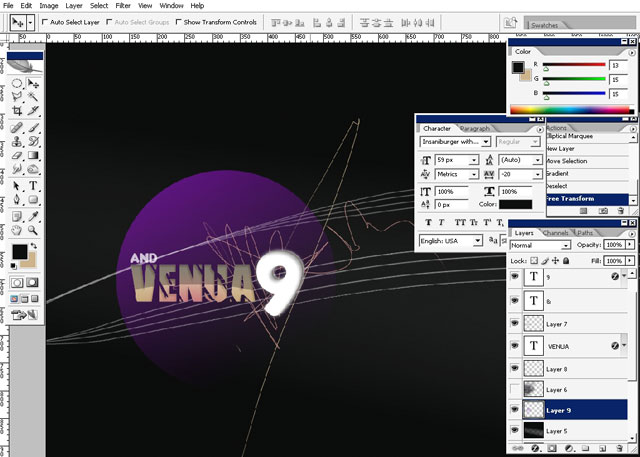
Now the whole thing seems a little bit dull and formless.
So make a round selection underneath all the layers (except the background layer).
Choose Purple to transparency gradient and make this move inside the selection.
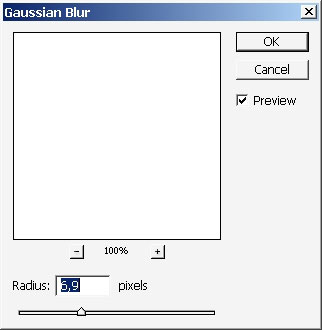
Choose and merge background line layers and apply blur to them.
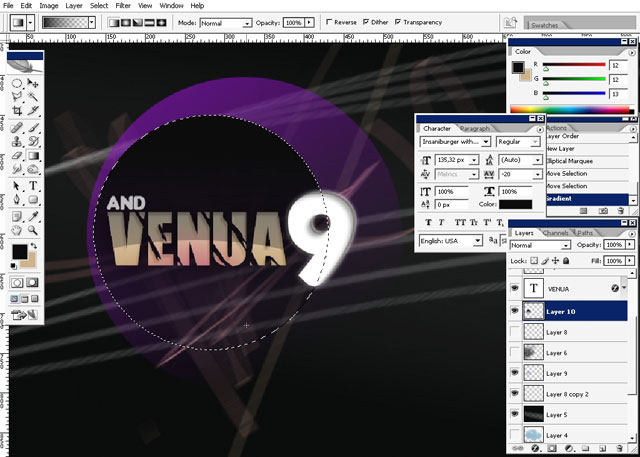
Make another selection – this time smaller and fill it with black to transparency gradient.
Now I think our concept is ready all that left is t make some really small adjustments.
Select soft edged brush.

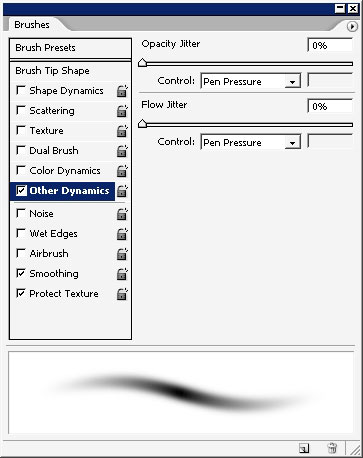
Select Overlay mode for the brush.
And soften a little bit the purple Round shape. Pick the purple color as well.
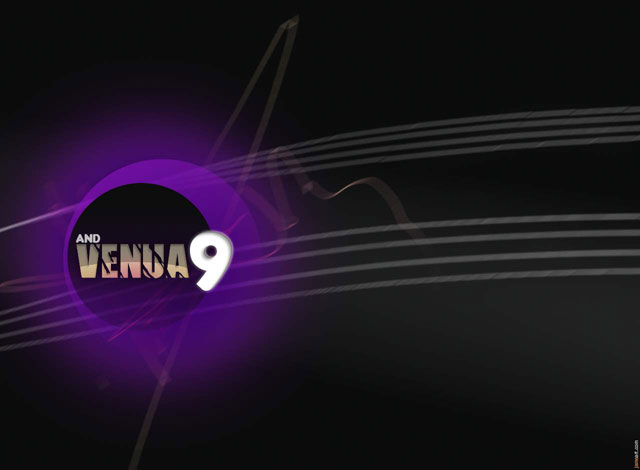
So and this is it – our 9 and venue wallpaper is ready I think. I hope you learned something from this tutorial and of course, see you next time on eyesontutorials.com.
View full size:
VENUA 9 Wallpaper
Comments