
Integrate Business Logic
Now comes the interesting part – integrating PHP business logic into this example. Click the “PHP” tab that should have appeared on your “Insert” panel, and take a look at the functions it provides:

Pretty basic: you can insert PHP code to access POST, GET, cookie and session variables, include() and require() files, and attach programming constructs like “if” and “else” statements.
Now, you probably already know how PHP form processing typically works. A form processing script contains two logical blocks – one displays the empty form and the other processes the user input submitted. Therefore, the first thing to do is to insert an “if” conditional statement at the top of the code – just click on the “If” button and Dreamweaver will do it for you:
<?php if ?>
// form code
Next, you need to check if the form has been submitted or not, via the “submit” form variable. Use the “Form Variables” button, and write some code around what Dreamweaver inserts for you:

<?php if (!$HTTP_POST_VARS['submit']) { ?>
// form code
Once you’ve wrapped your empty form in the “if” branch of the conditional, you need to add form processing logic to the “else” branch. Use the “else” button on the toolbar, and let Dreamweaver insert it for you.
<?php } else { ?>
This “else” branch of the script is supposed to merely display the data entered by the user. You can do this via the echo() command, also accessible via a button on the PHP toolbar.
<?php echo $HTTP_POST_VARS['name']; ?>
Here’s the final script:
<?php if (!$HTTP_POST_VARS['submit']) { ?>
<?php } else { ?>
| Name | <?php echo $HTTP_POST_VARS['name']; ?> |
| Comments | <?php echo $HTTP_POST_VARS['comment']; ?> |
<?php } ?>
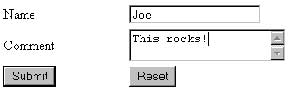
Now, you can easily test this code using the “Preview” button, as discussed earlier. Here’s the output:

It should be noted that Dreamweaver’s attempt to make PHP scripting a point-and-click exercise, as demonstrated via the example above, isn’t really an unqualified success – the functionality provided on the PHP toolbar is extremely limited, and most developers would find it more efficient to type in PHP statements themselves, rather than clicking their way through the buttons on the PHP tab. Don’t be disappointed, though – although the program fails at this task, it excels when it comes to building database-driven dynamic pages (more on this on the next page).
Once you’re happy with the way your script is working, you can transfer the file to your remote server (named “cerberus” in this case). Pop open the “Files” panel on the right side of the workspace, select the “local view”, and use the arrow buttons to transfer files from your local site to the remote site.

You can also perform transfers in the other direction, by changing to the “remote view” and either putting or getting files to/from the server.

Comments