
Inserting an Image
Inserting an Image
Now that my page is orange, I need to add my splash image. This is when the Palette Window comes into play. The Palette Window is what you use to plug-in objects or formatting, instead of writing the code. Just find the icon representing what you need and drag it to the Document Window. You’ll probably be using the Basic Tags section most frequently – it has the line breaks and tables and such.
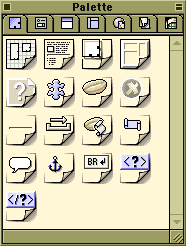
Since I plan to add a GIF to my site, I click on the image icon, drag it to the Layout Window, and drop it onto the page. This icon represents the generic picture.

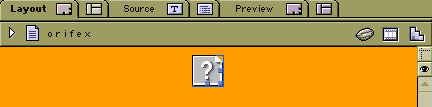
GoLive has now reserved a place for my image and updated the HTML accordingly. Next, I have to tell it what image I want there, where exactly it should go, and make it into a link.
Before I do that, though, I’m going to drop all of my images into my site. Because the Site Window has such a tight integration with the Finder, this can easily be done without leaving the program. I go to the Files section of the Site Window and choose New:Group from the Site menu at the top of the screen. This creates a new folder in my Site Window, which I rename “Stuff” (in the fine Webmonkey tradition). All my images and other media files will be stored here. Next, I then choose Add Files from the Site menu and drop all of my picture files, sound clips, and videos, all at once, into the “Stuff” folder.
If, for whatever reason, the files don’t end up where you want them, you can drag them around the Site Window just as you would in the Finder. And if you go back to the Finder and look in your site folder, you’ll see that all the files you selected have been copied and put where they belong. You can also change your site on the desktop and have those changes appear in GoLive, but be sure to press the Update button in the toolbar – it looks like a check mark – so GoLive has the latest info.
Now all my stuff is in “Stuff,” and I can place my splash image into index.html. I click on the generic image icon that’s sitting in the corner, which brings up the Image Inspector Window. This is where I fine-tune the picture. If I know the name of the image, I can just type it in, or I can use the Browse button to locate it on my computer, or I can go to the Site Window and drag the icon of that image into the Layout Window, or I can use the weird, not-always-convenient-but-still-nifty Point-and-Shoot button (it’s the little spiral below the name of the image):
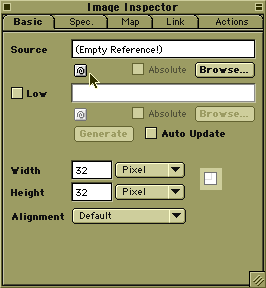
Point-and-Shoot is basically drag-and-drop technology, but with a slightly different spin. Click on the spiral, then drag the resulting rope/line/cable/thingie over to the Site Window and highlight one of the files there. You can even navigate in and out of folders while pointing and shooting. Once you release the mouse button, the rope will snag whatever it was on and pull it into its window. So I pick an image out of my Stuff folder and GoLive automatically plugs it into my code, supplying the correct URL (either relative or absolute – you decide) and dimensions, and I’m left with the image sitting in the Layout Window.
In GoLive, there are always several ways to do something (one reason why the manual is so huge), so it’s fairly easy to find a methodology that works for you.
So my splash picture is on the page, but now I need it centered. Resisting the urge to think like a Denny’s busboy and get my hands dirty in the HTML, I’m going to let the WYSIWYG editor do the work for me. I drag a few line breaks from the Palette Window to push the image down a little, then I center it by clicking on the picture and choosing Alignment:Center from the Format menu. And that’s that. My splash page is done.
Comments