
Hue Blending Mode in Photoshop
The Hue Blend mode is pretty straightforward: Hue Mode: Creates a result color with the luminance and saturation of the base color and the hue of the blend color.
So essentially, the top blend layer, set to Hue, will “color” the layers below with whatever color you put on the blend layer, and adjust the color to take on the brightness and saturation of the layers beneath.
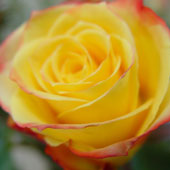
For example, let’s start with my standard rose image:
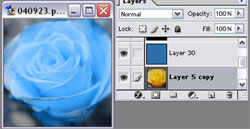
I’ll put a solid blue layer over it and set it to “Hue” mode. The rose layer will be “colorized”—kind of—with the blue (but note that the areas around the rose have a bit more grey than blue in them because it adjusts the saturation of the color as well).

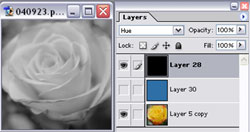
So, here’s yet another way to turn a color image into black and white: Add a black—or white—layer and set it to “Hue” mode:
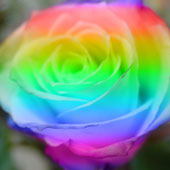
Setting a new, blank layer to “Hue” means that you can “paint over” any part of your image and change the color. As a kind of extreme example, I made a selection of just the rose and then filled it with a rainbow gradient.

And here’s what the result looks like:
Comments