
How To Record On Your Computer with Adobe Audition
How To Record On Your Computer Using Adobe Audition
Including a basic set up guide for any program.
It doesn’t have to break your bank to start recording on your computer.
This is a simple way for you to find out if you LIKE to do it without spending a lot of cash.
THE BEGINNING
First you need Backing Tracks / CDG’s.
If you have any CDG’s (karaoke discs) you can easily put them into your CD or DVD drive and “rip” them to your recording software
(Note: we are not going to go through how to play a CDG or Rip the actual Lyrics in this Tutorial. This is only for getting the backing track music onto your computer and not the lyrics to play also)
If you don’t have any CDG’s again… go to Wal-Mart if you need a fast fix, they have some good selections.
If you want MORE, then do an online search. There are hundreds if not Thousands of Karaoke Stores online where you can purchase CDG’s.
KSK also has a members database for backings that other members are willing to share.
There are also some online businesses where you can pay for an individual track or have a membership.
Some of these you have to purchase a specific program in order to play the Track, and it only works in that particular software, but there are ways around this. 🙂
Here is an example:
http://www.pckaraoke.com
The software is $29.95 to buy it. The songs are $1.99 each ($5 minimum order)
Now with this one, you can actually record right from this software, it isn’t the best system, but it is pretty good for a basic starter package that won’t rob ya blind.
If you want to just get the track to use in Audition, that is easy.. Just RECORD and don’t SING! And turn off your Mic!
After you have recorded the track, go into your Program Files look for the file called KARAOKE.COM (Unless you changed the file name when installing the software this is where you will find these). Inside that folder you will see a folder called RECORDINGS. Find the recording of your Track and upload it into Audition. The recordings will have funky Numbers for names… but you should be able to find it.
Now just open that into your Adobe Audition.

Now Back to the Tutorial.
Download Adobe Audition Recording Software
Download your trial Audition from Adobe’s website.
http://www.adobe.com/products/audition/main.html
Follow the instructions to unzip the files to your computer.
YOU ARE READY TO RECORD!
Ripping the Track from a CDG
OK you have everything you need, you are ready to record.
First. Lets get the backing track from your CDG.
Put the CDG into your CD drive
A popup window should appear.. Click CANCEL
Next Open your Audition Software
You will see Three Panels in the main area
Edit View – MultiTrack View – CD Project View.
[Image T-1]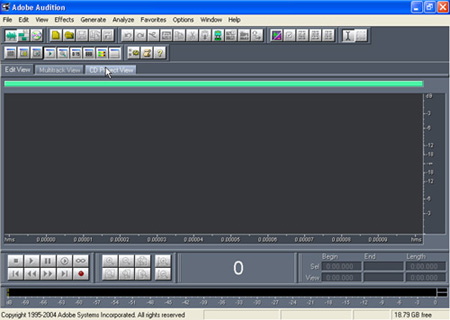
Click on CD Project View
Click on FILE (in the top Menu)
Click EXTRACT AUDIO FROM CD
[Image T-2]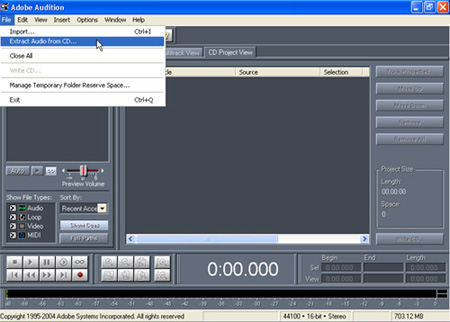
This will open a new window which has a listing of all the track on the CDG.
[Image T-3]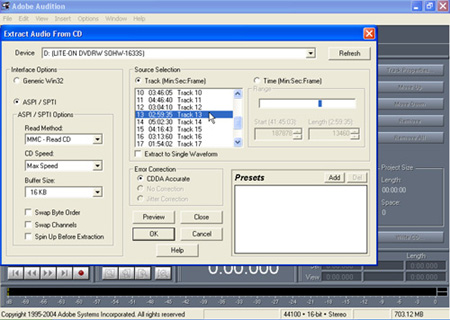
Click the number of the track you want (not sure which one it is? use the PREVIEW feature)
Once you click on the track and it is Highlighted, click the OK button
The computer will now rip the Track. It will appear in the box to the left when it is finished.
[Image T-4] Ripping Track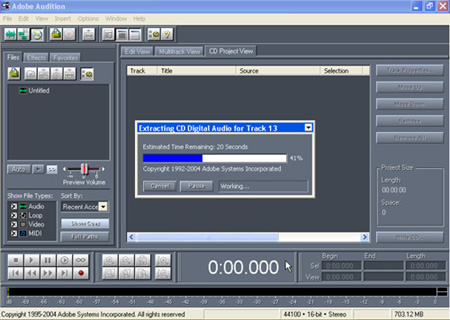
[Image T-5] Ripping Done 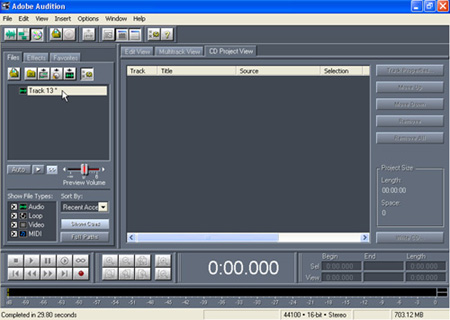
Click on the ripped Track in the window on the left.
Right Click and select INSERT INTO MULTITRACK
[Image T-6] 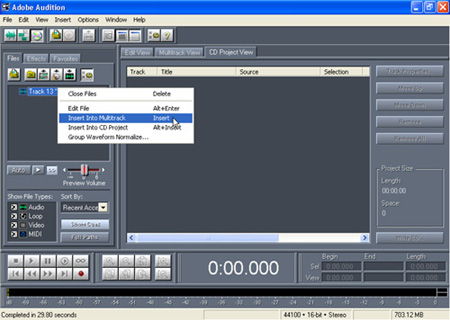
Now Click on the Panel MULTITRACK VIEW
The track you just “Ripped” should be in the first Track.
[Image T-7] 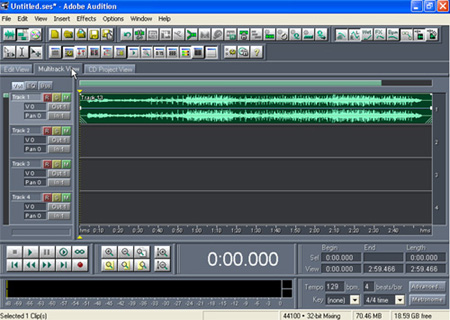
Now you may want to save the file so you don’t have to always have the CDG in the computer when you record if you decide to come back to this session.
Select the Track by clicking anywhere in the track.
Click on EDIT VIEW panel.
You will now see a close up of the track.
[Image T-8] 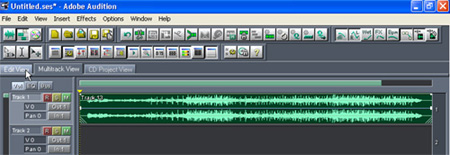
[Image T-9] 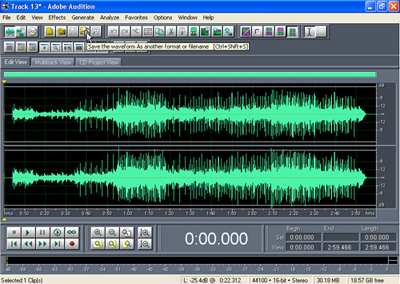
If you want to do any adjustments to the track such as normalize etc do that now.
Otherwise click on the
‘Save The Waveform as another format or filename” Icon (7th icon over in the Toolbar menu on the top)
[Image T-9a] 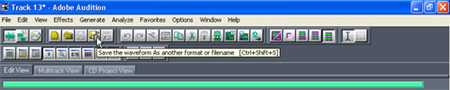
In the window that opens click on the pull down menu ‘Save as type” select the TYPE you want to save as such as Mp3
[Image T-10] 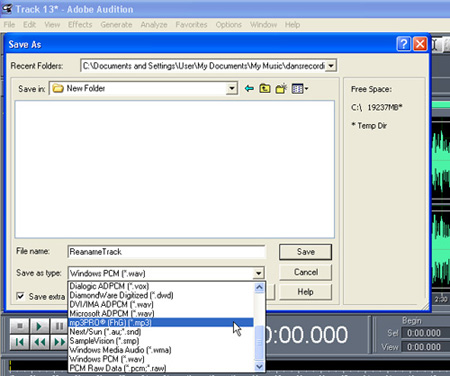
Make any Optional Adjustments to the MP3 as far as Sound Quality. Select the OPTIONS button and select the Rate you would like to use. The most commonly used it 128kps.
But you can go as high as you like. Remember the Option selected here will determine the size of your file for uploading.
[Image T-10a] 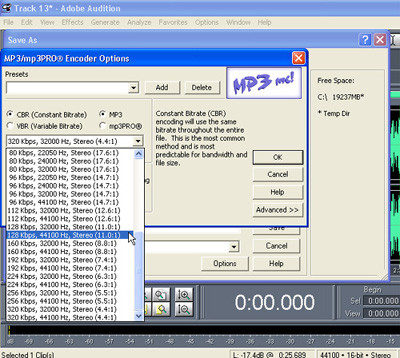
Save the file.
You are now ready to RECORD!
LETS RECORD!
These are VERY BASIC recording directions. There is a lot more you can do, but this will at least get your vocals in a track with the backing track!
On each track you will see 3 buttons to the left
R-S-M
[Image T-11]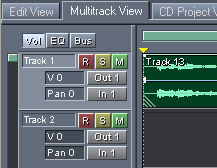
On Track 2 click the R button, The button will turn RED
This track is now armed for Recording!
[Image T-12] 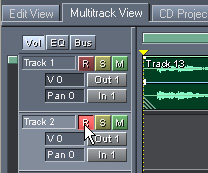
In the main menu on top click on OPTIONS then WINDOWS RECORDING MIXER
[Image T-13] 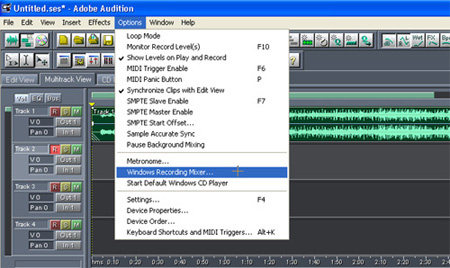
This will open the recording mixer window.
[Image T-14] 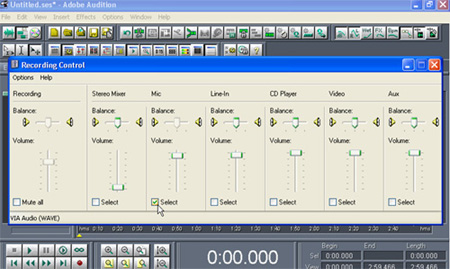
(Depending on your system, it will look something like the image T-14 above. If it doesn’t simply look for the MIC area and make sure it is selected.)
Make sure that MIC select box is Checked.
Adjust the volume as needed.
Close the window
When you are ready On the bottom of the Audition screen you will see the Play controls.
[Image T-15] 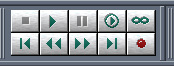
These include Stop, Play, Pause etc. which look like any tape or CD player buttons.
On the bottom Row you will see the Red Dot Record button.
Click it.
You are now recording!
[Image T-16] 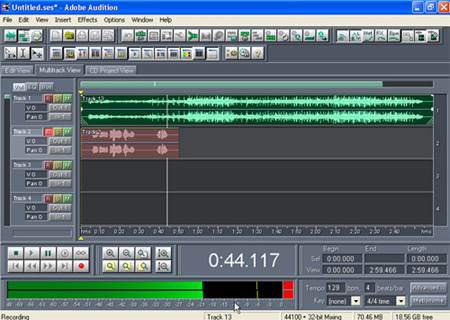
You will see your voice being recorded in Track 2 – like in the example in Image T-16
Once you are done recording you will need to save your session.
It is advisable to save your session right away so that you never loose anything.
To save click on FILE – Save Session As.
[Image T-17] 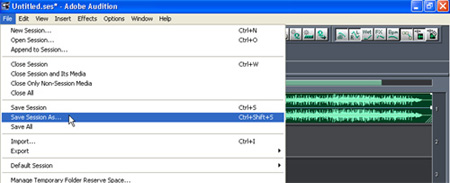
Comments