
How to create nice abstract artwork via custom shapes and brushes in Photoshop CS5
Make a copy of the recently made layer and select the Free Transform (Ctrl+T) command to change the sizes, angle and the placement of the copy to get the same result from the next picture:
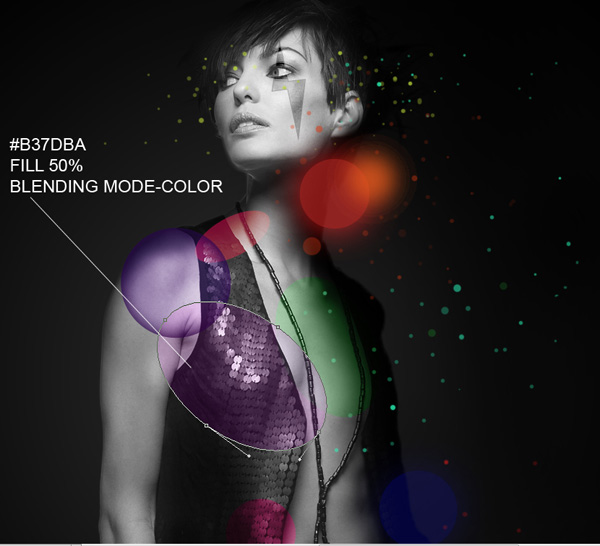
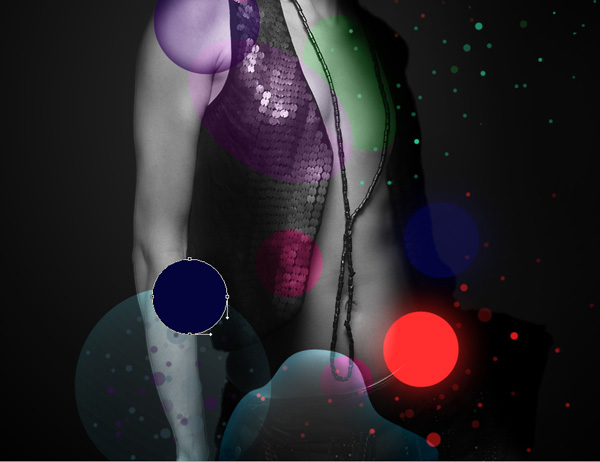
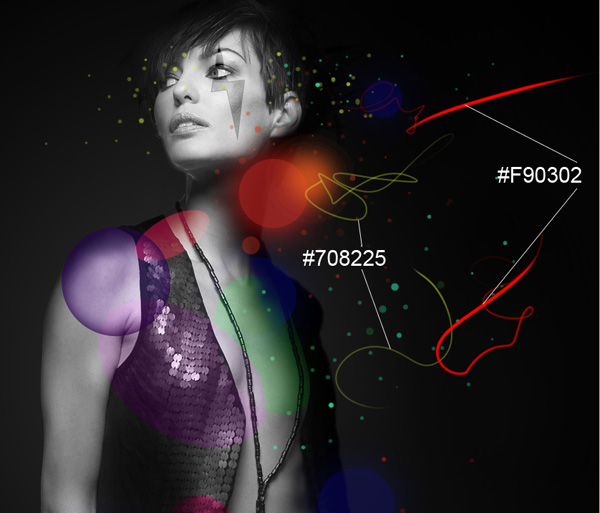
Use the same Ellipse Tool (U) to represent one more new circle of the #03023B color.
Click on Add a layer style icon from bottom part of the Layers panel and select Outer Glow.
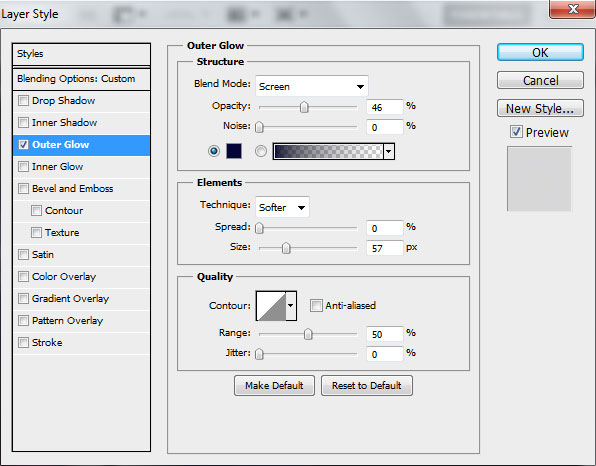

Set the Blending mode for this layer to Lighten.
Make three copies of the last made layer and select then the Free Transform (Ctrl+T) command to situate the copies as on the next shown picture.

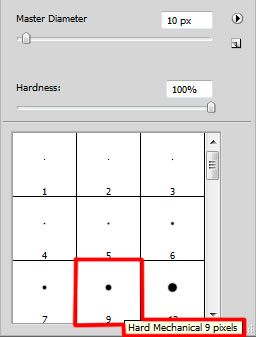
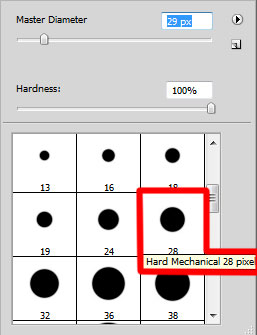
Next we’ll need a pen tablet. Create a new layer and select here the Hard Mechanical brush.

Using this brush draw some abstract lines of different thickness.
Set the Blending mode for this layer to Hard Light.
On the next new layer we’ll use the Hard Mechanical brush with different Opacity value and a different brush’s diameter to represent more circles.
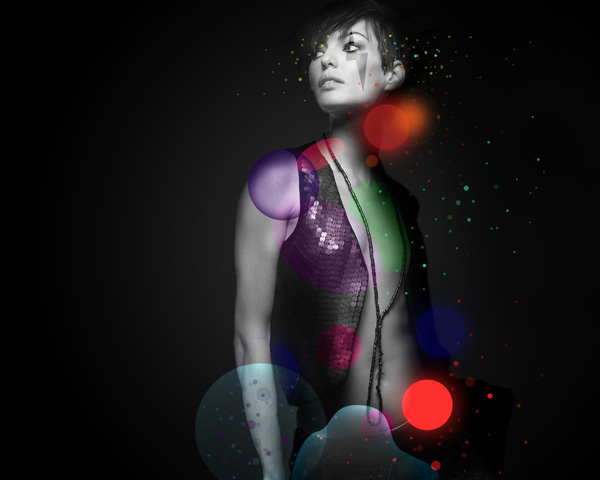
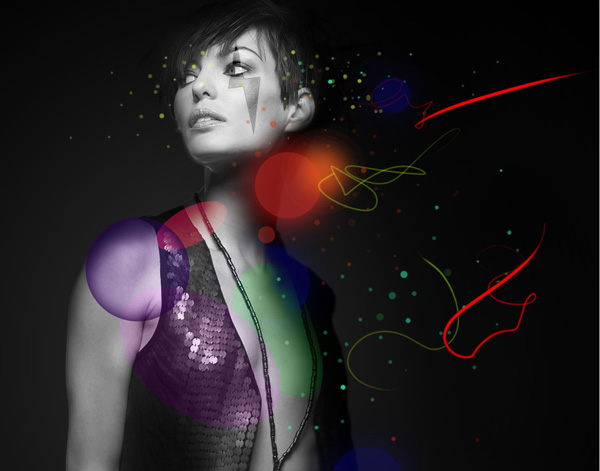
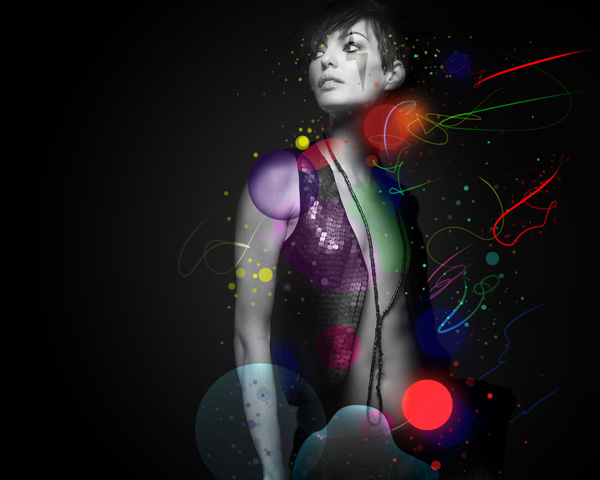
We’ve got the next result:

Create a new layer and use also the Hard Mechanical brush to represent abstract lines with different thickness, choosing the pen tablet too.
Set the Blending mode for this layer to Divide.
Make a copy of the recently made layer. Set Fill to 63% for this layer and change the Blending mode to Divide.
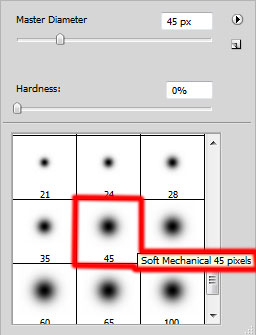
Create a new layer and choose for it the Soft Mechanical brush .
Use this brush to represent a kind of reflection on the girl’s body, take colors using the Eyedropper Tool (I). Place the layer with the brush under the layers containing the ellipses, abstract lines or small circles.
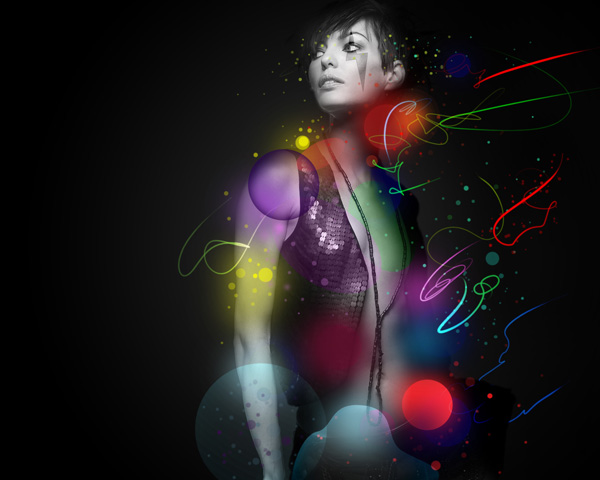
Set the Blending mode for this layer to Color.
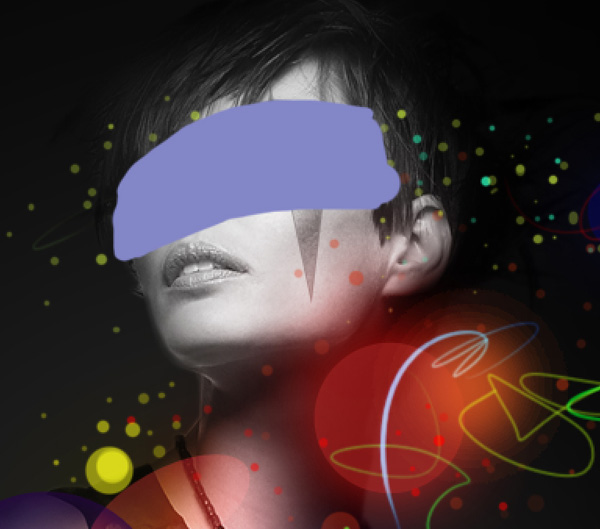
On the next new layer we’ll apply the Hard Mechanical brush to represent a mask on the girl’s face of the color #8386C9.
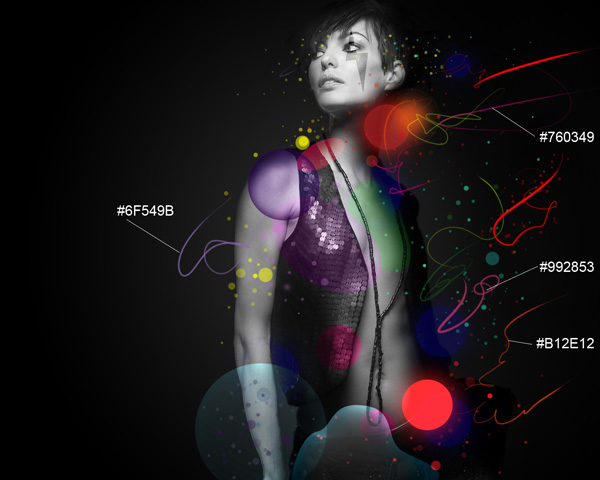
We’ve got the next result:
Insert the mask on the layer by choosing Add layer mask on the bottom part of the Layers panel and choose the Hard Mechanical brush of black color.

Paint in the mask using this brush to hide out very accurately the mask.

Set Fill to 49% for this layer and change the Blending mode to Divide.

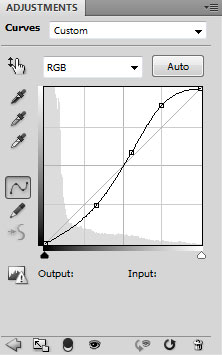
Click Create new fill or adjustment layer from bottom part of the Layers panel and click to Curves to adjust the curve shape as shown to make a little color corrections.
We’ve got the next result:
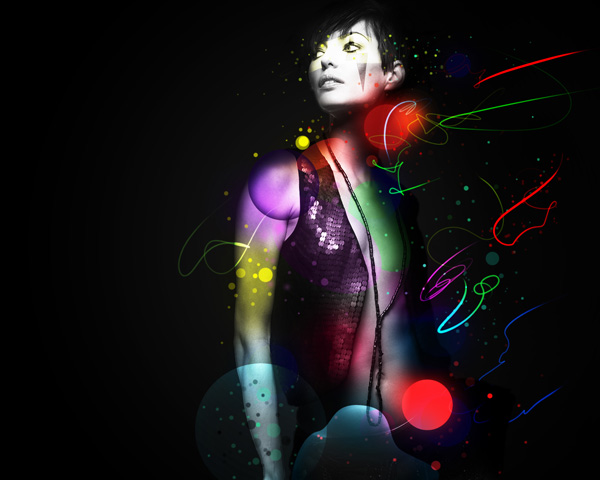
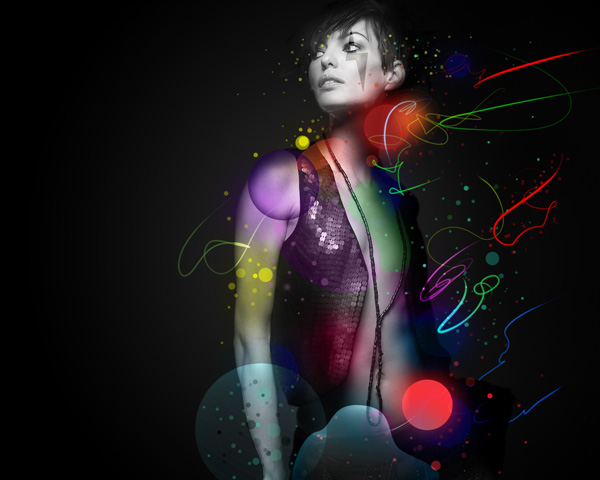
View full size here.
Download free Layered PSD file.
Comments