
How to create Greeting Card with Christmas ball and Green Ribbon in Adobe Photoshop CS6
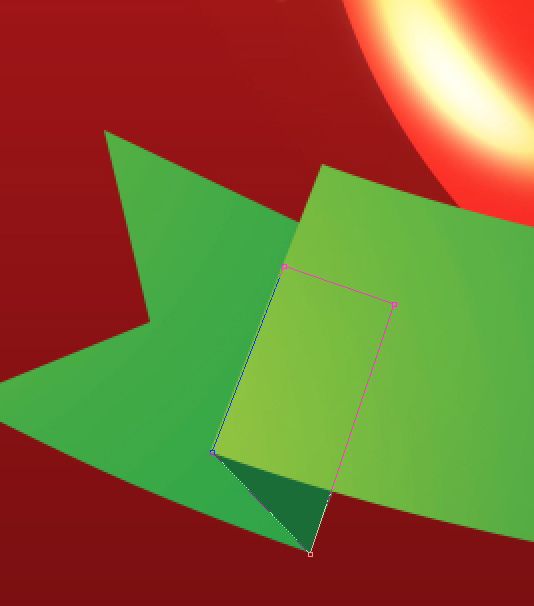
Continue representing the ribbon and its next element using the Pen Tool (P) and the Convert Point Tool. The element’s color is #28A349. This layer must be put under the ribbon’s first layer.

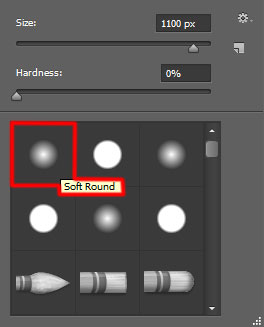
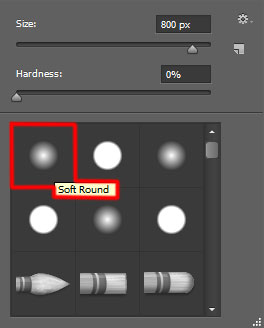
Create a new layer the same way we did for the first layer belonging to the ribbon and situate it above the element’s layer. Select the Soft Round brush on it and paint the ribbon’s element with the next color: #FDD900 (brush Opacity – 10%).

We’ve got the next result:


Hold down Alt (Windows) or Option (Mac OS) and click between the brush’s layer and the layer having the ribbon’s element on it in the Layers panel to create a clipping mask.

We’ve got the next result:

Make a copy of the last represented ribbon’s element (without the brush’s layer). Using the Free Transform (Ctrl+T) command turn over the copy’s layer and place the copy’s layer under the very first ribbon’s layer. Next we’ll create a new layer above the copy’s layer containing the ribbon’s element the same way we did before and we’ll paint the layer using the same brush we have used on the previous example. The brush’s color is still the same.

Next we’ll draw several shadows coming out of the ribbon’s bends, using the Pen Tool (P) and the color #1A6D37. The shadow’s layer must be situated under the very first ribbon’s layer but above the element’s layer.
Make a copy of the recently made layer and select the Free Transform (Ctrl+T) command to turn over the copy’s layer and place it the same way described on the picture below.

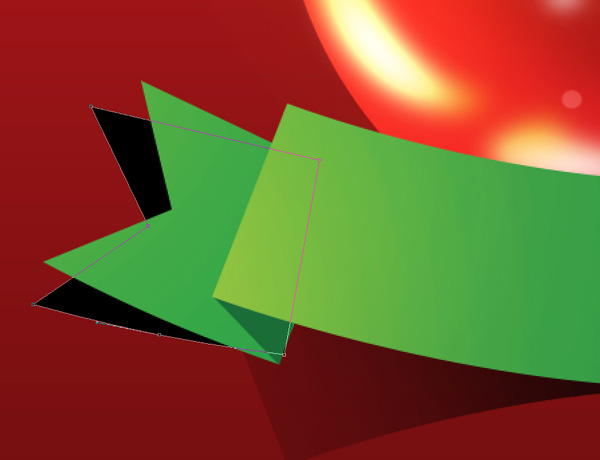
Next we’ll draw the shadow coming out of the ribbon itself and its elements. Make a copy of the very first element’s layer on the ribbon and select the Free Transform (Ctrl+T) command to turn around by vertical position the copy’s layer and change its color on the black one. Place this layer under all the ribbon’s layers.

Insert the mask on the same layer by choosing Add layer mask on the bottom part of the Layers panel and choose the Soft Round brush of black color (set Opacity to 80% in Options bar).
Paint in the mask using this brush to hide the shadow’s layer on the left and right sides.

Next we’ll draw the shadow coming out of the ribbon’s element on the left side. Make a copy of the layer containing the left element (without the brush’s layer) and choose the Free Transform (Ctrl+T) command to turn over the copy’s layer changing its color on black also. Place this layer under the layer having the left element on the ribbon.
Insert the mask on the shadow’s layer also the same way described before and apply the Soft Round brush of black color mentioned in the previous example to HIDE the shadow’s layer the same way indicated on the picture.

This way we have to represent the shadow belonging to the ribbon’s element on the right side.

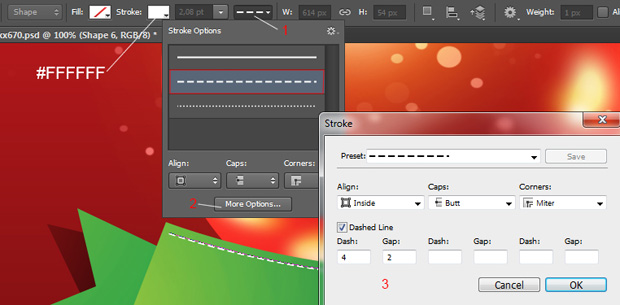
Create a new layer now and choose the Pen Tool (P), set the drawing mode on Shape Layers in Options bar and draw a discontinued line which shape may be corrected applying the Convert Point Tool on the middle part of the line. Using the Add Anchor Point Tool we may add an anchor point on the line additionally.
In Adobe Photoshop CS6, there’s now a convenient Stroke option on your Options Bar when you have a shape active. Use drop downs to set the next Stroke options for our shape, Fill – (None), Stroke color – #FFFFFF, Stroke type – Dotted:
We’ve got the next result:

This way we may insert a kind of the same line, but lower this time.

Insert also a shape on the left side on the ribbon’s element and on the right side too. Situate correctly the layers to get the same result as it is indicated below.
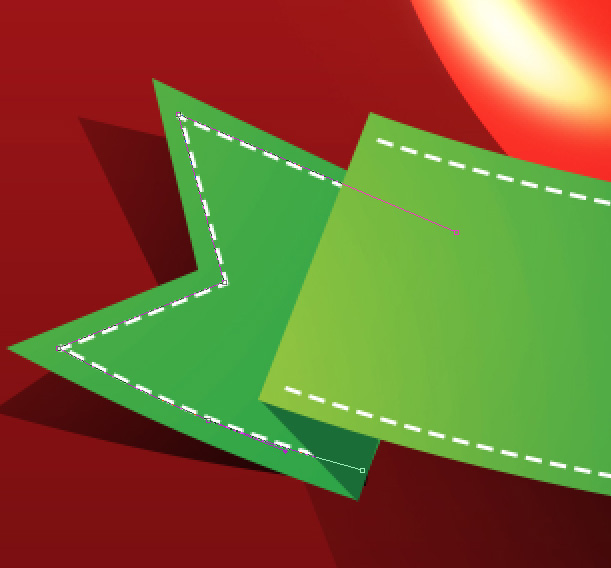
On the right side introduce the next shape:

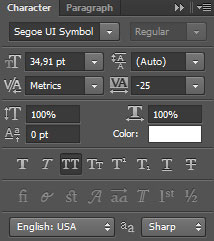
Next we’ll insert the greeting text on the ribbon. Select the Horizontal Type tool (T). Select a font, size and color in the Character panel. I used this font from FontSquirrel.

Click in the canvas and type ‘Merry Christmas’. Press Enter to apply the text. Select Create warped text option from Options bar for our text:
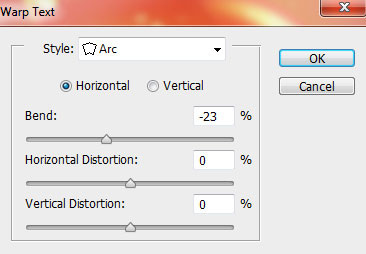
We’ve got the next result:

Click on Add a layer style icon from bottom part of the Layers panel and select Drop Shadow.
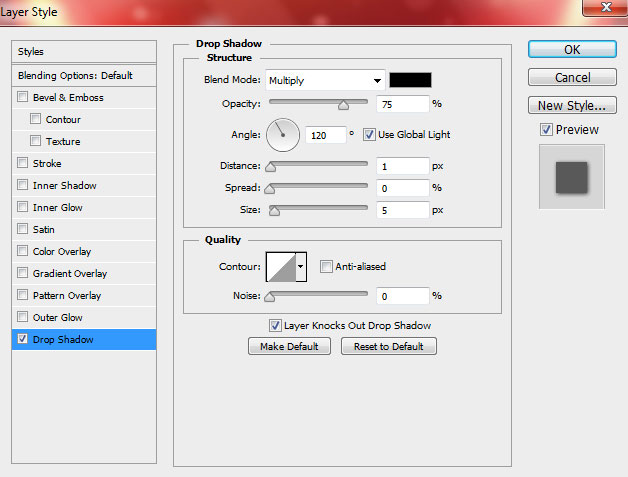
We’ve got the next result:

Insert more of the text to be under the ribbon on a certain distance using the Horizontal Type tool (T).
We’ve got the next result:

On the top and bottom parts of the text we need to create lines of white color the same way described below, using the Line Tool (U) (set Weight to 1px in Options bar)

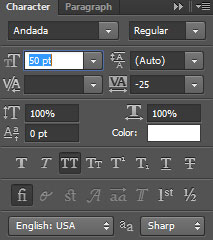
Next we’ll add on the text’s right and left sides a special symbol from the Character Map. Available for Windows XP / Windows 7 in Start / All Programs / Accessories / System Tools / Character Map. Select special symbol and copy them.
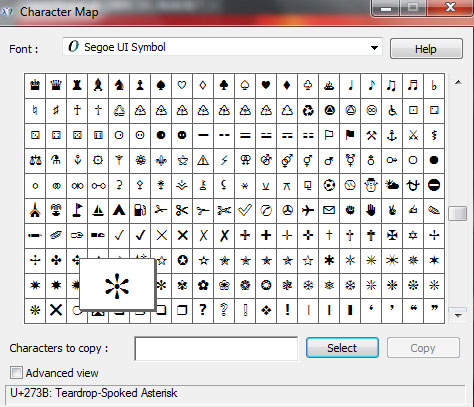
Select the Horizontal Type tool (T). Select a font, size and color in the Character panel and paste the special symbol.
We’ve got the next result:

Finally we’ll add the highlight on the Christmas ball by creating a new layer above all the layers and applying on it the Soft Round brush of white color (brush Opacity – 20%).
We’ve got the next result:

Set the Blending mode for this layer to Overlay.

Our Greeting Card with Christmas ball and Green Ribbon is finished!
Merry Christmas and Happy New Year!
View full size here.
Download free Layered PSD file.
Comments