
How to create Festive Christmas card with Shining Decorative Star in Photoshop CS5
Get back to the big polygon. Select the Custom Shape Tool (U) in the Tools bar, in the Options bar click the Shape to open the selection menu. Find 5 Point Star at the bottom of the menu, and then double-click a shape thumbnail to select it.
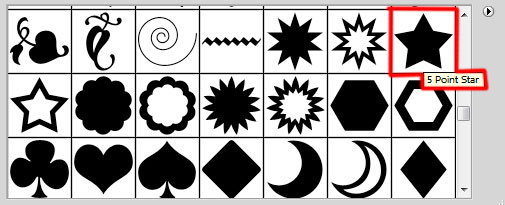
Click and drag to draw a small star. Its layer should be situated under the layer containing the big polygon.

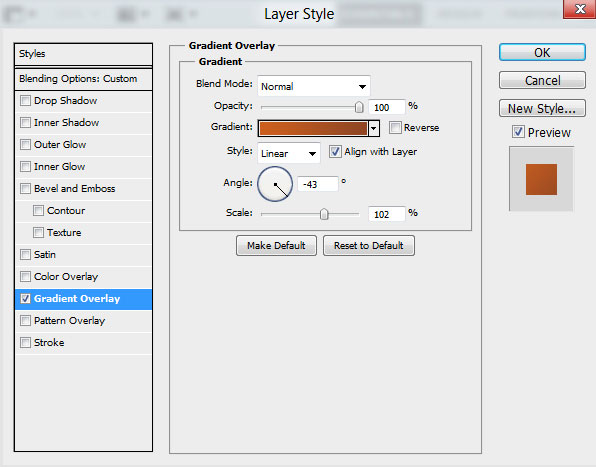
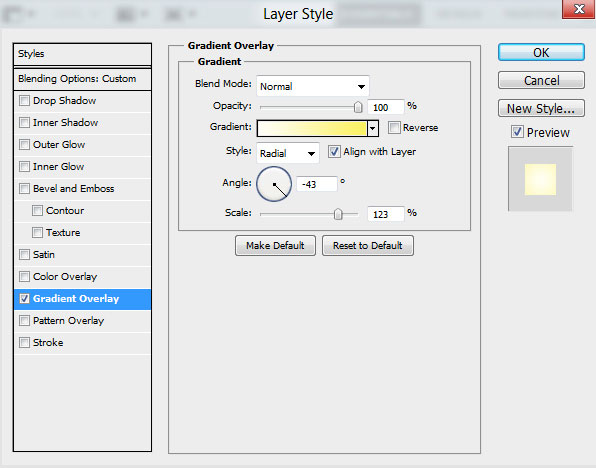
Set Fill to 0% for this layer and click on Add a layer style icon from bottom part of the Layers panel to select Gradient Overlay.

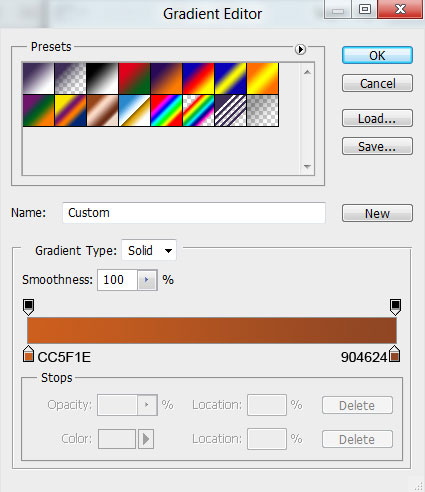
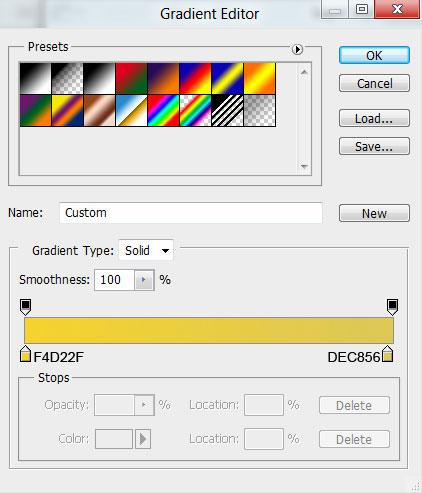
Click in the color bar to open the Gradient Editor and set the color stops as shown. Click OK to close the Gradient Editor dialog box.
We’ve got the next result:

Make a copy of the last made layer and select the Free Transform (Ctrl+T) command (check Maintain Aspect Ration in Options bar) to make the copy smaller as it is shown on the picture below:

Set Fill to 0% for this layer and click on Add a layer style icon from bottom part of the Layers panel to select Gradient Overlay.
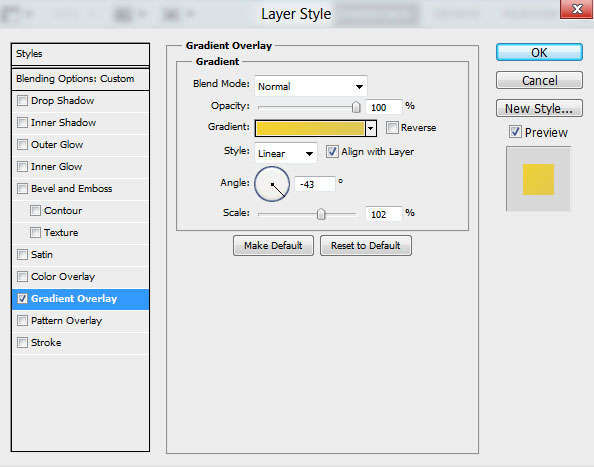
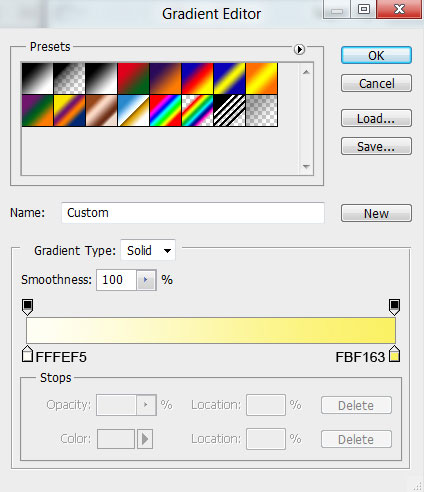
Click in the color bar to open the Gradient Editor and set the color stops as shown. Click OK to close the Gradient Editor dialog box.
We’ve got the next result:

Make one more copy of the last made layer and select the Free Transform (Ctrl+T) command to make smaller the copy’s size and place it the same way as on the picture. The previous two layers and this one should be situated under the layer with the big star on it.

Set Fill to 0% for this layer and click on Add a layer style icon from bottom part of the Layers panel to select Gradient Overlay.
Click in the color bar to open the Gradient Editor and set the color stops as shown. Click OK to close the Gradient Editor dialog box.
We’ve got the next result:

Next we’ll create again a small polygon, select the Polygon Tool (U), go to Options bar and click on Polygon Options. Set Radius – 200px, Indent Sides by – 99% and check the Smooth Corners, Star, Smooth Indents. Also set in Options bar the Sides – 7
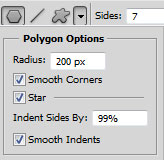
Click and drag to draw the next poligon:

Set Fill to 50% for this layer and click on Add a layer style icon from bottom part of the Layers panel to select Drop Shadow.
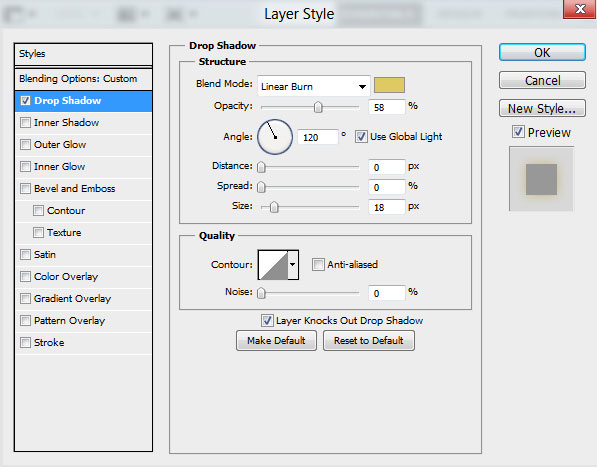
We’ve got the next result:

Make a copy of the last made layer containing the star and choose the Free Transform (Ctrl+T) to make the copy smaller, turning it also around its axe, placing it the same way from the next picture. Remove the Drop Shadow style on the copy and place it under the previous made one.
Set Fill to 100% for this layer.

We’ve got the next result:

Comments