
How to create bullet holes from scratch in Photoshop
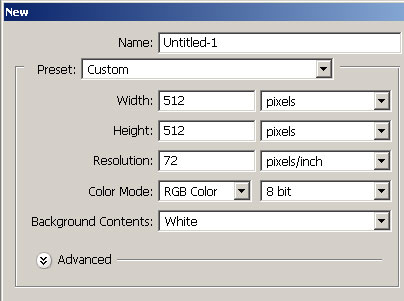
1. Create a new document with dimensions 512×512 pixels at 72 dpi
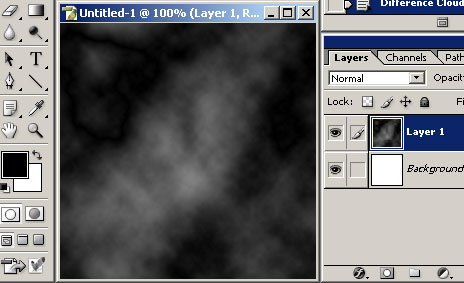
2.Press D to reset the swatches to black and white. Create new layer. Now Apply the clouds filter. Filter > Render > Clouds. Next, apply the difference clouds filter. Filter > Render > Difference Clouds. Your image should look like this:
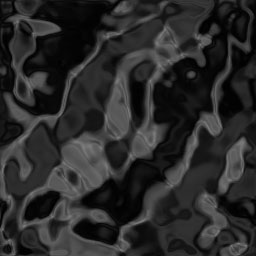
3. Now select Filter > Blur > Gaussian Blur. The radius should be set to 4 pixels. Next, choose Filter > Sketch > Chrome. Settings: Detail 10, Smoothness 0. Your image should look like this:

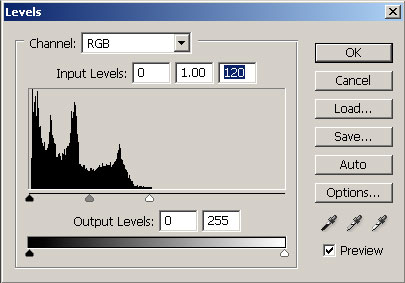
4. Choose Image > Adjustments > Levels and slide the Highlights arrow to the left as shown below:
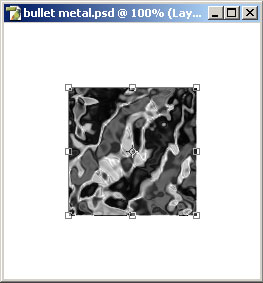
5. Select Edit > Transform > Scale to scale the image down proportionally by 50%
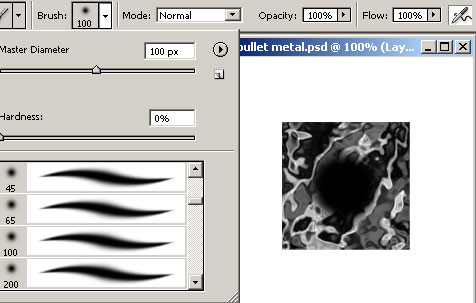
6. Create a new layer, and set the foreground color to black. Using the airbrush tool, with the brush set to Soft Round 100px, spray a hole in the metal in the middle of the metal as shown below. Make sure this hole is on a seperate layer than the metal texture.
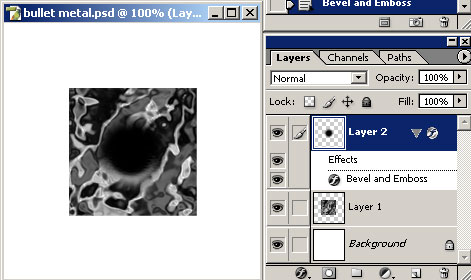
7. Go to Layer > Layer Style > Bevel and Emboss. Settings: Style inner bevel, Technique chisel soft, Depth 500%, Size 10px, Soften 0px, Angle 90 degrees, Hightlight mode Screen, Hightlight color #FFFFFF.
8. Select Layer 1. Using the lasso tool, create a jagged selection around the bullet hole as shown below:

9. Choose Select > Inverse. Now enter quick mask mode by pressing Q. Select Filter > Brush Strokes > Spatter. Settings: Spray Radius 10, Smoothness 5.
10. Exit quick mask mode by pressing Q. Next press delete to remove the outside portion. Add a small drop shadow to bring the metal some dimension. Your image should now look like this:
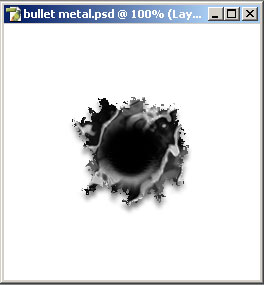
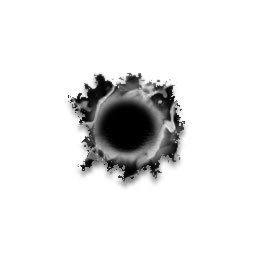
11. Finish up by adding some highlights to layer 1using the dodge and burn tools. Your final image should look something like this:
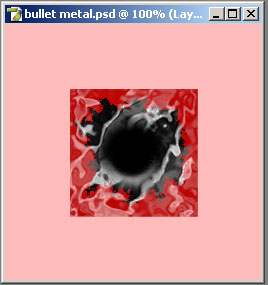
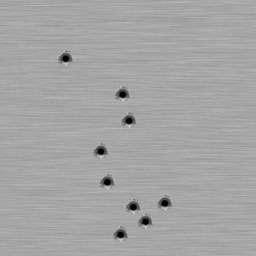
The bullet hole can be used on metal textures of all kinds (see sample below).
Comments