
Handling Movie Clips and Graphic Symbols
Handling Movie Clips and Graphic Symbols
Exporting Flash projects to video format requires everything to be on the main Timeline. Graphic symbols are treated as part of the Timeline because, technically, they are in sync with it. So if you have nested animations, make sure to use the Graphic symbol type for all your symbols.
There is more than one way to create a symbol. If you have a vector drawing or imported image on the Stage, select it and choose Modify > Convert to Symbol. You will be presented with the Convert to Symbol dialog box (see Figure 10), where you can type in a symbol name, select its type, and determine its registration point.
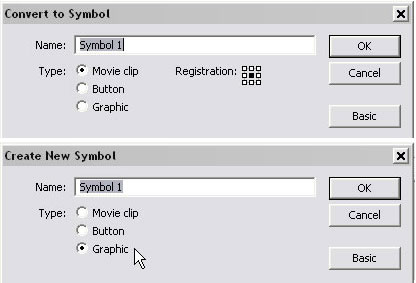
Figure 10. Converting to a Movie Clip (top) or Graphic (bottom) symbol
Avoid movie clips. Avoid movie clips. Avoid movie clips! I can’t emphasize enough the importance of avoiding the use of movie clip symbols containing content beyond the first frame. The movie clip in the exported movie will appear as a static image only. Did I say to avoid movie clips?
If any of your movie clips contain an animation, you must convert it to the Graphic symbol behavior. Movie clips are independent from the main Timeline and are not synchronized with other timelines. Graphic symbols play in sync with the main Timeline and other graphic symbols. They also render to video format, while movie clips do not. To convert a Movie Clip symbol to a Graphic symbol, select the movie clip instance on the Stage and, from the Property inspector (Window > Properties or press Control+F3), change its behavior from Movie Clip to Graphic (see Figure 11).

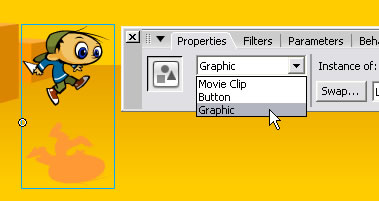
Figure 11. Converting an animation to a Graphic symbol
Next, change the behavior of the instance from Single Frame to either Loop or Play Once, depending on your needs (see Figure 12). Make sure there are enough frames on the main Timeline to accommodate the graphic symbol’s length. To lengthen the timeline, choose a frame in the Timeline panel that represents the duration of the movie and select Insert > Timeline > Frame (or press F5). You will now be able to drag the playhead back and forth (or press Enter) to see your nested animation play.
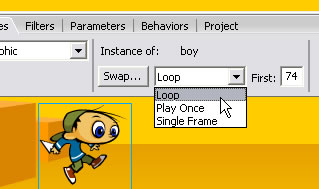
Figure 12. Changing the behavior of the instance to Loop
In general, when you author content for video, avoid dynamic content completely. Flash documents that include ActionScript, buttons, and dynamically loaded content will fail during export. Even a simple stop(); action causes the export to fail. But if you do have dynamic content.
Comments