
Hacking Preferences and Documents part 1
Photoshop, ImageReady, and Bridge all use preference files to store application settings. For example, the Adobe Photoshop CS2 Prefs file contains all the options for general display; history logs; file saving; cursor; transparency and gamut; units and rulers; guides, grids, and slices; plug-ins and scratch disks; and memory allocation. The file lives in the Adobe Photoshop CS2 Settings folder, along with a host of other files that keep track of your Preferences and settings, such as Color Settings, New Doc Sizes, and so forth. Settings for Adobe Camera Raw, Save for Web, and paths are kept separately in the Registry by Windows, whereas the Mac OS keeps them in the Preferences folder, located in the user’s Library folder.
Restoring Prefs
When you are satisfied with your customizing of Photoshop, it’s a good idea to save the Adobe Photoshop CS2 Settings folder. You can find the folder in the following location for Windows and Mac OS, respectively:
C:Documents and SettingsAdministrator or
UserNameAdobePhotoshop9.0Adobe Photoshop CS2 Settings
Macintosh HDUsersUserNameLibraryPreferencesAdobe Photoshop CS2Settings
To understand the rationale behind the decision to save the settings folder, you have to know how Photoshop makes use of the files and that, occasionally, you have to delete them. Each time Photoshop closes in an orderly fashion, it updates the settings files that need updating, saving any modifications that you may have made; for example, you may have added new actions or made changes to the color settings, in which case the files relating to the Actions palette and Color Settings are updated. If Photoshop quits unexpectedly, any customized settings made since Photoshop was last closed are lost. However, occasionally, even if you quit in an orderly fashion, Photoshop may start to behave erratically. If that happens to you, you have two choices: either you can delete the settings files and let Photoshop create default settings files or you can replace the files with the saved files, hence the need to save the settings folder. To delete Prefs, take the following steps: Immediately after launching Photoshop or ImageReady, hold down Ctrl+Alt+Shift (Windows), Ф+Opt+Shift (Mac OS). You will be presented with a dialog box (Figure 5-1); make your choice and click the OK button.
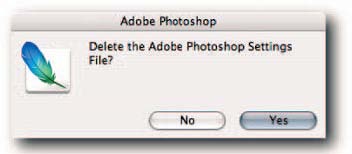
FIGURE 5-1: The dialog box that appears when you use the modifier keys to launch Photoshop to replace the currents Prefs with factory default settings.

If the problem disappears, you can then replace the default Prefs with the saved files and reset any Preferences that were changed since you saved the Adobe Photoshop CS2 Settings folder. If the problem returns, as it can sometimes, revert to the default settings, customize them again and then resave the settings folder.
Changing Scratch Disks and Plug-Ins at Launch Time
To select an alternative scratch disk, press Ctrl+Alt (Windows),Ф+Opt (Mac OS) immediately after launching Photoshop.
If you have plug-ins installed in more than one folder, you can select an additional plug-ins folder by pressing Ctrl+Shift (Windows), Ф+Shift (Mac OS) immediately after launching Photoshop.
Specifying Update Prefs
If Bridge and Photoshop irritate you when they periodically check for the latest updates, chances are you have not clicked on the Preferences button in the Adobe Updater dialog box when it has finished checking. To do so, choose Help>Updates in either application and then, after the Adobe Updater has finished checking for new updates, click the Preferences button. Doing so opens the Adobe Updater Preferences dialog box (Figure 5-2). In the dialog box, you specify how you want to check for and where to download any available updates for Photoshop, Bridge, Help Center, and Stock Photos.
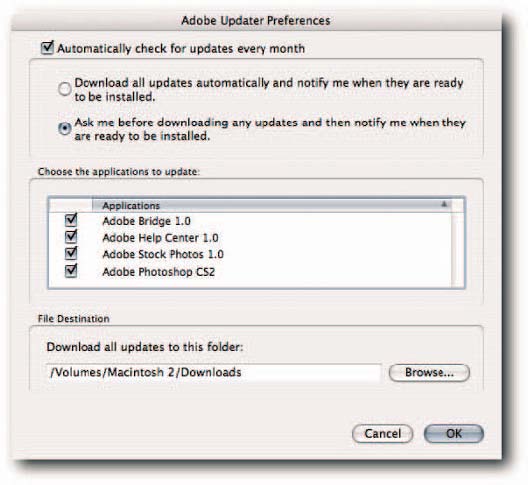
FIGURE 5-2: The Adobe Updater Preferences dialog box lets you control how and when it checks for updates, where it downloads the files to, and how it deals with the installation.
Installing Plug-Ins into a Safe Folder
Installing plug-ins into the default plug-ins folder in the Adobe Photoshop CS2 folder is quick and painless. Just point the installer to it and sit back. However, saving a little time when installing can cost a lot more time down the line. For example, when you need to reinstall Photoshop, it’s easy to accidentally delete the plug-ins folder even though you had every intention of keeping it (especially on Mac OS, where dragging application folders to the Trash is a common practice).When you come to upgrade Photoshop to the next version, you may find that you have to reinstall some if not all the plug-ins because you cannot just copy them into the new version. If you do, some of them are sure to require a reinstall, owing to the name change of the top-level folder. It all adds up to a loss of time. To avoid reinstalls and save time, you can take advantage of a little known Photoshop functionality. If you drop a shortcut (Windows) or alias (Mac OS) into any of the folders within the application folder, Photoshop can see the path and find the folder at the end of it. Therefore, by installing the plug-ins once into a designated folder away from the main Photoshop folder, creating a shortcut/alias to it, and then dropping it into the plug-ins folder, you can do away with the need to reinstall and reduce the chance of accidentally deleting the folder. You can even create shortcuts/aliases from the individual plug-ins and drop those into the plug-ins folder one at a time. That way, you can control how many plug-ins load into memory each time you launch Photoshop. Furthermore, if you don’t fancy making shortcuts/aliases, you can simply choose the designated folder in Preferences>Plug-Ins & Scratch Disks as the Additional Plug-Ins Folder and have Photoshop find it automatically at launch time.
Comments