Green Interface Button
1. New Document (whatever size you want the button to be. For the sake of this tutorial, I will make it a little bigger, I’m using 200×200) Fill the background with black.
2. Now use the rounded Rectangular Tool (Under the text tool) with a white foreground color, and make a shape like the one shown below. Make sure you rasterize the layer as well (Right click the layer, and select Rasterize Layer)
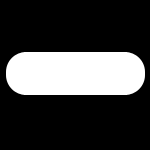
3. Now go to the blending options for that layer, and use the following examples as guidelines.
Inner Shadow: 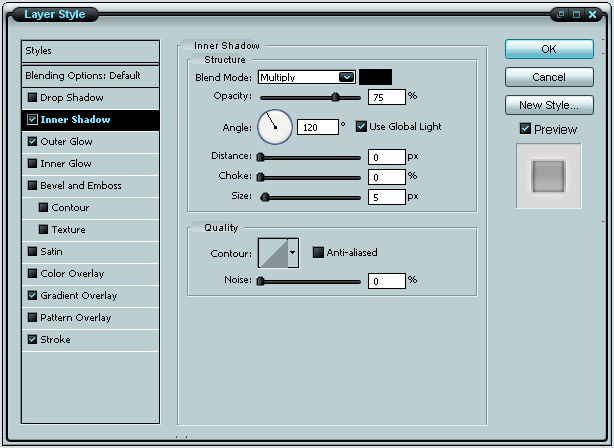
Gradient Overlay: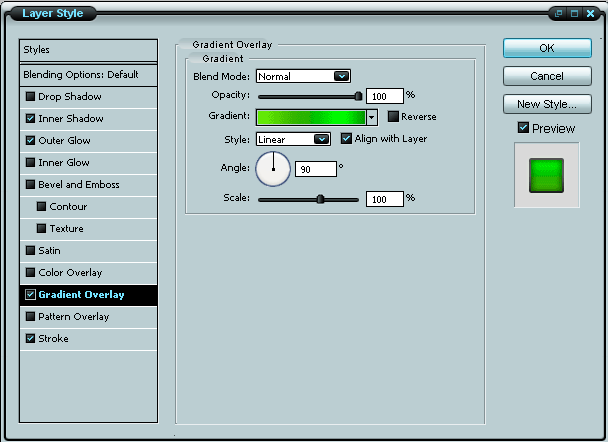
Gradient Settings: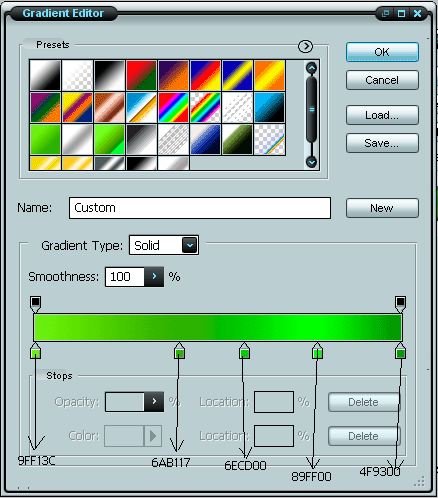
Stroke: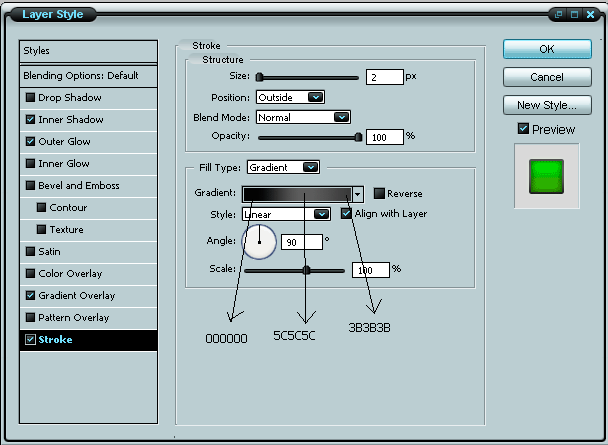
It should now look something like this:

4. Make a new Layer (Layer > New Layer)
Now its time to add a gloss! “Ctrl+Click” the layer (This should put a selection around the button.) Now grab the elliptical marquee tool, hold ALT and drag it across the bottom half of the button. (This should subtract the bottom half of the button) Fill the remaining selection with White. And drop the opacity down to “40%”
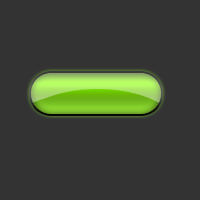
And you’re done! Should look something like this when you’re done!


Comments