
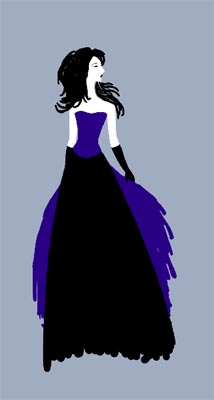
Ghotic girl gone wild
This lesson we’ll have the
possibility to learn drawing a girl from the Gothic period, imitate also
the lace and use several of the program’s filters.
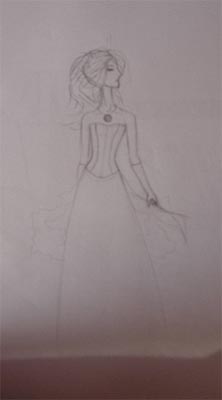
Open in a new window the scanned girl’s picture: File – Open (ctrl+o).
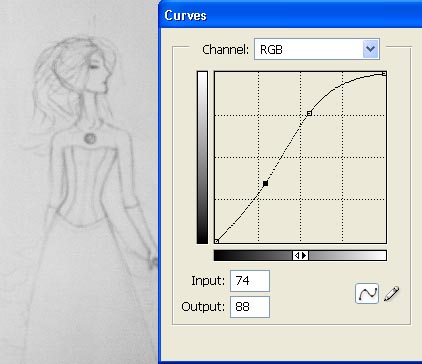
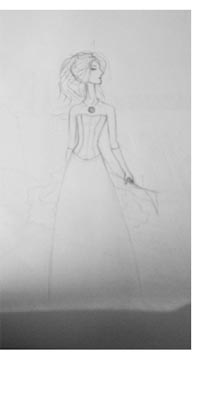
We have to decolorize firstly the layer to make the lines more visible: Image – Adjustments – Desaturate (shift+ctrl+u). Then make the layer brighter and look in contrast, using the command: Image – Adjustments – Curves (ctrl+m).
We have to enlarge the working place, selecting previously the Crop Tool.

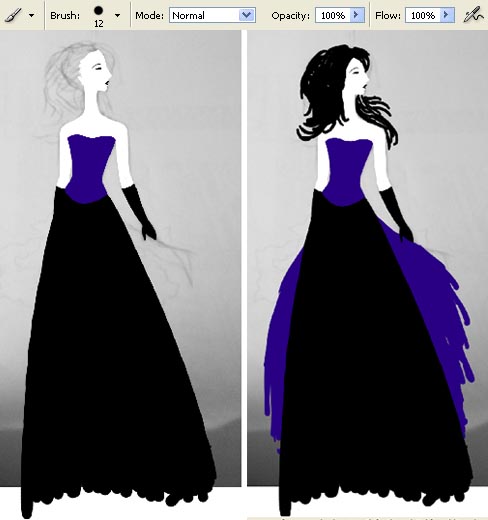
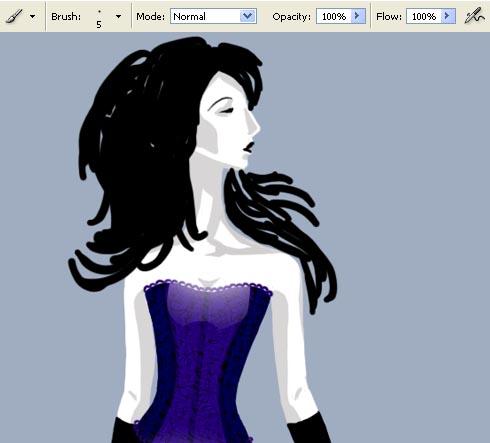
Start paining the picture. Open a new layer: Layer – New – Layer and select the Brush Tool to paint the girl with the main colors. For your convenience, each color should be placed on a new layer.
Create
one more layer above the layer containing the outlined contours. Paint
this layer with any color, but not too bright one, choosing the Paint Bucket Tool. The layer with the scanned contours should be erased.
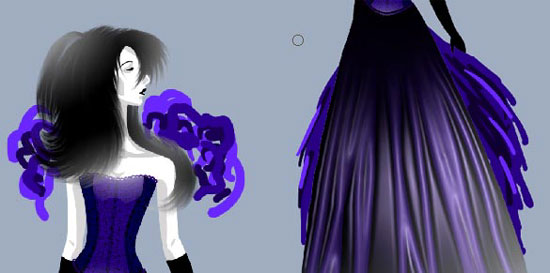
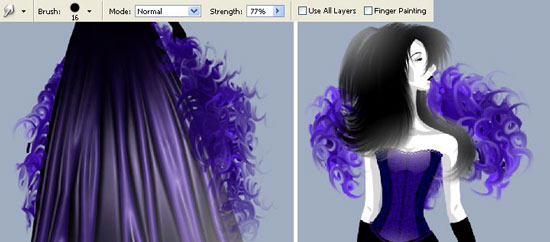
I’ve decided to start painting the corset firstly It’s necessary to use the Brush Tool
with the same adjustments we’ve applied earlier. We have to take care
of the fact that the corset is situated on a separate layer and the next
drawing should be done by creating a new layer above the first one and
combining them both in a group: Layer – Create Clipping Mask (ctrl+g). For the beginning we should draw the stitches, using the brush of 6 px. Minimizing the size continuously till 1 px, make some chaotic brush’s motions to imitate the lace.
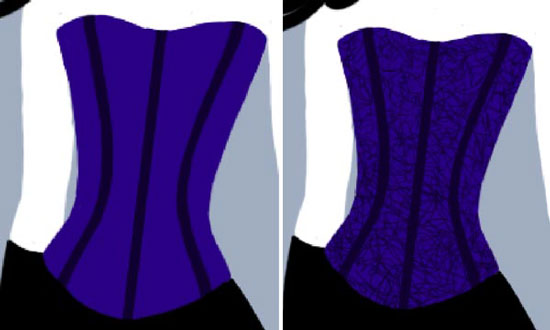
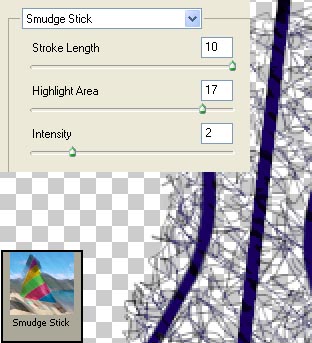
Apply on this layer next selection: Filter – Artistic – Smudge Stick.
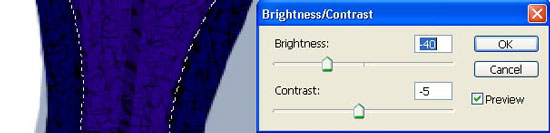
Merge down these layers: Layer – Merge Down (ctrl+e) and use the Pen Tool with Make Selection command to mark out a part of the corset that will be situated in the shadow.
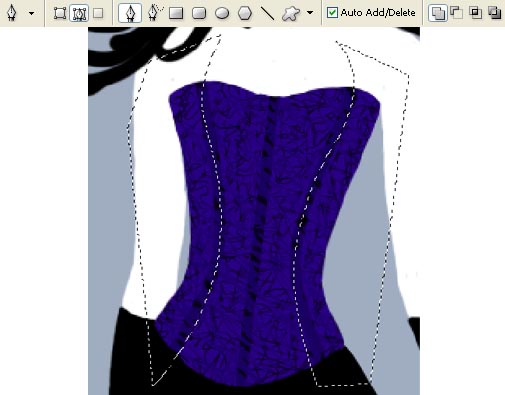
Dark out the marked zone with Image – Adjustments – Brightness/Contrast.
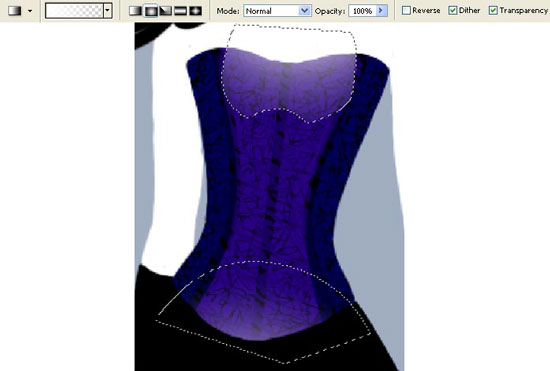
Move off the marked zone: Select – Deselect (ctrl+d) and create a new layer. Group them out (ctrl+g) and apply the Gradient Tool to make lighter the brighter zones of the corset.
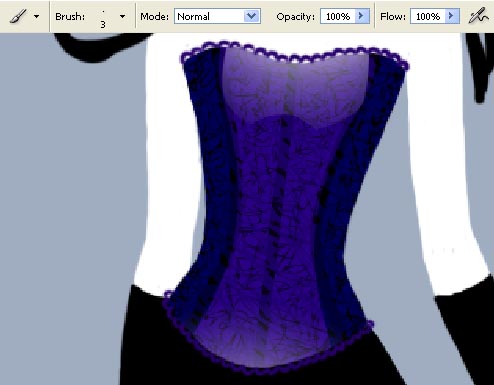
Merge down again the layers (ctrl+e) and choose the Brush Tool to paint the lace along the corset:
Use the Gradient Tool on the grouped layer to make lighter its middle part.
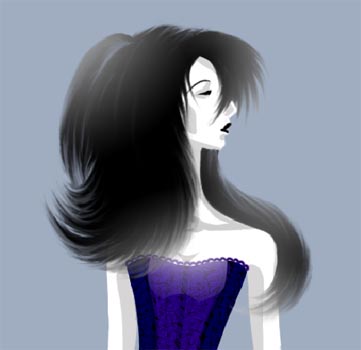
Select the Brush Tool now to add the shadow on the girl’s skin:
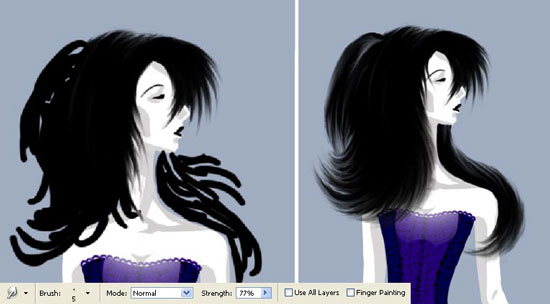
Choose now the Smudge Tool with blurred motions to make the hair livelier:
Then select the Gradient Tool on the grouped layer with the same adjustments from the corset’s layer and make them lighter a little.
Use the Brush Tool on the skirt’s layer, to draw the pleats on the skirt.
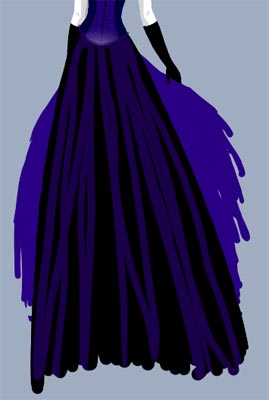
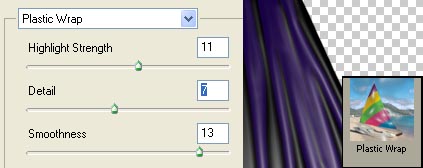
Apply the next filter on this layer: Filter – Artistic – Plastic Wrap.
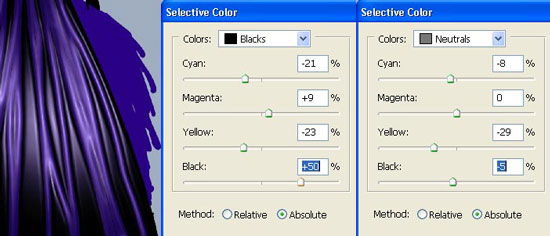
Make the corrections on the colors, using Image – Adjustments – Selective Color.
Then we have to use again the Gradient Tool on the grouped layer and dark out the upper part of the skirt.
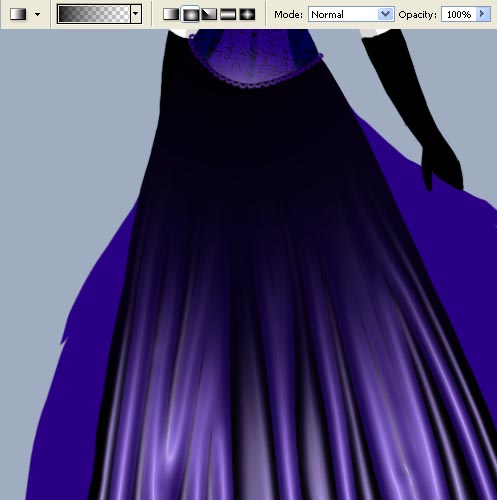
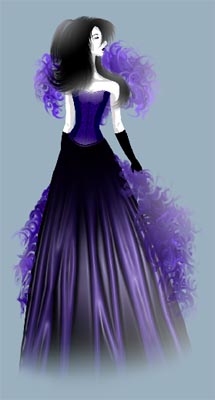
Merge
down these layers (ctrl+e) and create a layer’s mask. Applying the
previous instrument of black color, make the skirt’s visibility
appearing smoothly on the bottom.

Apply the next command Layer – Remove Layer Mask – Apply and make lighter the lowest part of the skirt.
Insert more colors on the scarf’s layer, applying the Brush Tool.
Select the Smudge Tool with spiral motions to make the scarf fluffier.
We have to make it lighter a little, choosing the Gradient Tool for this operation.
We have to paint the background now. Using the Brush Tool for the beginning, we have to place the necessary colors’ nuances on the appropriate places.
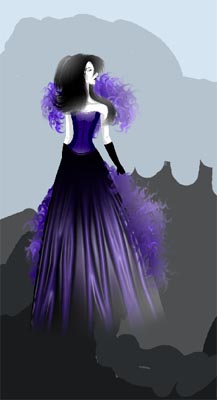
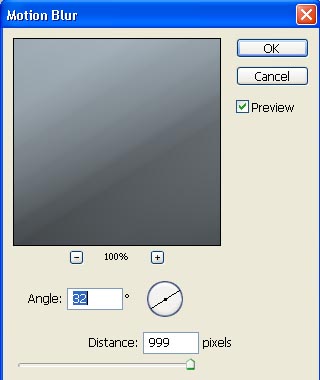
Blur out the colors, applying the next option: Filter – Blur – Motion Blur.
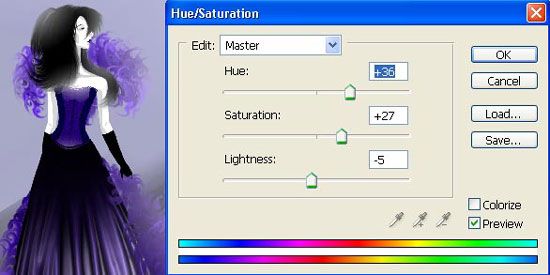
Change a little the nuance of the background: Image – Adjustments – Hue/Saturation (ctrl+u).
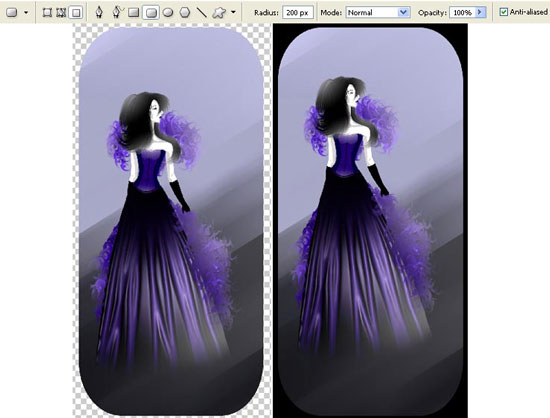
Choose now the Rounded Rectangular Tool
to draw on a new layer, under the background’s one the next element and
then group out both layers (ctrl+g). Create a new layer situated under
all the rest and paint it in black color, using the Paint Bucket Tool.
Dark out one of the background’s corners, making lighter the opposite corner, using the Gradient Tool of black and white colors.
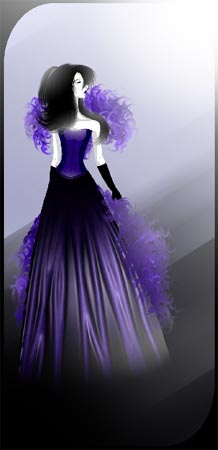
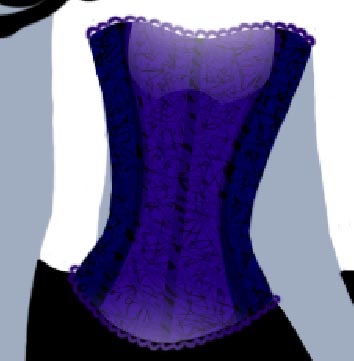
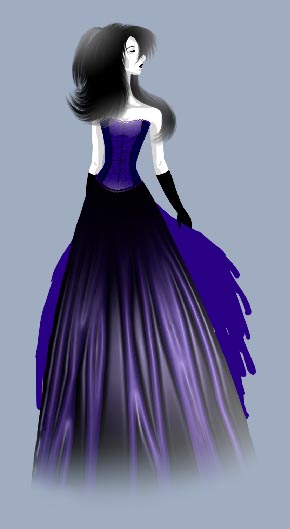
The picture is finished!
Made by Sigma
Comments