
Flying Santa Claus with gifts
Using the method of subtraction one ellipse out of the other, make the last mouth’s element, having the color #D8D8D8.


Start representing Santa’s arms. Begin with the one, situated near to us. This is the hand that will keep also the presents’ sack. Let’s choose again the Ellipse Tool (U) with the color #E02126 and represent an oval which shape will be adapted to our needs. Press SHIFT button to represent a rectangle with round corners, selecting previously the Rounded Rectangle Tool (U) with the same color’s code mentioned above. Then we have to mark it out with Path Selection Tool and turn it over with Free Transform selection. Press Alt button to make two copies of it:

As you may see, we have made the mitten and a piece of the sack that Santa will keep in his hands. Continue representing his arm. Take after that the Pen Tool (P) to draw the basis of our mitten (the fur).


The Ellipse Tool (U) will be helpful when representing the elbow (the color – #D52027). Place the ellipse’s points as below:

Finally we have to finish the sack, having the color #CD2026

Start representing the other arm. Select the same Ellipse Tool (U), having the color #D12026 and represent an ellipse as the next picture indicates it.

Represent the Santa’s finger out of the same ellipse, having the color #C12026.

Use now the Rounded Rectangle Tool (U) to create the lowest part of the mitten, making the corrections on its shape the way demonstrated below:

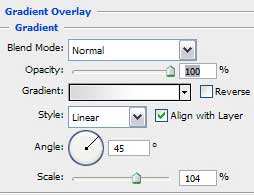
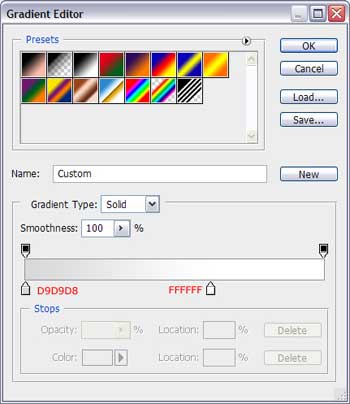
Blending Options>Gradient Overlay:

Using the same instrument, try to represent the rest of the arm, colored with #CA2128

Comments